
Japanese Cotton Cheesecake Recipe: 5 Simple, Delicious Steps
Table of Contents
- 1. Indulge in the Lightness: A Japanese Cotton Cheesecake Delight
- 2. Why You’ll Adore This Japanese Cotton Cheesecake Recipe
- 3. Gather Your Ingredients for This Japanese Cotton Cheesecake Recipe
- 3.1. Essential Equipment You’ll Need
- 4. The 5 Simple Steps to a Perfect Japanese Cotton Cheesecake Recipe
- 4.1. Step 1: Preparing the Batter
- 4.2. Step 2: Whipping the Meringue
- 4.3. Step 3: Gently Combining and Baking
- 4.4. Step 4: Cooling for the Perfect Texture
- 4.5. Step 5: The Final Touches and Serving
- 5. Tips and Tricks for a Flawless Cotton Cheesecake
- 6. Serving and Storage Suggestions
- Foire Aux Questions
Welcome, fellow dessert lovers! If you’ve ever dreamt of a cake that is simultaneously rich yet impossibly light, you’ve found your bliss. This is the ultimate guide to the perfect Japanese Cotton Cheesecake Recipe, a cloud-like, jiggly confection that is part soufflé, part cheesecake, and entirely unforgettable. Prepare to create a dessert that will have everyone asking for your secret.
Unlike its dense, creamy American cousin, this Japanese dessert is famous for its airy texture and subtle, tangy sweetness. It’s a true showstopper, but don’t be intimidated! We’ve broken it down into five simple, foolproof steps that will guide you to baking perfection. Let’s get our aprons on and bake something magical!
1. Indulge in the Lightness: A Japanese Cotton Cheesecake Delight
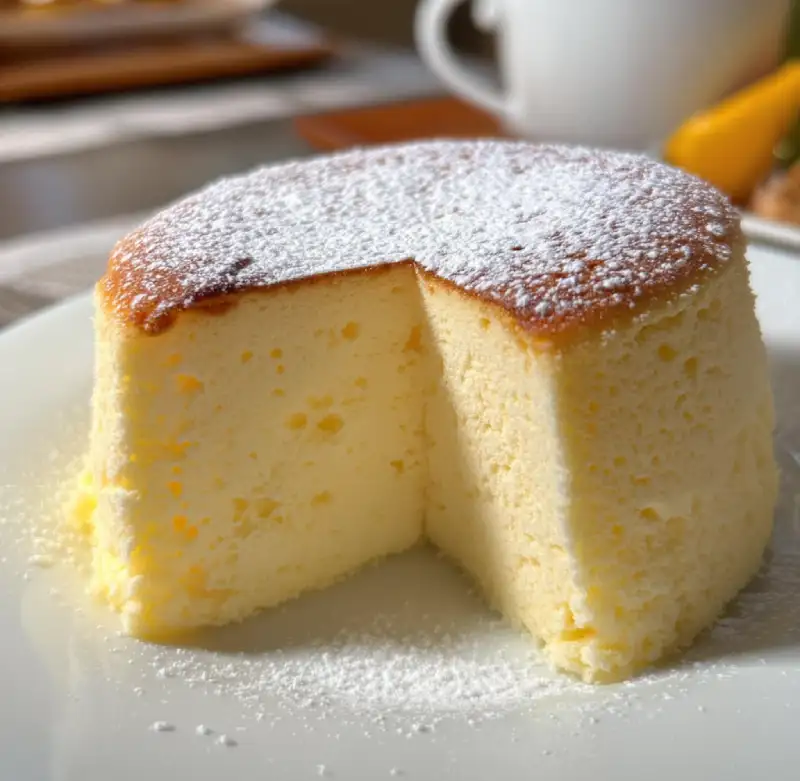
Imagine taking a bite of a cloud. That’s the sensation of a Japanese Cotton Cheesecake. It’s ethereally light, with a delicate crumb that dissolves on your tongue, leaving behind a subtle, creamy flavor. It’s a sophisticated dessert that feels both indulgent and surprisingly refreshing.
The magic lies in the technique. By combining a rich cream cheese batter with a fluffy, perfectly whipped meringue, we create a cake that rises beautifully in the oven, resulting in that signature “jiggle” and an incredibly soft texture. This isn’t just a cake; it’s an experience.
2. Why You’ll Adore This Japanese Cotton Cheesecake Recipe
First and foremost, the texture is unparalleled. If you love soufflés, angel food cake, or light-as-air desserts, this fluffy cheesecake will become your new obsession. It’s a delightful departure from heavier desserts.
Second, it’s surprisingly simple when you follow the steps carefully. The ingredient list is short and consists of pantry staples. The real key is precision in your technique, especially when whipping the meringue and controlling the oven temperature, which we’ll cover in detail.
3. Gather Your Ingredients for This Japanese Cotton Cheesecake Recipe
Precision is key in baking, so be sure to measure your ingredients accurately. Using room temperature ingredients, especially the cream cheese and eggs, is crucial for a smooth batter.
- Cream Cheese: 250g (about 8.8 oz), full-fat, softened to room temperature
- Unsalted Butter: 60g (1/4 cup)
- Milk: 100ml (about 1/2 cup), whole milk
- Large Eggs: 6, separated, at room temperature
- Granulated Sugar: 140g (2/3 cup), divided
- All-Purpose Flour: 60g (1/2 cup)
- Cornstarch: 20g (2.5 tablespoons)
- Cream of Tartar: 1/4 teaspoon
- Lemon Juice: 1 tablespoon, freshly squeezed
- Vanilla Extract: 1 teaspoon
3.1. Essential Equipment You’ll Need
- 8-inch (20 cm) round cake pan with high sides (at least 3 inches)
- Parchment paper
- Large roasting pan (for the water bath)
- Electric mixer (stand or handheld)
- Several mixing bowls
- Fine-mesh sieve
4. The 5 Simple Steps to a Perfect Japanese Cotton Cheesecake Recipe
Follow these steps closely, and you’ll be rewarded with a spectacular, jiggly cheesecake. Read through them all before you begin to familiarize yourself with the process.
4.1. Step 1: Preparing the Batter
- Preheat your oven to 160°C (320°F). Line your 8-inch cake pan with parchment paper on the bottom and sides. To prevent leaks from the water bath, wrap the outside of the pan with two layers of heavy-duty aluminum foil.
- In a medium saucepan over low heat, gently melt the cream cheese, butter, and milk. Whisk continuously until the mixture is completely smooth and lump-free. Remove from heat and let it cool slightly.
- In a separate bowl, whisk the egg yolks until they are pale and slightly frothy. Slowly pour the slightly cooled cream cheese mixture into the egg yolks, whisking constantly to prevent the eggs from scrambling.
- Sift the all-purpose flour and cornstarch together into the cream cheese mixture. Whisk until just combined, then stir in the lemon juice and vanilla extract. Set this batter aside.
4.2. Step 2: Whipping the Meringue
- In a large, clean, and dry bowl, use an electric mixer to beat the egg whites and cream of tartar on medium speed. Beat until frothy and soft peaks begin to form.
- While still mixing, gradually add the granulated sugar, a tablespoon at a time. Increase the mixer speed to high and continue to beat until you achieve soft, glossy peaks. The meringue should be firm enough to hold its shape but still curl at the tip when the beater is lifted. Be careful not to over-whip!
4.3. Step 3: Gently Combining and Baking
- Take about one-third of the meringue and gently fold it into the cream cheese batter using a spatula. This will lighten the batter.
- Carefully fold in the remaining meringue in two more additions. Be gentle and use a “J” folding motion to avoid deflating the air you worked so hard to incorporate.
- Pour the final batter into your prepared cake pan. Tap the pan on the counter a few times to release any large air bubbles.
- Place the cake pan into the larger roasting pan. Pour hot water into the roasting pan until it comes about 1-inch up the sides of the cake pan. This is your bain-marie, or water bath.
- Bake at 160°C (320°F) for 20 minutes, then reduce the temperature to 140°C (285°F) and bake for another 60 minutes, or until a skewer inserted into the center comes out clean. Turn off the oven, but do not open the door.
4.4. Step 4: Cooling for the Perfect Texture
- Let the cheesecake cool in the turned-off oven with the door closed for 30 minutes.
- After 30 minutes, crack the oven door open slightly and let it continue to cool for another 30 minutes. This slow cooling process is crucial to prevent the cake from cracking or shrinking too drastically.
- Remove the cake from the oven and the water bath. Let it cool completely on a wire rack before attempting to remove it from the pan.
4.5. Step 5: The Final Touches and Serving
- Once completely cool, carefully remove the cake from the pan. You can serve it immediately, but for the best flavor and texture, chill it in the refrigerator for at least 4 hours.
- Dust with powdered sugar, serve with fresh berries, or enjoy its simple, delicious perfection on its own.
5. Tips and Tricks for a Flawless Cotton Cheesecake
Mastering this Japanese Cotton Cheesecake Recipe comes down to a few key details. Don’t skip the water bath (bain-marie)! This method provides moist, even heat, which is essential for the cake’s delicate texture and helps prevent cracks. For a deeper understanding of this technique, you can read more about how water baths create the perfect cheesecake.
Room temperature ingredients are non-negotiable. Cold ingredients, especially cream cheese and eggs, won’t combine smoothly, leading to a lumpy batter. Finally, be patient with the cooling process. A sudden temperature change is the number one cause of cracks and shrinkage.
6. Serving and Storage Suggestions
This cheesecake is delightful served chilled straight from the refrigerator. Its delicate flavor pairs wonderfully with fresh fruit like strawberries or raspberries, a light dusting of powdered sugar, or a dollop of unsweetened whipped cream.
To store, wrap the cheesecake tightly in plastic wrap or place it in an airtight container. It will keep in the refrigerator for up to 3 days. The texture will become slightly denser as it chills, but it remains incredibly delicious. For more amazing bakes, See others recipes here .
Foire Aux Questions
Why did my Japanese Cotton Cheesecake crack on top?
Cracking is usually caused by two main factors: over-baking or a sudden change in temperature. Ensure you bake at the correct, lower temperature and follow the slow cooling process meticulously—letting it rest in the turned-off oven with the door closed, then cracked, is essential to allow it to cool down gradually. Also, make sure your water bath has enough water throughout the baking process.
How should I store my cheesecake to keep its fluffy texture?
For best results, store your Japanese Cotton Cheesecake in an airtight container in the refrigerator. This prevents it from drying out and absorbing other fridge odors. While it will firm up slightly when chilled, it will retain most of its signature light and airy texture for up to 3 days. It’s best enjoyed cold.
Can I make this recipe gluten-free?
Yes, you can adapt this recipe to be gluten-free! Simply substitute the all-purpose flour with a good quality gluten-free all-purpose baking blend. Since the recipe also contains cornstarch (which is naturally gluten-free), the structure should hold up well. Ensure your GF flour blend doesn’t contain xanthan gum, as it’s not needed here and could affect the delicate texture.