
Japanese Katsu Bowls: 10 Easy Recipes for the Best Taste
Table of Contents
- Welcome to Katsu Bowl Heaven!
- Why You’ll Love These Japanese Katsu Bowls
- Essential Ingredients for Perfect Katsu
- Mastering the Katsu Bowl: A Step-by-Step Guide
- Pro Tips for the Crispiest Katsu
- Delicious Variations: 10 Katsu Bowl Recipes to Try
- Serving Suggestions and Perfect Pairings
- Storing and Reheating Your Katsu Bowls
- F.A.Q
Welcome to the delightful world of **Japanese Katsu Bowls: 10 Easy Recipes for the Best Taste**! If you’re craving a meal that’s both comforting and incredibly satisfying, you’ve come to the right place. These crispy, savory rice bowls are a staple in Japanese cuisine for good reason, offering a perfect blend of textures and flavors.
Our guide will walk you through everything you need to know to create the most authentic and delicious **Japanese Katsu Bowls** right in your own kitchen. Get ready to impress your taste buds and loved ones with these simple yet spectacular dishes!
Welcome to Katsu Bowl Heaven!
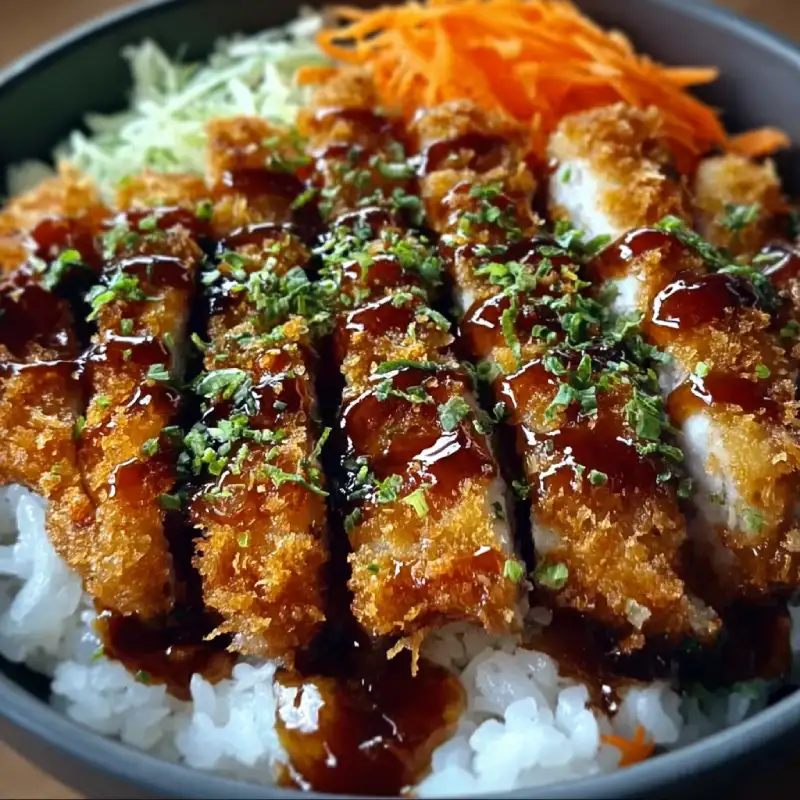
There’s something truly magical about a perfectly crafted katsu bowl. Imagine golden-fried pork or chicken cutlets, tender and juicy on the inside, resting atop a bed of fluffy, steamed rice. Drizzled with a rich, savory sauce, it’s an experience that transports you straight to Japan.
This post is your ultimate resource for mastering the art of the katsu bowl. Whether you’re a seasoned chef or a kitchen novice, our easy-to-follow instructions and tips will ensure your success every time.
Why You’ll Love These Japanese Katsu Bowls
These aren’t just any rice bowls; **Japanese Katsu Bowls** offer a unique combination of textures and flavors that make them an instant favorite. The satisfying crunch of the panko-breaded cutlet paired with soft rice and an umami-rich sauce creates an unforgettable meal.
They are also incredibly versatile! You can choose between pork katsu or chicken katsu, and even experiment with different sauces and toppings. Plus, they make for an exciting yet easy dinner option any night of the week.
Essential Ingredients for Perfect Katsu
Crafting the perfect katsu requires a few key components. High-quality ingredients make all the difference, so don’t skimp on these essentials. Here’s what you’ll need for a classic **katsu chicken** or tonkatsu experience.
- Pork loin or chicken breast cutlets (about 1/2 inch thick)
- Panko breadcrumbs (Japanese style, for ultimate crispiness)
- All-purpose flour
- Eggs (for dredging)
- Vegetable oil (for frying)
- Short-grain Japanese rice
- Katsu sauce (store-bought or homemade)
- Optional: Shredded cabbage, pickled ginger, sesame seeds, scallions for garnish
Mastering the Katsu Bowl: A Step-by-Step Guide
Creating a delicious katsu bowl is simpler than you might think. We’ll break down the process into easy, manageable steps, ensuring you achieve a perfectly crispy cutlet and fluffy rice every time. This foundational recipe will be the base for all our delicious variations.
Step 1: Preparing the Chicken Cutlets
- **Pound the Cutlets:** Place chicken breasts or pork loin between two sheets of plastic wrap. Using a meat mallet, pound them evenly to about 1/2-inch thickness. This ensures even cooking and tenderness.
- **Set Up Breading Stations:** Prepare three shallow dishes. One with flour, seasoned with salt and pepper. One with beaten eggs. The third with panko breadcrumbs.
- **Bread the Katsu:** Dredge each cutlet first in flour, shaking off excess. Then dip it into the egg, ensuring full coverage. Finally, generously coat with panko breadcrumbs, pressing gently to adhere.
Step 2: Cooking the Rice to Perfection
- **Rinse the Rice:** Rinse your short-grain Japanese rice thoroughly under cold water until the water runs clear. This removes excess starch, resulting in fluffier rice.
- **Cook the Rice:** Combine the rinsed rice with water in a saucepan according to package directions (typically a 1:1 or 1:1.25 ratio of rice to water). Bring to a boil, then reduce heat to low, cover, and simmer for 15-20 minutes until all water is absorbed.
- **Rest and Fluff:** Let the rice rest, covered, for 10 minutes off the heat. Then, fluff with a fork before serving.
For additional insights on Japanese cooking techniques, you might find this external resource helpful: Explore Japanese Cuisine on Food Network.
Pro Tips for the Crispiest Katsu
Achieving that signature crispy exterior on your **katsu chicken** or tonkatsu is key. Here are a few secrets to making your katsu truly shine.
- **Double Fry (Optional but Recommended):** For extra crispiness, fry the katsu once until golden, remove, let it cool for a few minutes, then fry again briefly at a slightly higher temperature until deeply golden and extra crunchy.
- **Don’t Overcrowd the Pan:** Fry katsu in batches to maintain oil temperature. Overcrowding will lower the temperature, leading to greasy rather than crispy cutlets.
- **Use Fresh Oil:** Old oil can impart off-flavors. Start with fresh oil for the best results. A good frying temperature is around 325-350°F (160-175°C).
Delicious Variations: 10 Katsu Bowl Recipes to Try
While the classic katsu bowl is fantastic, there are endless ways to customize your dish! Here are some ideas to inspire your next easy dinner. Feel free to mix and match proteins, sauces, and toppings.
- **Classic Tonkatsu Bowl:** Pork katsu with a rich tonkatsu sauce.
- **Chicken Katsu Curry:** Crispy chicken katsu served with a mild, savory Japanese curry over rice.
- **Katsudon (Egg & Onion Katsu Bowl):** Katsu simmered in a dashi-based sauce with onions and egg, then poured over rice.
- **Miso Katsu:** Katsu with a sweet and savory miso-based sauce.
- **Cheesy Katsu:** Melted cheese over the katsu, often served with a tomato-based sauce.
- **Spicy Katsu Bowl:** Add a kick with sriracha mayo or a spicy gochujang-infused sauce.
- **Vegetable Katsu:** Use thick slices of eggplant or firm tofu breaded like katsu.
- **Shrimp Katsu Bowl:** Panko-fried shrimp for a delicious seafood alternative.
- **Teriyaki Katsu:** Glaze your katsu with a homemade or store-bought teriyaki sauce.
- **Okonomiyaki-Style Katsu:** Drizzle with okonomiyaki sauce, mayo, bonito flakes, and nori.
For more baking and dessert ideas, you might enjoy our other recipes. Read our in-depth guide here.
Serving Suggestions and Perfect Pairings
A Japanese katsu bowl is a complete meal in itself, but a few additions can elevate the experience. Traditionally, it’s served with a side of shredded cabbage, which provides a refreshing contrast to the rich fried cutlet. Miso soup and a simple green salad are also excellent companions.
Don’t forget the pickled ginger (gari) to cleanse your palate between bites! A sprinkle of toasted sesame seeds or chopped scallions adds both flavor and visual appeal.
Storing and Reheating Your Katsu Bowls
While katsu is best enjoyed fresh, you can definitely store leftovers. Separate the katsu from the rice and sauce to prevent sogginess. Store them in airtight containers in the refrigerator for up to 2-3 days.
To reheat, the best method for the katsu is to crisp it up in a toaster oven or air fryer at 350°F (175°C) for about 5-10 minutes. Reheat the rice and sauce separately in the microwave or on the stovetop. Assemble just before serving to maintain that desired crispiness.
F.A.Q
Can I make katsu bowls ahead of time?
You can prepare the chicken or pork cutlets by breading them and storing them in the refrigerator for up to 24 hours before frying. Cooked katsu is best eaten fresh for crispiness, but can be refrigerated separately from the rice and sauce for 2-3 days and reheated.
What’s the best type of rice for katsu bowls?
Short-grain Japanese rice is ideal for katsu bowls. Its sticky texture and slight sweetness complement the katsu perfectly, making it easy to eat with chopsticks and soak up the delicious sauce.
How do I ensure my katsu is extra crispy?
To achieve maximum crispiness, use high-quality panko breadcrumbs, ensure your oil is at the correct temperature (325-350°F / 160-175°C), and avoid overcrowding the pan. For an even crunchier result, consider a double-fry method: fry once until light golden, cool, then fry again briefly at a slightly higher temperature.