
Table of Contents
- Make Your Own Starbucks Vanilla Bean Frappuccino at Home
- Essential Ingredients & Smart Substitutions
- Step-by-Step: Blending Your Perfect Vanilla Bean Frappuccino
- Expert Tips for Frappuccino Perfection
- What to Serve With Your Homemade Frappuccino
- Storing & Reheating Frappuccinos: A Practical Guide
- Vanilla Bean Frappuccino FAQ
Imagine that creamy, dreamy, vanilla-infused bliss that only a Starbucks Vanilla Bean Frappuccino can deliver. Now, imagine creating that exact same magic right in your own kitchen! This isn’t just another copycat recipe; it’s a meticulously crafted guide designed to replicate the iconic texture and unparalleled flavor of your favorite blended beverage. Get ready for a frosty, sweet, and utterly satisfying treat that tastes like it came straight from your local barista, but with the added satisfaction of making it yourself.
Make Your Own Starbucks Vanilla Bean Frappuccino at Home
There’s something incredibly satisfying about recreating a beloved cafe drink at home, especially when it tastes just as good, if not better, than the original. This recipe for a Starbucks Vanilla Bean Frappuccino is designed to hit all the right notes – the perfect balance of sweetness, the unmistakable depth of real vanilla, and that signature thick, smooth, and icy texture that makes a Frappuccino so irresistible.
Why This Recipe Delivers Authentic Frappuccino Taste
- Real Vanilla Power: We’re not cutting corners here. Using vanilla bean paste or high-quality extract ensures a rich, authentic vanilla flavor that shines through the ice and milk.
- Texture Mastery: The secret to that signature Frappuccino thickness lies in a tiny but mighty ingredient: xanthan gum. It’s what gives the drink its smooth, non-separated consistency.
- Perfect Sweetness Balance: This recipe guides you to achieve the ideal level of sweetness, allowing the vanilla to be the star without being cloyingly sweet.
- Blender Savvy: Specific blending techniques ensure a perfectly pulverized, uniform icy texture, free from large ice chunks.
Essential Ingredients & Smart Substitutions
Here is what you need and why:
Ice: The Foundation of Froth: This is non-negotiable! Use plenty of ice, preferably from filtered water, to ensure a clean taste. The amount of ice is crucial for achieving the right thickness and chill. Too little, and it’s watery; too much, and it’s too thick to blend.
Milk: Creaminess & Texture: Whole milk is my top recommendation for the creamiest, most authentic Frappuccino experience. Its fat content contributes significantly to the luxurious mouthfeel. However, you can absolutely use 2% milk for a slightly lighter version. For dairy-free options, unsweetened almond milk or oat milk work wonderfully, though they might result in a slightly less rich texture. Learn more about milk substitutes here.
Vanilla Bean Paste/Extract: The Core Flavor: For the absolute best flavor, vanilla bean paste is king. It provides those beautiful specks and an incredibly deep, complex vanilla aroma. If you don’t have paste, a high-quality pure vanilla extract is an excellent substitute. Avoid imitation vanilla if you want that true Starbucks taste.
Sweetener: Getting the Right Balance: Simple syrup (equal parts sugar and water, heated until dissolved) is ideal because it blends seamlessly without leaving a grainy texture. Granulated sugar can also be used, but ensure your blender is powerful enough to fully dissolve it. Adjust the amount to your personal preference – Starbucks Frappuccinos are quite sweet, so don’t be shy!
Xanthan Gum: Achieving the Signature Frappuccino Viscosity: This is the secret ingredient! A tiny pinch of xanthan gum acts as a stabilizer and thickener, preventing the ice from separating from the liquid and giving your Frappuccino that characteristic smooth, almost milkshake-like consistency. You can find it in the baking aisle or health food section of most grocery stores. Don’t skip it for the most authentic result!
Step-by-Step: Blending Your Perfect Vanilla Bean Frappuccino
Follow these step-by-step photos:
1. Prepare Your Blender
Ensure your blender is clean and ready to go. A high-powered blender is highly recommended for the smoothest results, as it will pulverize the ice more effectively.
2. Combine Liquid Ingredients
Pour the milk into your blender pitcher first. This helps the blades move freely and prevents the ice from getting stuck at the bottom. Add your simple syrup (or granulated sugar) next.
3. Add Sweetener and Vanilla
Measure in your vanilla bean paste or vanilla extract. If using granulated sugar instead of simple syrup, add it now. Give it a quick stir or pulse to combine these liquid elements.
4. Introduce Ice and Thickener
Add the ice to the blender. Sprinkle the xanthan gum directly over the ice. This helps distribute it evenly and prevents it from clumping at the bottom.
5. Blend to Desired Consistency
Start blending on a low setting, then gradually increase to high. Use your blender’s tamper if it has one, to push the ice down towards the blades. Blend until the mixture is completely smooth, thick, and free of any large ice chunks. It should have a uniform, creamy texture. This usually takes about 30-60 seconds in a good blender.
6. Serve Immediately
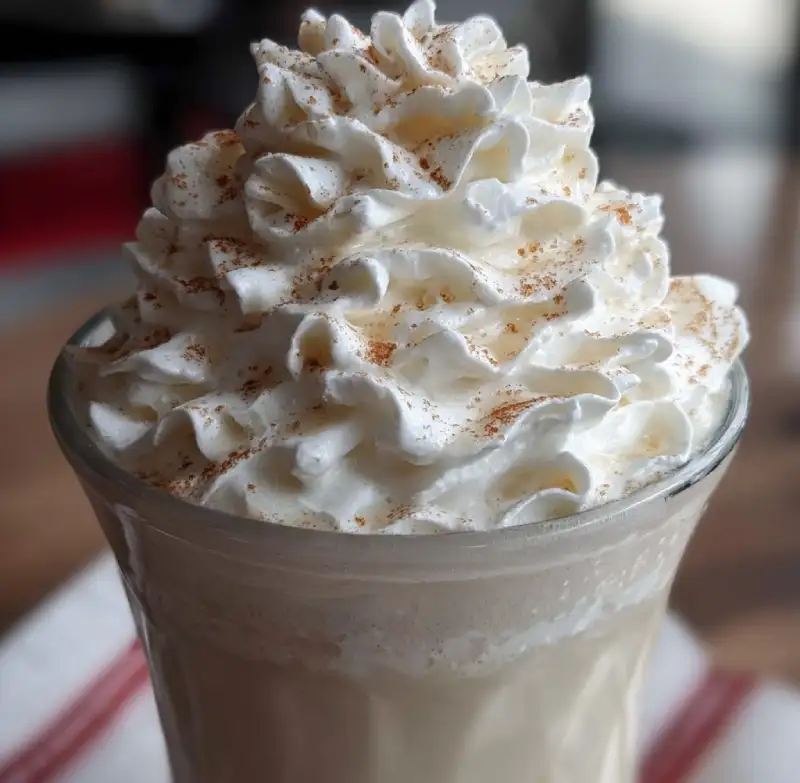
Pour your freshly blended Starbucks Vanilla Bean Frappuccino into a tall glass. Top with whipped cream and an extra drizzle of vanilla syrup or a sprinkle of vanilla bean specks if desired. Enjoy right away!
Expert Tips for Frappuccino Perfection
- Don’t Over-blend: While you want a smooth consistency, over-blending can melt the ice too much, resulting in a thinner, less frosty drink. Blend just until smooth.
- Adjust Sweetness to Taste: The amount of simple syrup is a guideline. Taste a small spoonful before serving and add more if you prefer a sweeter drink.
- Experiment with Toppings: Whipped cream is classic, but consider a drizzle of caramel, chocolate syrup, or even a sprinkle of cinnamon for an extra touch.
- Use a High-Powered Blender: This is truly key for achieving that ultra-smooth, creamy texture without chunky ice bits. Blenders like Vitamix or Blendtec make a noticeable difference.
What to Serve With Your Homemade Frappuccino
A homemade Starbucks Vanilla Bean Frappuccino is a treat in itself, but it pairs beautifully with a variety of snacks. For a classic cafe experience, serve it alongside a freshly baked muffin, a flaky croissant, or a sweet scone. It’s also a delightful accompaniment to a light brunch or as a refreshing afternoon pick-me-up with a simple cookie. For more baking inspiration, see more easy recipes on my blog!
Storing & Reheating Frappuccinos: A Practical Guide
Can You Store Leftover Frappuccino?
Unfortunately, Frappuccinos are best enjoyed immediately after blending. The icy, frothy texture is ephemeral. If you store a leftover Frappuccino in the refrigerator, the ice will melt, separating from the milk and resulting in a watery, unappetizing drink.
Reheating and Re-blending Considerations
While you can’t ‘reheat’ a Frappuccino in the traditional sense, you can attempt to re-blend it. If you have a small amount leftover, you can add a few fresh ice cubes and re-blend it briefly. However, it will likely not achieve the exact same fresh texture and flavor as a newly made one. It’s always best to make only what you plan to consume right away.
Vanilla Bean Frappuccino FAQ
What makes Starbucks’ Frappuccinos so thick?
Can I make this dairy-free?
What’s the best type of vanilla to use?
Why is my Frappuccino not blending smoothly?
Can I add coffee to this recipe?
Starbucks Vanilla Bean Frappuccino
- Total Time: 5 minutes
- Yield: 1 large serving
Description
Recreate the iconic Starbucks Vanilla Bean Frappuccino at home with this easy, step-by-step recipe. Enjoy the creamy, sweet, and perfectly blended vanilla goodness in minutes.
Ingredients
- 1 cup ice cubes
- 3/4 cup whole milk (or 2% milk, unsweetened almond/oat milk)
- 2–3 tablespoons simple syrup (or granulated sugar, to taste)
- 1 teaspoon vanilla bean paste (or 1.5 teaspoons pure vanilla extract)
- 1/8 teaspoon xanthan gum (a tiny pinch!)
- Whipped cream, for topping (optional)
- Extra vanilla drizzle, for topping (optional)
Instructions
- 1. Prepare Your Blender: Ensure your blender is clean and ready.
- 2. Combine Liquid Ingredients: Pour the milk and simple syrup (or granulated sugar) into the blender pitcher.
- 3. Add Vanilla: Add the vanilla bean paste or extract to the liquid mixture.
- 4. Introduce Ice and Thickener: Add the ice cubes to the blender, then sprinkle the xanthan gum evenly over the ice.
- 5. Blend to Desired Consistency: Blend on low, then gradually increase to high speed. Blend until the mixture is completely smooth, thick, and free of ice chunks (about 30-60 seconds). Use a tamper if needed.
- 6. Serve Immediately: Pour into a tall glass, top with whipped cream and extra vanilla drizzle if desired, and enjoy right away!
- Prep Time: 5 mins
- Cook Time: 0 mins