
Introduction to Sugar-Free Cheesecake
As a busy mom, I know how challenging it can be to find time for yourself, let alone whip up a dessert that feels indulgent yet guilt-free. That’s where my Sugar-Free Cheesecake comes in! This delightful treat is perfect for those moments when you crave something sweet but want to keep it healthy. With its creamy texture and rich flavor, it’s sure to impress your loved ones without the added sugar. Plus, it’s a quick solution for a busy day, making it a go-to recipe in my kitchen. Let’s dive into this delicious adventure!
Why You’ll Love This Sugar-Free Cheesecake
This Sugar-Free Cheesecake is not just a dessert; it’s a lifesaver for busy days! It’s incredibly easy to make, requiring minimal prep time, which is perfect for those hectic evenings. The taste? Oh, it’s rich and creamy, just like the traditional version, but without the guilt. You can enjoy a slice (or two!) knowing you’re treating yourself right. Plus, it’s a fantastic way to impress guests without spending hours in the kitchen!
Ingredients for Sugar-Free Cheesecake
Gathering the right ingredients is key to making a delicious Sugar-Free Cheesecake. Here’s what you’ll need:
- Almond flour: This gluten-free alternative gives the crust a nutty flavor and a delightful crunch.
- Unsalted butter: Melted butter binds the crust together, adding richness without overpowering the flavors.
- Erythritol: A popular sugar substitute, it sweetens the cheesecake without the calories or blood sugar spikes.
- Cream cheese: The star of the show! It provides that creamy texture we all love in cheesecake.
- Sour cream: This adds a tangy flavor and helps create a smooth filling that’s simply irresistible.
- Vanilla extract: A splash of this enhances the overall flavor, making every bite feel special.
- Eggs: They help set the cheesecake, giving it that perfect, creamy consistency.
- Lemon juice: A little acidity brightens the flavors and balances the sweetness beautifully.
For those looking to customize, you can swap almond flour for a gluten-free blend or use coconut flour for a different flavor profile. If you prefer a different sweetener, feel free to experiment with monk fruit or stevia.
How to Make Sugar-Free Cheesecake
Now that we have our ingredients ready, let’s dive into the fun part: making this Sugar-Free Cheesecake! Follow these simple steps, and you’ll be on your way to a delicious dessert that everyone will love.
Step 1: Preheat the Oven
First things first, preheat your oven to 325°F (160°C). Preheating is crucial because it ensures that your cheesecake bakes evenly. If you skip this step, you might end up with a soggy crust or an unevenly cooked filling. Trust me, a little patience here goes a long way!
Step 2: Prepare the Crust
In a mixing bowl, combine the almond flour, melted butter, and erythritol. Stir until everything is well mixed. The mixture should resemble wet sand. Now, press this mixture firmly into the bottom of a springform pan. This step is vital! A well-pressed crust will hold together beautifully when you slice into your cheesecake.
Step 3: Make the Filling
In a separate bowl, beat the softened cream cheese until it’s smooth and creamy. This is where the magic happens! Gradually add in the sour cream, vanilla extract, eggs, and lemon juice. Mix until everything is well combined and silky. Make sure there are no lumps; a smooth filling is key to a perfect cheesecake!
Step 4: Assemble the Cheesecake
Now it’s time to pour that luscious filling over your crust. Gently spread it out with a spatula to ensure even distribution. This step is important for a beautiful presentation. You want every slice to look as good as it tastes!
Step 5: Bake the Cheesecake
Place your cheesecake in the preheated oven and bake for 50-60 minutes. Keep an eye on it! You’ll know it’s done when the center is set but still slightly jiggly. This is the sweet spot for a creamy texture. Overbaking can lead to cracks, so check it a few minutes before the timer goes off.
Step 6: Cool and Refrigerate
Once baked, remove the cheesecake from the oven and let it cool at room temperature. This cooling process is essential for the texture. After it’s cooled, refrigerate it for at least 4 hours, or overnight if you can wait! Chilling allows the flavors to meld and gives you that perfect slice when you’re ready to serve.
Tips for Success
- Always use room temperature ingredients for a smoother filling.
- Press the crust firmly to prevent it from crumbling when sliced.
- Check for doneness a few minutes early to avoid overbaking.
- For a firmer cheesecake, refrigerate overnight.
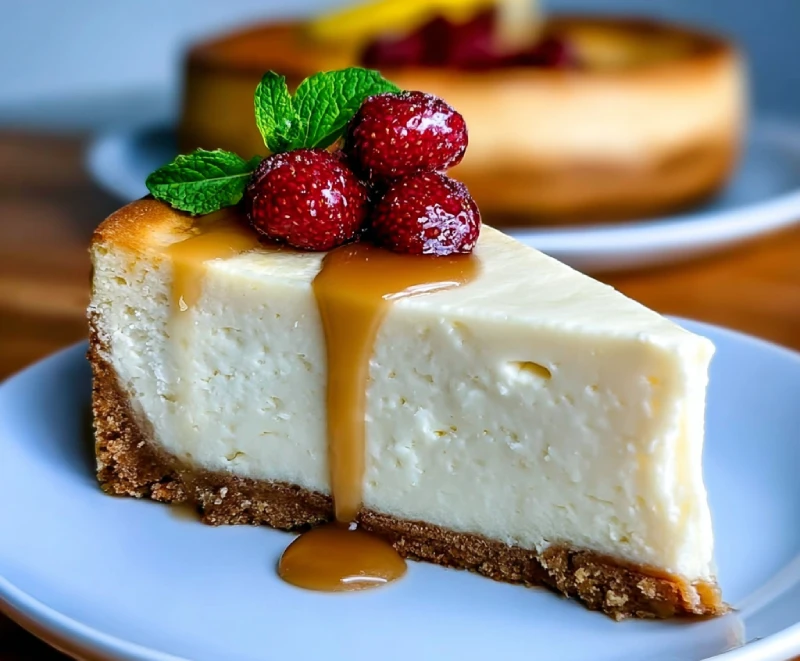
- Top with fresh berries or a sugar-free sauce for added flavor.
Equipment Needed
- Springform pan: Essential for easy removal; a regular cake pan works too, but slicing will be trickier.
- Mixing bowls: Use any size you have; just ensure they’re large enough for mixing.
- Electric mixer: A hand mixer is great, but a stand mixer can save time.
- Spatula: Perfect for spreading the filling evenly; a wooden spoon can work in a pinch.
Variations of Sugar-Free Cheesecake
- Chocolate Swirl: Add unsweetened cocoa powder to the filling for a rich chocolate flavor. Swirl it in before baking for a marbled effect.
- Berry Bliss: Fold in fresh or frozen berries like blueberries or raspberries into the filling for a fruity twist.
- Nutty Delight: Mix in chopped nuts like pecans or walnuts into the crust for added crunch and flavor.
- Pumpkin Spice: Substitute some cream cheese with pumpkin puree and add pumpkin spice for a seasonal treat.
- Matcha Green Tea: Incorporate matcha powder into the filling for a unique flavor and a beautiful green hue.
Serving Suggestions for Sugar-Free Cheesecake
- Top with fresh berries like strawberries or blueberries for a pop of color and flavor.
- Drizzle with a sugar-free chocolate or caramel sauce for an extra indulgent touch.
- Serve with a dollop of whipped cream or Greek yogurt for added creaminess.
- Pair with a cup of herbal tea or coffee for a delightful dessert experience.
- Garnish with mint leaves for a refreshing finish and beautiful presentation.
FAQs about Sugar-Free Cheesecake
As you embark on your journey to create this Sugar-Free Cheesecake, you might have a few questions. Here are some common queries I’ve encountered, along with helpful answers to guide you!
Can I use a different sweetener instead of erythritol?
Absolutely! You can substitute erythritol with monk fruit or stevia. Just remember to adjust the quantity according to the sweetness level of the alternative sweetener you choose.
How do I know when the cheesecake is done baking?
The cheesecake is done when the edges are set, but the center still has a slight jiggle. It will firm up as it cools, so don’t worry if it looks a bit wobbly when you take it out!
Can I freeze the sugar-free cheesecake?
Yes, you can freeze it! Just wrap it tightly in plastic wrap and then in aluminum foil. It can last up to three months in the freezer. Thaw it in the fridge before serving for the best texture.
What can I use instead of cream cheese for a dairy-free version?
You can use a dairy-free cream cheese alternative made from nuts or soy. Just ensure it has a similar texture to achieve that creamy filling we all love!
How long does the cheesecake need to chill before serving?
For the best flavor and texture, refrigerate the cheesecake for at least 4 hours. If you can wait overnight, even better! This allows the flavors to meld beautifully.
Final Thoughts
Creating this Sugar-Free Cheesecake has been a delightful journey, one that brings joy not just to my taste buds but to my heart as well. It’s a dessert that allows me to indulge without the guilt, making it perfect for family gatherings or a quiet night in. Each slice is a reminder that we can enjoy sweet moments while still being mindful of our health. I hope this recipe brings as much happiness to your kitchen as it has to mine. So, gather your loved ones, slice up that cheesecake, and savor every delicious bite together!