
Table of Contents
- Introduction: Your New Favorite Brownie Awaits
- Why This Recipe Delivers Unbeatable Results
- Ingredients: Understanding Each Component’s Role
- Step-by-Step Instructions: Creating Your Masterpiece
- Expert Tips for Brownie Success
- What to Serve With Your Chocolate Covered Strawberry Brownies
- Storing and Reheating Your Brownies
- Frequently Asked Questions (FAQ)
Introduction: Your New Favorite Brownie Awaits
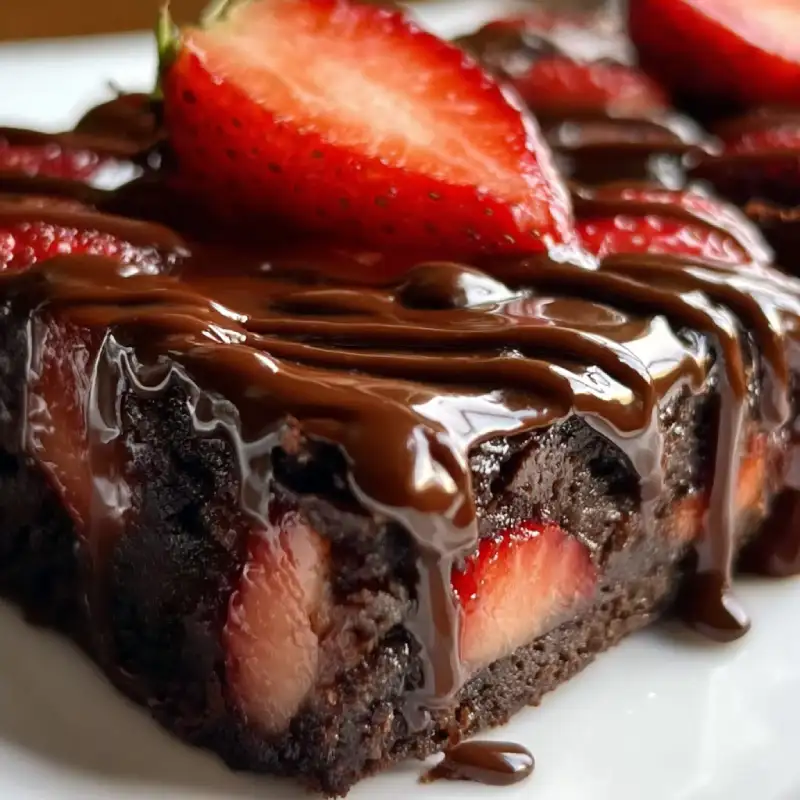
Oh, brownies! Is there anything more comforting, more universally loved, than a perfectly fudgy, intensely chocolatey brownie? For me, it’s a lifelong love affair. I’ve baked countless batches, always chasing that elusive perfect texture and flavor. And today, my friends, I’m thrilled to share a recipe that doesn’t just meet expectations, it absolutely shatters them: my Chocolate Covered Strawberry Brownies. Imagine a rich, dense, and incredibly fudgy brownie base, studded with bursts of sweet, juicy fresh strawberries, all crowned with a delicate chocolate drizzle. It’s a symphony of textures and tastes that will make your heart sing.
These aren’t just any brownies; these are the brownies that will become your go-to for every occasion. They’re sophisticated enough for a dinner party, yet comforting enough for a quiet night in. The combination of deep chocolate and bright, fresh strawberries is simply irresistible, making these Chocolate Covered Strawberry Brownies a showstopper that everyone will rave about. Get ready to fall in love!
Why This Recipe Delivers Unbeatable Results
- Fudgy Interior, Perfect Chew: We use a precise ratio of ingredients and a specific baking technique to ensure every bite is dense, moist, and delightfully chewy, never cakey.
- Balanced Chocolate and Fruit Flavor: The intensity of high-quality chocolate is perfectly complemented by the natural sweetness and slight tartness of fresh strawberries, creating a harmonious flavor profile.
- Easy to Achieve Brownie Perfection: Don’t let the gourmet taste fool you; this recipe is straightforward and designed for home bakers of all skill levels to achieve professional-level results.
- Visually Stunning and Event-Ready: The vibrant red of the strawberries against the dark chocolate, often enhanced with an elegant chocolate drizzle, makes these brownies a feast for the eyes as well as the palate, perfect for any celebration.
Ingredients: Understanding Each Component’s Role
Here is what you need and why:
High-Quality Cocoa Powder: This is the foundation of our deep chocolate flavor. I recommend using a good quality unsweetened natural cocoa powder for a rich, complex taste. Dutch-processed cocoa can also be used for a darker color and milder flavor, but natural cocoa often provides a more intense chocolate punch.
Real Chocolate vs. Chocolate Chips: For the ultimate fudginess and melt-in-your-mouth texture, I strongly advocate for using good quality baking chocolate (like a 60-70% cacao bar), finely chopped, rather than just chocolate chips. Baking chocolate melts more smoothly and incorporates better into the batter, contributing to that luxurious texture. Chocolate chips often contain stabilizers that prevent them from melting as smoothly.
Unsalted Butter: Using unsalted butter gives you complete control over the salt content in your brownies. Butter provides richness, moisture, and helps carry the chocolate flavor. Make sure it’s at room temperature for easier creaming, or melted as specified in the recipe.
Eggs: Eggs are crucial for both structure and richness. They bind the ingredients together, provide lift, and contribute to the fudgy texture. Using large eggs at room temperature helps them emulsify better with the other ingredients, leading to a smoother batter.
Flour: We use a minimalist approach with all-purpose flour here to ensure maximum fudginess. Too much flour can lead to a cakey brownie, which is not what we’re after! Measure it carefully, preferably by weight, to avoid over-measuring.
Sugar: A combination of granulated sugar provides sweetness and helps create that desirable crackly top, while also contributing to the moistness of the brownies. Don’t skimp on the sugar; it’s essential for both flavor and texture.
Fresh Strawberries: Why fresh is best? Fresh strawberries offer a vibrant burst of natural sweetness and a slight tang that perfectly cuts through the richness of the chocolate. Their texture holds up beautifully during baking, providing delightful pockets of fruit. Frozen strawberries can release too much water, potentially altering the brownie’s texture.
Optional Toppings: Elevating the experience is easy! Consider a simple chocolate drizzle (melted chocolate chips or baking chocolate), a dusting of powdered sugar, or even a dollop of whipped cream when serving. These small touches make a big difference.
Step-by-Step Instructions: Creating Your Masterpiece
Follow these step-by-step photos:
1. Prepare Your Pan and Oven
Preheat your oven to 350°F (175°C). Line an 8×8 inch baking pan with parchment paper, leaving an overhang on two sides to create ‘handles’ for easy removal. Lightly grease the parchment paper and exposed sides of the pan. This ensures your beautiful Chocolate Covered Strawberry Brownies won’t stick!
2. Melt Chocolate and Butter: The Base
In a heatproof bowl set over a saucepan of simmering water (or in the microwave in 30-second intervals), melt the chopped baking chocolate and unsalted butter together. Stir until smooth and glossy. Remove from heat and let it cool slightly. This creates the rich, decadent base for our brownies.
3. Whisk Eggs and Sugar: Air and Texture
In a large bowl, whisk together the granulated sugar and eggs until light in color and slightly thickened, about 2-3 minutes. This incorporates air, which contributes to the crackly top and chewy texture of the brownies. A hand mixer works wonders here!
4. Combine Wet and Dry Ingredients: Don’t Overmix
Pour the slightly cooled chocolate-butter mixture into the egg-sugar mixture and whisk until just combined. In a separate bowl, whisk together the all-purpose flour, cocoa powder, and a pinch of salt. Gradually add the dry ingredients to the wet ingredients, mixing only until no streaks of flour remain. Do not overmix! Overmixing develops gluten, leading to tough, cakey brownies.
5. Fold in Strawberries: Distribute Evenly
Gently fold in the chopped fresh strawberries into the brownie batter. Be careful not to crush them. You want them evenly distributed throughout the batter so every bite gets a burst of fruity goodness. Pour the batter into your prepared baking pan and spread evenly.
6. Bake to Perfection: Knowing When They’re Done
Bake for 25-30 minutes, or until a toothpick inserted into the center comes out with moist crumbs, but not wet batter. The edges should be set, but the center might still look a little soft – that’s the secret to fudginess! Overbaking is the enemy of a fudgy brownie. Trust your instincts and the toothpick test.
7. Cool Completely: Patience for the Best Texture
This is perhaps the hardest step! Let the brownies cool completely in the pan on a wire rack before attempting to cut them. Cooling allows the brownies to set properly, intensifying their fudgy texture and making them much easier to slice cleanly. Resist the urge to cut them warm!
8. Garnish and Serve: The Final Flourish
Once completely cool, lift the brownies out of the pan using the parchment paper handles. Slice into squares. For an extra touch, melt a little extra chocolate and drizzle it over the top, or dust with powdered sugar. Serve your magnificent Chocolate Covered Strawberry Brownies and enjoy the accolades!
Expert Tips for Brownie Success
- Do Not Overbake: The Key to Fudginess: This is the golden rule for brownies! A slightly underbaked brownie is a fudgy brownie. When a toothpick inserted comes out with moist crumbs, it’s done.
- Room Temperature Ingredients: For Smooth Blending: Eggs and butter at room temperature emulsify better, creating a smoother, more uniform batter and a better final texture.
- Chopping Strawberries: Size Matters for Distribution: Chop your strawberries into small, even pieces (about 1/4 to 1/2 inch). This ensures they are evenly distributed and don’t sink to the bottom or create large pockets of moisture.
- Line Your Pan: Easy Removal Guaranteed: Always line your baking pan with parchment paper, leaving an overhang. This makes lifting the cooled brownies out of the pan incredibly easy and mess-free.
- Let Them Cool: Essential for Clean Slices: Patience is a virtue, especially with brownies! Cooling completely allows the brownies to set and firm up, making clean, neat slices possible. Warm brownies will crumble and be difficult to cut.
What to Serve With Your Chocolate Covered Strawberry Brownies
These Chocolate Covered Strawberry Brownies are divine on their own, but a little something extra can elevate the experience even further:
- Coffee or Tea: Classic Pairings: A hot cup of freshly brewed coffee or a robust black tea is a timeless companion, cutting through the richness of the chocolate beautifully.
- Vanilla Ice Cream: A Warm/Cold Contrast: A scoop of creamy vanilla bean ice cream melting over a slightly warmed brownie is pure bliss. The temperature and flavor contrast is simply irresistible.
- Whipped Cream: Light and Complementary: A dollop of freshly whipped cream adds a light, airy counterpoint to the dense brownie, enhancing its luxurious feel.
- A Glass of Milk: Simple Indulgence: Sometimes, the simplest pairings are the best. A cold glass of milk is a classic choice that perfectly complements the rich chocolate.
Storing and Reheating Your Brownies
To keep your Chocolate Covered Strawberry Brownies tasting their best:
- Optimal Storage Conditions: Store cooled brownies in an airtight container at room temperature for up to 3-4 days. If your kitchen is very warm, or if you prefer, you can store them in the refrigerator for up to a week. Bring them to room temperature before serving for the best texture.
- Freezing for Future Enjoyment: Brownies freeze beautifully! Once completely cooled, wrap individual brownies tightly in plastic wrap, then place them in a freezer-safe bag or container. They can be frozen for up to 2-3 months.
- Gentle Reheating Techniques: To reheat, thaw frozen brownies at room temperature or in the refrigerator. For a warm, gooey treat, microwave individual brownies for 10-15 seconds, or warm in a preheated oven at 275°F (135°C) for 5-10 minutes.
Frequently Asked Questions (FAQ)
Can I use frozen strawberries?
How do I know when the brownies are done?
What if my brownies are too cakey?
Can I add other fruits?
How far in advance can I make these?
Chocolate Covered Strawberry Brownies
- Total Time: 50 minutes
- Yield: 9-12 servings
Description
Indulge in these rich, fudgy brownies studded with fresh strawberries and topped with a delicate chocolate drizzle. A perfect blend of decadent chocolate and bright fruit.
Ingredients
- 1 cup (2 sticks) unsalted butter, melted
- 1 cup granulated sugar
- 1/2 cup packed light brown sugar
- 4 large eggs, room temperature
- 1 teaspoon vanilla extract
- 1 cup all-purpose flour
- 3/4 cup unsweetened cocoa powder
- 1/2 teaspoon salt
- 1 cup fresh strawberries, hulled and chopped
- 2 oz (56g) baking chocolate (60-70% cacao), finely chopped (for drizzle, optional)
Instructions
- 1. Prepare Pan & Oven: Preheat oven to 350°F (175°C). Line an 8×8 inch baking pan with parchment paper, leaving an overhang. Grease lightly.
- 2. Melt Chocolate & Butter: In a heatproof bowl, melt butter and chopped baking chocolate together until smooth. Let cool slightly.
- 3. Whisk Eggs & Sugar: In a large bowl, whisk granulated sugar, brown sugar, and eggs until light and slightly thickened (2-3 minutes). Stir in vanilla extract.
- 4. Combine Wet & Dry: Pour cooled chocolate-butter mixture into egg mixture; whisk until just combined. In a separate bowl, whisk flour, cocoa powder, and salt. Gradually add dry to wet, mixing until no streaks of flour remain. Do not overmix.
- 5. Fold in Strawberries: Gently fold in chopped fresh strawberries. Pour batter into prepared pan and spread evenly.
- 6. Bake: Bake for 25-30 minutes, or until a toothpick inserted into the center comes out with moist crumbs.
- 7. Cool Completely: Let cool completely in the pan on a wire rack before slicing.
- 8. Garnish & Serve: Once cool, lift from pan, slice, and optionally drizzle with melted chocolate.
- Prep Time: 20 mins
- Cook Time: 30 mins