
Table of Contents
- Make Your Own Dark Chocolate Reese’s: A Homemade Treat
- Why This Dark Chocolate Reese’s Recipe Delivers
- Ingredients and Smart Substitutions for the Best Flavor
- Step-by-Step: Crafting Your Dark Chocolate Reese’s
- Expert Tips for Dark Chocolate Reese’s Success
- What to Serve With Your Homemade Reese’s
- Storing and Reheating Your Dark Chocolate Reese’s
- Dark Chocolate Reese’s FAQ
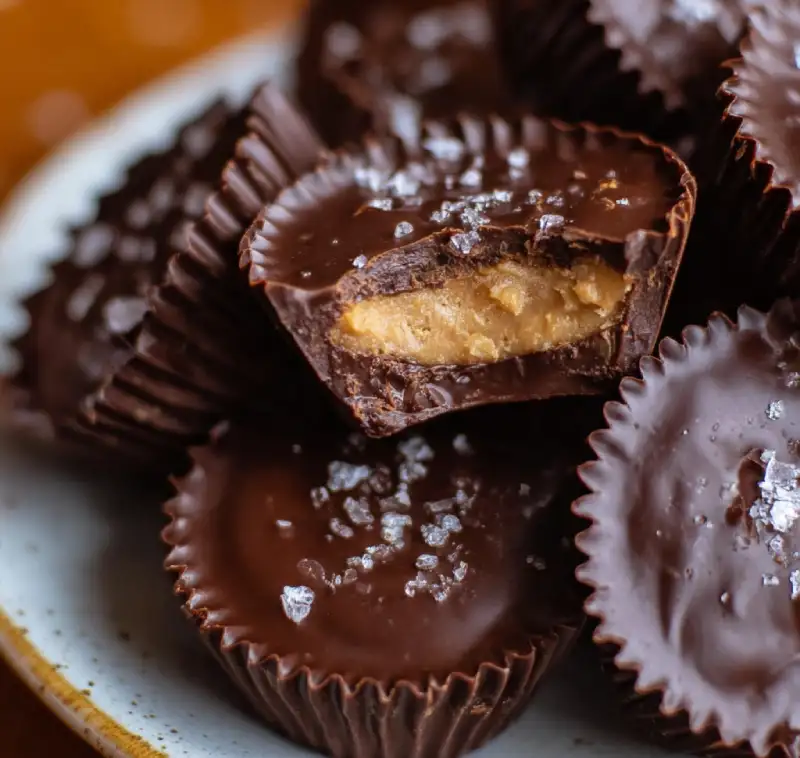
Imagine biting into a perfectly balanced treat: the rich, slightly bitter snap of dark chocolate giving way to a creamy, crumbly, and intensely peanut buttery filling. That, my friends, is the magic of homemade dark chocolate Reese’s. Forget those waxy, overly sweet store-bought versions; we’re about to embark on a culinary adventure that will redefine your peanut butter cup expectations. Get ready for a symphony of textures and flavors that will have you reaching for just one more, every single time.
Make Your Own Dark Chocolate Reese’s: A Homemade Treat
There’s a certain satisfaction that comes with creating something delicious from scratch, and when it comes to peanut butter cups, homemade truly beats store-bought every single time. Commercial versions often rely on cheaper ingredients, excessive sugar, and stabilizers that detract from the pure, unadulterated joy of chocolate and peanut butter. When you make your own dark chocolate Reese’s, you control the quality of every ingredient, ensuring a superior flavor and texture that’s simply unparalleled.
My journey to the perfect dark chocolate peanut butter cup has been a delicious one, filled with experimentation. I’ve tried various chocolate percentages, different types of peanut butter, and countless ratios of sweet to salty. What I’ve landed on is a recipe that consistently delivers that nostalgic comfort with an elevated, sophisticated twist. It’s a recipe born from a love of classic treats and a desire for something truly exceptional.
Why This Dark Chocolate Reese’s Recipe Delivers
- Achieving the perfect balance: sweet, salty, and bitter. This recipe masterfully balances the sweetness of the peanut butter filling with a crucial pinch of salt and the delightful bitterness of dark chocolate. It’s a sophisticated flavor profile that keeps you coming back for more.
- The creamy, crumbly peanut butter texture. We’re aiming for that iconic, slightly crumbly yet melt-in-your-mouth peanut butter filling that defines a great peanut butter cup. The right ratio of powdered sugar and butter ensures this perfect consistency.
- Crackable dark chocolate shell, every time. No flimsy, soft chocolate here! With proper melting and chilling techniques, you’ll achieve a satisfyingly crisp, crackable dark chocolate shell that encases the luscious filling.
- Simple ingredients, maximum flavor impact. You won’t find any obscure ingredients in this recipe. Just a handful of pantry staples, thoughtfully combined, create an explosion of flavor that belies its simplicity.
Ingredients and Smart Substitutions for the Best Flavor
Here is what you need and why:
Dark Chocolate: The key to rich flavor and how to choose it. For the best dark chocolate Reese’s, opt for a high-quality dark chocolate with a cocoa percentage between 60-75%. Anything higher might be too bitter for some, and anything lower might be too sweet. Chocolate bars or wafers designed for melting (like couverture chocolate) work beautifully, but good quality dark chocolate chips can also be used. My personal favorite is Ghirardelli 60% Cacao baking chips for their consistent melt and rich flavor. For an excellent guide on choosing chocolate, check out Food Network’s Baking Chocolate Guide.
Peanut Butter: Creamy vs. natural – understanding the difference. For that classic Reese’s texture, a creamy, processed peanut butter (like Jif or Skippy) works best. Natural peanut butter, which often separates, can lead to an oilier, less stable filling. If you must use natural, make sure it’s well-stirred and consider adding a tiny bit more powdered sugar to absorb excess oil.
Powdered Sugar: Why it’s essential for texture. Also known as confectioners’ sugar, this finely milled sugar is crucial for creating the smooth, crumbly, and non-gritty texture of the peanut butter filling. Granulated sugar would make the filling grainy.
Butter: Unsalted for control, or a plant-based alternative. Unsalted butter allows you to control the overall saltiness of your cups. It adds richness and helps bind the peanut butter filling. For a dairy-free version, a good quality plant-based butter alternative (like Miyoko’s Kitchen or Earth Balance sticks) works wonderfully.
Vanilla Extract: A flavor enhancer, don’t skip it. A touch of pure vanilla extract elevates the flavor profile, adding warmth and depth that complements both the chocolate and peanut butter beautifully.
Pinch of Salt: Balancing sweetness and boosting peanut flavor. This tiny addition is a game-changer! It cuts through the sweetness, enhances the natural peanut flavor, and makes the entire treat more complex and satisfying.
Step-by-Step: Crafting Your Dark Chocolate Reese’s
Follow these step-by-step photos:
1. Prep Your Molds
Line a mini muffin tin with paper liners or use silicone mini muffin molds. Silicone molds are fantastic for easy release and a perfectly smooth finish. If using paper liners, make sure they are firmly seated in the tin. This preparation ensures your dark chocolate Reese’s come out perfectly shaped.
2. Make the Peanut Butter Filling
In a medium bowl, combine the creamy peanut butter, powdered sugar, softened unsalted butter, vanilla extract, and a pinch of salt. Mix with a spoon or a stand mixer on low speed until thoroughly combined and a thick, dough-like consistency forms. It should be firm enough to roll into balls but still pliable. If it’s too sticky, add a tiny bit more powdered sugar; if too dry, a touch more softened butter.
3. Melt the Chocolate
Set up a double boiler: place a heatproof bowl over a saucepan of simmering water, ensuring the bottom of the bowl doesn’t touch the water. Add about two-thirds of your chopped dark chocolate (or chips) to the bowl. Stir occasionally until the chocolate is mostly melted and smooth. Remove from heat and add the remaining one-third of chocolate, stirring until fully melted and smooth. This tempering-like method helps achieve a glossy, crackable shell and prevents chocolate bloom. Alternatively, you can melt in the microwave in 30-second intervals, stirring well after each, until smooth.
4. Layering Your Cups
Spoon about 1 teaspoon of melted dark chocolate into the bottom of each prepared mold, spreading it slightly up the sides. Place the muffin tin in the refrigerator for 5-10 minutes to allow the chocolate to set. While the chocolate is setting, roll the peanut butter filling into small balls, about 1 teaspoon each, and flatten them slightly into discs. Once the chocolate base is firm, place a peanut butter disc on top of each chocolate layer. Finally, spoon another 1-2 teaspoons of melted dark chocolate over the peanut butter, gently spreading to cover completely. Tap the muffin tin lightly on the counter to release any air bubbles and ensure a smooth top.
5. Chill for Setting
Return the muffin tin to the refrigerator for at least 30-60 minutes, or until the dark chocolate Reese’s are completely firm. Patience is key here! Rushing this step can result in soft, messy cups. Once firm, gently pop them out of the molds or peel away the paper liners. Enjoy your homemade masterpiece!
Expert Tips for Dark Chocolate Reese’s Success
- Preventing chocolate bloom: Chocolate bloom (the grayish streaks on chocolate) is often caused by temperature fluctuations. Melting chocolate slowly and tempering it (as described in step 3) helps prevent this. Store your finished cups in a cool, consistent temperature.
- Achieving a smooth, glossy chocolate finish: Using good quality chocolate and melting it gently (double boiler is best) will give you a beautiful, shiny finish. Avoid overheating the chocolate, as this can make it seize or become dull.
- Troubleshooting crumbly or oily peanut butter filling: If your filling is too crumbly, add a tiny bit more softened butter, a quarter teaspoon at a time, until it comes together. If it’s too oily (often with natural peanut butter), add a little more powdered sugar to absorb the excess oil.
- Temperature control for easy handling: Ensure your butter is softened but not melted for the peanut butter filling. For the chocolate, keep it warm enough to be fluid but not so hot that it cooks the peanut butter. Working in a cool kitchen can also help prevent the chocolate from melting too quickly during assembly.
What to Serve With Your Homemade Reese’s
These homemade dark chocolate Reese’s are a treat in themselves, but they also pair beautifully with a variety of accompaniments. Enjoy them with a strong cup of coffee or a robust black tea for a delightful afternoon pick-me-up. They make an excellent dessert alongside a scoop of vanilla bean ice cream or a fresh fruit salad, offering a rich counterpoint to lighter flavors. For fellow chocolate lovers, these make an incredible homemade gift! Package them in a pretty box or cellophane bag for a thoughtful and delicious present. See more easy recipes for giftable treats!
Storing and Reheating Your Dark Chocolate Reese’s
For optimal freshness, store your homemade dark chocolate Reese’s in an airtight container in the refrigerator for up to 2 weeks. This keeps the chocolate firm and the peanut butter filling fresh. If you prefer them at room temperature, they can be stored in an airtight container in a cool, dry place for up to 5-7 days, though the chocolate may soften slightly. For longer enjoyment, these cups freeze beautifully! Place them in a single layer on a baking sheet until frozen solid, then transfer to a freezer-safe bag or container for up to 3 months. To revive them if they get too hard from refrigeration or freezing, simply let them sit at room temperature for 10-15 minutes before enjoying.
Dark Chocolate Reese’s FAQ
Can I use milk chocolate instead?
How do I prevent the chocolate from cracking?
Can I make these dairy-free or gluten-free?
How long do homemade Reese’s last?
Homemade Dark Chocolate Reese’s
- Total Time: 30 minutes
- Yield: 24 mini cups
Description
Indulge in the rich, balanced flavors of homemade dark chocolate peanut butter cups. This easy recipe delivers a crackable chocolate shell and a creamy, crumbly peanut butter filling.
Ingredients
- 1 ½ cups (about 9 oz) high-quality dark chocolate (60-75% cocoa), chopped or chips
- 1 cup creamy peanut butter (like Jif or Skippy)
- ½ cup powdered sugar
- ¼ cup (½ stick) unsalted butter, softened
- 1 teaspoon pure vanilla extract
- ¼ teaspoon salt
Instructions
- Prep Molds: Line a mini muffin tin with 24 paper liners or use silicone mini muffin molds.
- Make Filling: In a medium bowl, combine peanut butter, powdered sugar, softened butter, vanilla extract, and salt. Mix until well combined and a thick, dough-like consistency forms.
- Melt Chocolate: Using a double boiler or microwave, gently melt two-thirds of the dark chocolate until smooth. Remove from heat, add remaining chocolate, and stir until fully melted and glossy.
- Layer Cups: Spoon about 1 teaspoon of melted chocolate into each mold, spreading slightly. Chill for 5-10 minutes to set.
- Add Peanut Butter: Roll peanut butter filling into 24 small balls, flatten into discs, and place one on each set chocolate base.
- Top with Chocolate: Spoon another 1-2 teaspoons of melted chocolate over each peanut butter disc, spreading to cover completely. Tap tin to remove air bubbles.
- Chill to Set: Refrigerate for 30-60 minutes, or until completely firm. Gently remove from molds and enjoy!
- Prep Time: 20 mins
- Cook Time: 10 mins