
Table of Contents
- Introduction: Your New Favorite Gluten-Free Morning Treat
- Why This Gluten-Free Blueberry Bagel Recipe Works
- Essential Ingredients & Smart Substitutions
- Step-by-Step: Crafting Your Gluten-Free Blueberry Bagels
- Expert Tips for Gluten-Free Bagel Success
- What to Serve With Your Homemade Gluten-Free Blueberry Bagels
- Storing and Reheating Your Gluten-Free Bagels
- Gluten-Free Blueberry Bagels: Your Questions Answered (FAQ)
Introduction: Your New Favorite Gluten-Free Morning Treat
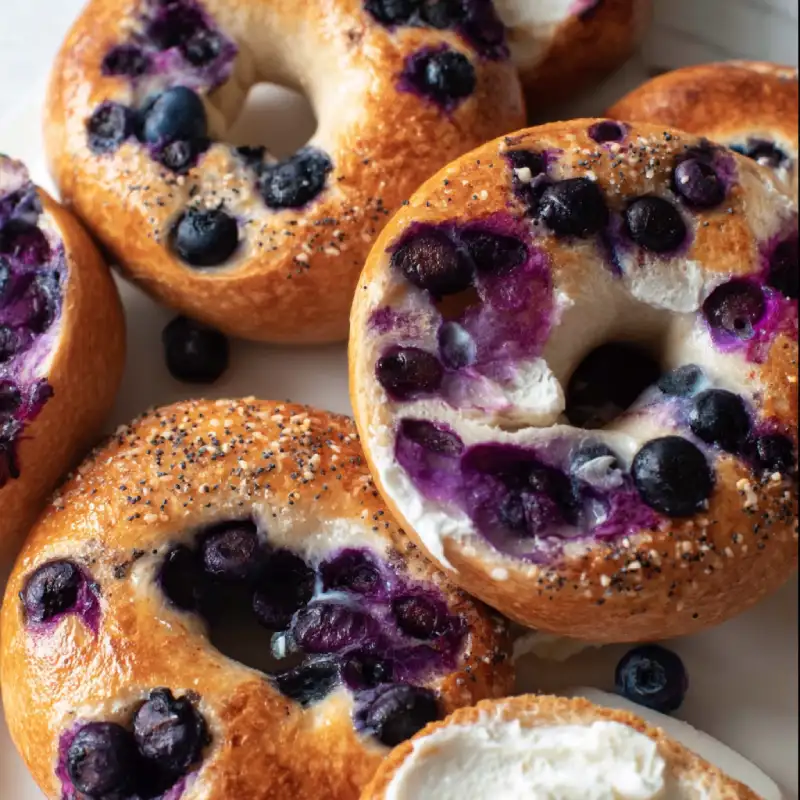
Imagine biting into a warm, chewy bagel, its golden crust giving way to a soft, pillowy interior studded with bursts of sweet, juicy blueberries. Now, imagine that bagel is entirely gluten-free! For years, the idea of a truly satisfying gluten-free bagel felt like a distant dream, often resulting in dense, crumbly disappointments. But I’m here to tell you that dream is now a delicious reality with these incredible gluten-free blueberry bagels.
Beyond the Box: Why You’ll Love Homemade Bagels
Forget those sad, pre-packaged versions that taste more like cardboard than a bakery treat. Making bagels at home, especially gluten-free ones, is a game-changer. You control the ingredients, the freshness, and most importantly, the incredible texture and flavor that simply can’t be replicated by store-bought options. There’s an unparalleled satisfaction in pulling a tray of perfectly golden, fragrant bagels from your own oven.
A Personal Triumph: My Journey to the Perfect Gluten-Free Bagel
My quest for the ultimate gluten-free bagel has been a long and passionate one. I’ve experimented with countless flour blends, hydration levels, and shaping techniques. There were many failures – bagels that were too hard, too soft, or simply fell apart. But through persistence and a deep dive into the science of gluten-free baking, I finally cracked the code. This recipe is the culmination of that journey, a personal triumph I’m thrilled to share, ensuring you get that authentic bagel experience without the gluten.
Why This Gluten-Free Blueberry Bagel Recipe Works
- Chewy, Not Crumbly: Achieving the Ideal Bagel Texture: We use a specific blend of gluten-free flours combined with psyllium husk powder to mimic gluten’s elasticity, resulting in that coveted chewy texture without any crumbling.
- Bursting with Flavor: The Magic of Fresh Blueberries: Fresh blueberries are folded directly into the dough, ensuring every bite is infused with their sweet, tangy goodness.
- Golden Crust, Soft Interior: The Baking Science Explained: The crucial boiling step before baking gelatinizes the starches on the surface, creating that signature shiny, golden crust while locking in moisture for a soft interior.
- Surprisingly Simple: No-Fuss Gluten-Free Baking: Despite the impressive results, this recipe is designed to be straightforward, breaking down each step into manageable, easy-to-follow instructions, making homemade bagels accessible to everyone.
Essential Ingredients & Smart Substitutions
Here is what you need and why:
The Right Gluten-Free Flour Blend: Balancing Starches and Grains: For these gluten-free blueberry bagels, I highly recommend a good quality all-purpose gluten-free flour blend that contains a mix of whole grains (like brown rice flour) and starches (like tapioca or potato starch). This balance is crucial for both flavor and texture. My personal favorite is King Arthur Gluten-Free All-Purpose Flour, but a similar blend from Bob’s Red Mill or Cup4Cup will also work beautifully. Avoid single-grain flours like almond or coconut flour, as they won’t provide the necessary structure.
Yeast & Sweetener: Activating for a Fluffy Rise: We use active dry yeast, which needs a little warmth and sugar to get going. Granulated sugar or maple syrup works perfectly here, providing food for the yeast and contributing to the bagel’s subtle sweetness and golden crust. Don’t skip this activation step – it’s your assurance that your bagels will rise!
Enhancing Texture: Psyllium Husk Powder vs. Xanthan Gum: This is where the magic happens for gluten-free texture! Psyllium husk powder is my secret weapon. It acts as a binder and provides elasticity, mimicking gluten’s role and giving the bagels their characteristic chewiness. If you absolutely can’t find psyllium husk, you can try substituting with xanthan gum (use about 1/2 teaspoon per cup of flour in your blend), but the texture won’t be quite as robust or chewy. Psyllium husk is truly superior for bagels.
Hydration Heroes: Water and Apple Cider Vinegar explained: Warm water is essential for activating the yeast and hydrating the flour. The temperature is key – too hot will kill the yeast, too cold won’t activate it. Apple cider vinegar (ACV) might seem unusual, but it plays a vital role. It helps tenderize the dough, improves the rise, and adds a subtle tang that enhances the overall flavor profile of the bagel without making it taste like vinegar.
Blueberries: Fresh vs. Frozen – What’s Best and Why: Fresh blueberries are ideal for their vibrant flavor and less moisture content. If using frozen blueberries, do not thaw them! Add them directly to the dough from the freezer to prevent them from bleeding too much color and moisture into the dough. Just be aware that frozen berries might require a slightly longer baking time.
Toppings & Glazes: Beyond the Basic Bagel: While these gluten-free blueberry bagels are fantastic plain, you can elevate them further! A simple egg wash (egg yolk mixed with a splash of water) before baking gives a beautiful shine. For extra sweetness, a sprinkle of coarse sugar or a light drizzle of a lemon glaze (powdered sugar + lemon juice) after baking is divine. You can also add a touch of lemon zest to the dough for an extra bright flavor!
Step-by-Step: Crafting Your Gluten-Free Blueberry Bagels
Follow these step-by-step instructions to create perfect gluten-free blueberry bagels:
1. Activating the Yeast: The Foundation of a Good Rise
In a large bowl, combine the warm water (around 105-115°F / 40-46°C) with the granulated sugar and active dry yeast. Stir gently and let it sit for 5-10 minutes. You should see a foamy layer form on top, indicating your yeast is active and ready to work its magic. If it doesn’t foam, your yeast might be old or the water temperature was off, and you’ll need to start again.
2. Mixing the Dough: Achieving the Perfect Consistency (Visual Cues)
To the activated yeast mixture, add the gluten-free flour blend, psyllium husk powder, salt, and apple cider vinegar. Mix with a sturdy spoon or a stand mixer with a paddle attachment until a shaggy dough forms. Continue mixing until all the flour is incorporated and the dough comes together. It will be sticky, but it should hold its shape somewhat. Gently fold in the fresh or frozen blueberries until evenly distributed. Avoid overmixing once the blueberries are in.
3. Kneading (Gluten-Free Style): Building Structure Without Gluten
Turn the dough out onto a lightly floured surface (using gluten-free flour). Knead for about 5-7 minutes. Gluten-free dough won’t develop the same elasticity as traditional dough, but kneading helps distribute ingredients, build what little structure we can, and create a smoother texture. The dough should become less sticky and more pliable, though still soft. If it’s too sticky, add a tiny bit more flour; if too dry, a few drops of water.
4. First Rise: Creating Air and Flavor
Lightly grease a large bowl with oil. Place the dough in the bowl, turning once to coat. Cover the bowl with plastic wrap or a clean kitchen towel and let it rise in a warm, draft-free place for 60-90 minutes, or until it has visibly increased in size (it won’t double like traditional dough, but it should look puffier). This rise is crucial for developing flavor and a lighter texture.
5. Shaping the Bagels: Techniques for a Classic Look
Gently punch down the risen dough and divide it into 8-10 equal pieces. Roll each piece into a smooth ball. To create the hole, you can either poke a hole through the center with your thumb and gently stretch it to about 1-inch in diameter, or roll the dough into a 6-inch rope and connect the ends to form a circle. Place the shaped bagels on a parchment-lined baking sheet.
6. The Bagel Boil: Why This Step is Non-Negotiable
Preheat your oven to 425°F (220°C). Bring a large pot of water to a rolling boil. You can add a tablespoon of honey or malt syrup to the water for extra flavor and shine, though it’s optional. Carefully drop 2-3 bagels into the boiling water at a time (don’t overcrowd). Boil for 60 seconds per side. This boiling step is essential for creating that signature chewy crust and helps the bagels hold their shape during baking. Remove with a slotted spoon and place back on the parchment-lined baking sheet.
7. Baking to Golden Perfection: Temperatures and Times
If desired, brush the boiled bagels with an egg wash for a glossy finish. Bake in the preheated oven for 20-25 minutes, or until golden brown and cooked through. The exact time may vary depending on your oven. Rotate the baking sheet halfway through for even browning. The bagels should sound hollow when tapped on the bottom. See more easy recipes for baking success!
Expert Tips for Gluten-Free Bagel Success
- Don’t Rush the Rise: Patience is Key: Gluten-free dough rises slower than traditional dough. Give it the full time recommended, and ensure your rising environment is warm and draft-free.
- Handling Sticky Dough: Your Best Friends Are Flour and Water: Gluten-free dough can be sticky. Keep a small bowl of gluten-free flour and a small bowl of water nearby. Lightly flour your hands or dip them in water when shaping to prevent sticking.
- Preventing Flat Bagels: Shaping and Boiling Advice: Ensure your bagel holes are at least 1 inch wide before boiling, as they will shrink. Don’t over-boil, as this can make them too dense.
- Achieving an Even Bake: Oven Hot Spots and Rotation: Know your oven! If it has hot spots, rotate your baking sheet halfway through the baking time to ensure all your gluten-free blueberry bagels brown evenly.
- Cooling Properly: The Secret to a Perfect Chew: Allow the bagels to cool completely on a wire rack before slicing and serving. Slicing them too soon can result in a gummy texture. Cooling allows the internal structure to set.
What to Serve With Your Homemade Gluten-Free Blueberry Bagels
Cream Cheese Combos: Sweet and Savory Options
These gluten-free blueberry bagels are fantastic with a simple smear of plain cream cheese, but why stop there? Try a lemon zest cream cheese for an extra bright flavor, or a cinnamon-sugar cream cheese for added sweetness. For a savory twist, a chive and onion cream cheese offers a delightful contrast.
Nut Butters & Jams: Classic Pairings
A classic pairing of almond butter or peanut butter with a dollop of your favorite fruit jam (strawberry, raspberry, or even more blueberry!) is always a winner. The protein from the nut butter makes for a satisfying and energizing breakfast.
Savory Spreads: Elevating Your Bagel Experience
Don’t be afraid to go savory! A thin layer of avocado mash with a sprinkle of everything bagel seasoning (yes, even on a blueberry bagel!) can be surprisingly delicious. Or, for a brunch treat, top with smoked salmon and capers.
Storing and Reheating Your Gluten-Free Bagels
Room Temperature vs. Freezer: Best Practices for Freshness
Homemade gluten-free blueberry bagels are best enjoyed fresh. At room temperature, stored in an airtight container, they will stay fresh for 1-2 days. For longer storage, freezing is your best bet. Once completely cooled, slice them in half (optional, but makes reheating easier) and place them in a freezer-safe bag or container. They will keep well for up to 3 months.
Reviving Stored Bagels: Toaster, Oven, or Pan?
To revive frozen bagels, you can pop them directly into a toaster or toaster oven until warmed through and slightly crispy. If reheating from room temperature, a quick toast will bring back their freshness. For a larger batch, a few minutes in a preheated oven (around 350°F / 175°C) will do the trick, especially if you mist them lightly with water first to help create a crispier crust.
Gluten-Free Blueberry Bagels: Your Questions Answered (FAQ)
Can I make these bagels dairy-free/egg-free?
How do I know if my yeast is active?
Why are my bagels dense/crumbly?
Can I use a different fruit or add-in?
What’s the best way to freeze the dough before baking?
Gluten-Free Blueberry Bagels
- Total Time: 50 minutes
- Yield: 8-10 bagels
Description
Discover how to make delicious gluten-free blueberry bagels with this step-by-step recipe. Easy to bake, these bagels have the best flavor and a wonderfully chewy texture!
Ingredients
- 1 ½ cups warm water (105-115°F / 40-46°C)
- 1 tablespoon granulated sugar (plus more for boiling water, optional)
- 2 ¼ teaspoons active dry yeast (one standard packet)
- 3 cups gluten-free all-purpose flour blend (with xanthan gum or psyllium husk, or add separately)
- 2 tablespoons psyllium husk powder (if your flour blend doesn’t contain it, or for extra chew)
- 1 teaspoon salt
- 1 tablespoon apple cider vinegar
- 1 cup fresh or frozen blueberries (do not thaw if frozen)
- 1 egg yolk + 1 tablespoon water (for egg wash, optional)
Instructions
- 1. Activate Yeast: In a large bowl, combine warm water, sugar, and yeast. Stir and let sit for 5-10 minutes until foamy.
- 2. Mix Dough: Add gluten-free flour, psyllium husk powder, salt, and apple cider vinegar to the yeast mixture. Mix until a shaggy dough forms, then fold in blueberries.
- 3. Knead: Turn dough onto a lightly floured surface and knead for 5-7 minutes until smoother and less sticky.
- 4. First Rise: Lightly grease a bowl, place dough in it, cover, and let rise in a warm place for 60-90 minutes.
- 5. Shape Bagels: Gently punch down dough, divide into 8-10 pieces, and shape into balls. Poke a 1-inch hole in the center of each, stretching gently. Place on a parchment-lined baking sheet.
- 6. Boil Bagels: Preheat oven to 425°F (220°C). Bring a large pot of water to a boil. Boil bagels 2-3 at a time for 60 seconds per side. Remove and return to baking sheet.
- 7. Bake: (Optional) Brush with egg wash. Bake for 20-25 minutes, or until golden brown. Cool completely on a wire rack before serving.
- Prep Time: 25 mins
- Cook Time: 25 mins