
Table of Contents
- Finally! Gluten-Free Greek Yogurt Bagels That Taste Amazing
- Why This Gluten-Free Bagel Recipe Actually Works
- Understanding Your Ingredients: Beyond Just a List
- Step-by-Step: Baking Your Gluten-Free Greek Yogurt Bagels
- Expert Tips for Gluten-Free Bagel Success
- What to Serve With Your Homemade Gluten-Free Bagels
- Storing and Reheating Your Gluten-Free Bagels
- Gluten-Free Greek Yogurt Bagels FAQ
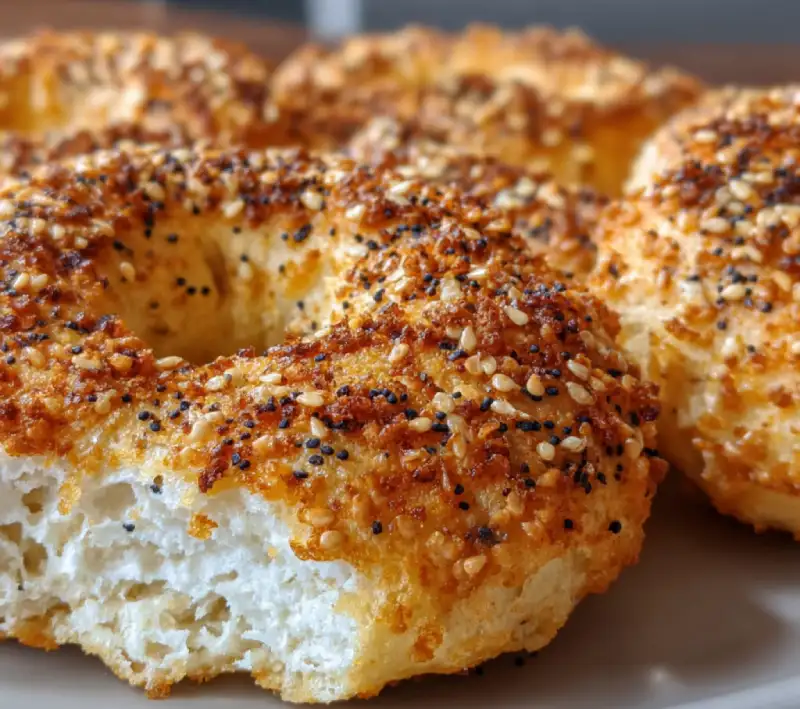
Finally! Gluten-Free Greek Yogurt Bagels That Taste Amazing
Oh, the elusive perfect bagel! For years, I’ve been on a mission to create a gluten-free Greek yogurt bagel that doesn’t just ‘pass’ but truly shines. You know, the kind with that satisfying chew, a golden-brown crust, and a flavor that makes you forget it’s gluten-free. Well, my friends, the quest is over! These gluten-free Greek yogurt bagels are a game-changer, delivering on all fronts: incredible texture, rich flavor, and surprisingly easy to make right in your own kitchen. Prepare to be amazed by how simple it is to achieve bakery-quality bagels without the gluten.
My Quest for the Perfect Gluten-Free Bagel Ends Here
I’ve tried countless recipes, experimented with various flour blends, and even attempted the traditional boil-and-bake method with gluten-free dough (spoiler: it was a sticky mess!). But the magic combination of Greek yogurt and a specific gluten-free flour blend, baked to perfection, has finally yielded the bagel of my dreams. This recipe is the culmination of all those trials, designed to give you consistent, delicious results every single time.
Why This Gluten-Free Bagel Recipe Actually Works
- Achieving That Chewy Bagel Texture: The secret lies in the Greek yogurt. Its acidity and protein content react beautifully with the baking powder and gluten-free flour, creating a dough that’s pliable and bakes up with an incredibly satisfying chew, mimicking traditional bagels without the gluten.
- The Secret to a Golden Crust: A simple egg wash isn’t just for shine; it’s crucial for developing that beautiful, deep golden-brown crust that’s characteristic of a truly great bagel. It also helps your toppings adhere perfectly.
- Flavor That Doesn’t Compromise: Many gluten-free baked goods can taste, well, ‘gluten-free.’ But this recipe focuses on balancing the ingredients to ensure a rich, slightly tangy flavor that stands up to any topping you choose, from classic cream cheese to savory avocado.
- One-Bowl Wonder: Most of the mixing happens in a single bowl, making cleanup a breeze. Who doesn’t love fewer dishes?
Understanding Your Ingredients: Beyond Just a List
Here is what you need and why:
Gluten-Free All-Purpose Flour (Why Brand Matters): This is not the time to skimp or use a single-ingredient gluten-free flour. A high-quality, pre-blended gluten-free all-purpose flour that contains xanthan gum is absolutely essential for the structure and texture of these gluten-free Greek yogurt bagels. Brands like King Arthur Gluten-Free All-Purpose Flour or Bob’s Red Mill 1-to-1 Baking Flour are excellent choices because they are formulated to mimic wheat flour’s properties. Using a blend without xanthan gum will result in a crumbly, less cohesive dough. King Arthur Baking has some fantastic resources on gluten-free baking.
Greek Yogurt (Type and Consistency): Opt for plain, full-fat Greek yogurt. The fat content contributes to moisture and richness, while the thickness of Greek yogurt (compared to regular yogurt) is crucial for the dough’s consistency. Avoid low-fat or non-fat varieties if possible, as they can make the dough too dry or require adjustments. The tang of the Greek yogurt also adds a lovely depth of flavor.
Baking Powder (For Lift, Not Leavening): In this recipe, baking powder acts as a leavening agent, creating air pockets and contributing to the bagel’s rise and light texture. It reacts with the acidity of the Greek yogurt to give these bagels their characteristic puff without needing yeast.
Salt (Flavor vs. Structure): Salt is vital for enhancing the overall flavor of your bagels. It balances the tang of the yogurt and prevents the bagels from tasting bland. Don’t skip it!
Egg Wash (Why It’s Essential): A simple egg wash (one egg whisked with a tablespoon of water or milk) is your secret weapon for a beautiful, glossy, golden-brown crust. It also acts as the perfect adhesive for any toppings you choose, ensuring they stick during baking.
Everything Bagel Seasoning (Or Your Preferred Topping): While Everything Bagel Seasoning is a classic for a reason, feel free to get creative! Poppy seeds, sesame seeds, coarse sea salt, dried garlic, or even cinnamon sugar are all fantastic options. The choice is yours to customize your gluten-free Greek yogurt bagels.
Step-by-Step: Baking Your Gluten-Free Greek Yogurt Bagels
Follow these step-by-step photos:
1. Mixing the Dough: The Right Consistency
In a large bowl, combine the gluten-free all-purpose flour, baking powder, and salt. Whisk them together thoroughly to ensure even distribution. Add the Greek yogurt and mix with a sturdy spoon or your hands until a shaggy dough forms. Continue to mix and knead lightly in the bowl for about 1-2 minutes until the dough comes together into a cohesive, slightly sticky ball. It should be firm enough to handle but still soft. If it’s too sticky, add a tiny bit more flour (1 teaspoon at a time); if too dry, add a tiny bit more yogurt.
2. Shaping Your Bagels: Perfecting the Ring
Divide the dough into 4 equal portions. On a lightly floured surface (using gluten-free flour), roll each portion into a rope about 6-7 inches long. Bring the ends together to form a circle, pinching them firmly to seal the seam. Alternatively, you can roll each portion into a ball, then use your thumb to poke a hole in the center, gently stretching it to create a bagel shape with a 1-inch hole. Place the shaped bagels on a baking sheet lined with parchment paper.
3. The Egg Wash: For Shine and Adhesion
In a small bowl, whisk together the egg and water (or milk) to create the egg wash. Brush the tops and sides of each shaped bagel generously with the egg wash. This step is crucial for achieving that beautiful golden crust and helping your chosen toppings stick.
4. Baking for a Beautiful Crust
Sprinkle your desired toppings (like Everything Bagel Seasoning) generously over the egg-washed bagels. Bake in a preheated oven at 375°F (190°C) for 20-25 minutes, or until the bagels are puffed, golden brown, and sound hollow when tapped on the bottom. The exact baking time may vary slightly depending on your oven, so keep an eye on them. Once baked, transfer the gluten-free Greek yogurt bagels to a wire rack to cool slightly before slicing and serving.
Expert Tips for Gluten-Free Bagel Success
- Don’t Overwork the Dough: Unlike traditional gluten-containing doughs, gluten-free dough doesn’t benefit from extensive kneading. Mix just until combined and cohesive to avoid a tough texture.
- Preheat Your Oven Properly: A hot oven is key for a good rise and a crisp crust. Make sure your oven is fully preheated to the specified temperature before placing the bagels inside.
- Experiment with Toppings: Don’t limit yourself to Everything Bagel Seasoning! Try poppy seeds, sesame seeds, coarse salt, dried onion flakes, or even a cinnamon-sugar blend for a sweet treat.
- Troubleshooting Common Issues: If your dough is too sticky, add a tiny bit more gluten-free flour (1 tsp at a time). If it’s too dry and crumbly, add a tiny bit more Greek yogurt. The consistency should be firm but pliable.
- Use Parchment Paper: Gluten-free dough can be a bit stickier than traditional dough. Parchment paper prevents sticking and makes cleanup easier.
What to Serve With Your Homemade Gluten-Free Bagels
Classic Cream Cheese Pairings
You can’t go wrong with a generous schmear of cream cheese! Try plain, chive, or even a sweet strawberry cream cheese. For an extra treat, add some smoked salmon and capers.
Savory Spreads and Toppings
Beyond cream cheese, these gluten-free Greek yogurt bagels are fantastic with avocado toast (smashed avocado, red pepper flakes, and a squeeze of lime), hummus, or even a fried egg and a slice of cheese for a hearty breakfast sandwich. A smear of pesto or a slice of tomato and fresh mozzarella also make for a delightful lunch.
Sweet Options for Breakfast or Brunch
For those with a sweet tooth, try spreading your bagel with butter and a sprinkle of cinnamon sugar, or a dollop of your favorite jam or fruit preserves. Nut butter (peanut, almond, or cashew) with sliced banana is also a delicious and filling option. See more easy recipes for sweet treats!
Storing and Reheating Your Gluten-Free Bagels
Keeping Them Fresh
These gluten-free Greek yogurt bagels are best enjoyed fresh on the day they are baked. However, you can store them at room temperature in an airtight container or a resealable bag for up to 2-3 days. For longer storage, freezing is your best bet.
Best Reheating Methods
To reheat, slice the bagels in half and toast them in a toaster or toaster oven until warmed through and slightly crispy. If reheating from frozen, you can toast them directly from the freezer, though it might take a bit longer. For a softer texture, you can also microwave them for 15-30 seconds, but toasting is highly recommended for the best results.
Gluten-Free Greek Yogurt Bagels FAQ
Can I make these dairy-free?
What if my dough is too sticky/dry?
Can I freeze the dough?
How long do these bagels last?
Delicious Gluten-Free Greek Yogurt Bagels
- Total Time: 40 minutes
- Yield: 4 bagels
Description
Discover how to make delicious gluten-free Greek yogurt bagels with this step-by-step guide. Easy to bake, these bagels offer the best flavor and texture.
Ingredients
- 1 ½ cups (180g) gluten-free all-purpose flour blend (with xanthan gum)
- 2 teaspoons baking powder
- ½ teaspoon salt
- 1 cup (240g) plain, full-fat Greek yogurt
- 1 large egg, for egg wash
- 1 tablespoon water or milk, for egg wash
- Everything Bagel Seasoning or other toppings (poppy seeds, sesame seeds, coarse salt)
Instructions
- Preheat Oven: Preheat your oven to 375°F (190°C). Line a baking sheet with parchment paper.
- Combine Dry Ingredients: In a large bowl, whisk together the gluten-free all-purpose flour, baking powder, and salt.
- Add Yogurt: Add the Greek yogurt to the dry ingredients. Mix with a sturdy spoon or your hands until a shaggy dough forms, then knead lightly in the bowl for 1-2 minutes until a cohesive, slightly sticky ball forms.
- Shape Bagels: Divide the dough into 4 equal portions. On a lightly floured surface, roll each portion into a 6-7 inch rope and connect the ends to form a circle, pinching firmly to seal. Alternatively, roll into a ball and poke a hole in the center, stretching gently. Place on the prepared baking sheet.
- Apply Egg Wash & Toppings: In a small bowl, whisk the egg and water (or milk) for the egg wash. Brush generously over each bagel. Sprinkle with your desired toppings.
- Bake: Bake for 20-25 minutes, or until the bagels are puffed, golden brown, and sound hollow when tapped.
- Cool: Transfer to a wire rack to cool slightly before slicing and serving.
- Prep Time: 15 mins
- Cook Time: 25 mins