
Bake Beautiful Heart Shaped Cakes: Your Go-To Guide
There’s something truly magical about a heart shaped cake, isn’t there? It’s more than just a dessert; it’s a delicious declaration, a sweet sentiment baked with love. Imagine biting into a slice – a tender, moist crumb that practically melts in your mouth, bursting with rich, balanced flavor that’s never too sweet. That’s the kind of cake we’re making today, and trust me, it’s easier than you think!
A Sweet Gesture Made Simple: My Personal Bake-Off Story
I remember my first attempt at a heart shaped cake. It was for my grandmother’s birthday, and I wanted something extra special. I didn’t have a heart-shaped pan, so I got creative with a round and a square cake (more on that trick later!). The result wasn’t perfect, but the joy on her face? Priceless. Since then, I’ve refined my technique, experimented with countless recipes, and finally landed on this absolute winner. This guide is born from those kitchen adventures, designed to help you create stunning Heart Shaped Cakes that taste as incredible as they look, without any of the stress.
Table of Contents
- Why This Heart Shaped Cake Recipe Will Be Your Favorite
- Ingredients & Smart Substitutions for Perfect Heart Shaped Cakes
- Step-by-Step: Crafting Your Heart Shaped Masterpiece
- Expert Tips for Heart Shaped Cake Success
- What to Serve with Your Heart Shaped Cakes
- Storing & Reheating Your Heart Shaped Cakes
- Heart Shaped Cakes FAQ
Why This Heart Shaped Cake Recipe Will Be Your Favorite (And Everyone Else’s)
- Moist & Tender Crumb: Why Butter & Buttermilk are Key: This recipe leverages the best of both worlds. Real butter provides unparalleled flavor and a delicate richness, while buttermilk reacts with our leavening agents to create an incredibly tender, fine crumb that stays moist for days. It’s a scientific symphony for your taste buds!
- Rich, Balanced Flavor: The Secret to a Not-Too-Sweet Cake: We’ve carefully balanced the sugar content to ensure a cake that’s sweet enough to be a treat, but not so cloying that it overwhelms the subtle notes of vanilla and butter. It’s a sophisticated sweetness that keeps you coming back for more.
- Sturdy, Yet Delicate: Perfect for Shaping and Decorating: You need a cake that can hold its shape, especially when you’re aiming for those beautiful heart contours. This recipe delivers a cake that’s robust enough to handle frosting and shaping, yet remains wonderfully light and delicate to eat. No crumbling catastrophes here!
- One-Bowl Cleanup (Almost!): While we separate wet and dry, the process is streamlined to minimize dishes, making your baking experience as enjoyable as the eating.
Ingredients & Smart Substitutions for Perfect Heart Shaped Cakes
Here is what you need and why:
Flour Power: Why Cake Flour (or a clever hack) Matters: For the ultimate tender crumb, cake flour is your best friend. It has a lower protein content than all-purpose flour, resulting in a softer texture. If you don’t have cake flour, don’t fret! You can make your own by measuring out 1 cup of all-purpose flour, removing 2 tablespoons, and then replacing those 2 tablespoons with cornstarch. Sift it together, and voilà – homemade cake flour!
Sugar’s Role Beyond Sweetness: Texture and Browning Explained: Granulated sugar doesn’t just sweeten; it also contributes to the cake’s moisture, tenderness, and helps create that beautiful golden-brown crust. It also aids in creaming with butter, incorporating air for a lighter cake.
Fats: Butter for Flavor vs. Oil for Moisture: We’re using unsalted butter here for its incredible flavor. Make sure it’s at room temperature for proper creaming. While oil can add moisture, butter provides a richness that’s essential for this recipe. If you absolutely must substitute, a neutral oil like canola or vegetable oil can be used, but the flavor profile will change.
Leavening Agents: Baking Powder vs. Soda – The Science Behind the Lift: This recipe uses both baking powder and baking soda. Baking soda needs an acid (like the buttermilk) to activate and produce carbon dioxide, giving the cake lift. Baking powder is double-acting, meaning it reacts once with liquid and again with heat, providing a consistent rise. This combination ensures a perfectly airy and light cake.
Dairy Decisions: Buttermilk for Tenderness, Other Milks for Alternatives: Buttermilk is crucial for that signature tender crumb and for activating the baking soda. If you don’t have buttermilk, you can make a quick substitute: add 1 tablespoon of white vinegar or lemon juice to a liquid measuring cup, then fill the rest with regular milk (dairy or non-dairy) to the 1-cup line. Let it sit for 5-10 minutes until it curdles slightly.
Flavor Boosters: Vanilla, Salt, and Your Choice of Zest: Pure vanilla extract is non-negotiable for a classic cake flavor. Salt balances the sweetness and enhances all the other flavors. For an extra pop, consider adding a teaspoon of lemon or orange zest to the batter – it brightens everything up beautifully!
How to Make Heart Shaped Cakes
Follow these step-by-step instructions to create your perfect Heart Shaped Cakes:
1. Prep Like a Pro: Greasing, Flour-Dusting, and Oven Ready
Preheat your oven to 350°F (175°C). Generously grease and flour your heart-shaped cake pans (or the round and square pans if you’re using the shaping trick). For extra insurance against sticking, you can line the bottoms with parchment paper. This crucial step ensures your beautiful cakes release cleanly. Have all your ingredients measured and at room temperature – this makes a huge difference in the final texture!
2. Dry Ingredients: Whisking for Even Distribution
In a large bowl, whisk together your cake flour (or homemade substitute), granulated sugar, baking powder, baking soda, and salt. Whisking ensures all the leavening agents and salt are evenly distributed throughout the flour, preventing pockets of unmixed ingredients and promoting an even rise. This also aerates the flour slightly.
3. Wet Ingredients: Mixing for Homogeneity
In a separate medium bowl, whisk together the room temperature buttermilk, pure vanilla extract, and any optional zest you’re using. Ensure these are well combined. Having them mixed separately ensures they are evenly incorporated into the batter without overmixing the flour.
4. Combining Wet & Dry: The Art of Not Overmixing
Add the softened, room temperature unsalted butter to the dry ingredients. Using a stand mixer with the paddle attachment or a hand mixer, beat on low speed until the mixture resembles coarse crumbs. Gradually add the wet ingredients to the dry mixture, mixing on low speed until just combined. Scrape down the sides of the bowl. Increase speed to medium and beat for about 1-2 minutes until the batter is smooth and light, but be careful not to overmix! Overmixing develops gluten, leading to a tough cake.
5. Filling the Pans: Achieving Even Layers
Divide the batter evenly among your prepared heart-shaped cake pans. If you’re using two 8-inch pans, aim for roughly equal amounts in each. Use a kitchen scale for precision if you have one. Gently tap the pans on the counter a few times to release any large air bubbles and ensure an even surface.
6. Baking for Perfection: How to Tell When It’s Done
Bake for 25-30 minutes, or until a wooden skewer or toothpick inserted into the center of the cake comes out clean. The cakes should be golden brown and spring back lightly when gently pressed. Avoid opening the oven door too frequently, especially during the first 20 minutes, as this can cause the cakes to sink.
7. Cooling Correctly: Why Patience Prevents Crumbling
Once baked, remove the cakes from the oven and let them cool in their pans on a wire rack for 10-15 minutes. This allows the cakes to firm up slightly, making them less prone to breaking. After this initial cooling, invert the cakes onto the wire rack to cool completely. Do not attempt to frost warm cakes – it will melt your frosting and lead to a messy situation!
Expert Tips for Heart Shaped Cake Success
- Temperature Matters: Room Temp Ingredients for Emulsification: Ensure your butter, eggs (if using in a different recipe), and buttermilk are all at room temperature. This allows them to emulsify properly, creating a smooth, uniform batter that bakes evenly and results in a tender crumb.
- Don’t Overmix: The Enemy of a Tender Crumb: Once you add the wet ingredients to the dry, mix only until just combined. Overmixing develops gluten, which can make your cake tough and chewy instead of light and tender.
- The Toothpick Test: Your Best Friend for Doneness: Always rely on the toothpick test. Insert a wooden skewer or toothpick into the center of the cake. If it comes out clean or with a few moist crumbs attached (but no wet batter), your cake is done.
- Easy Release: The Parchment Paper Trick: For foolproof release, cut a circle of parchment paper to fit the bottom of your pan after greasing and flouring. This creates a non-stick barrier that guarantees your cake won’t get stuck.
- Creative Shaping: No Heart Pan? No Problem! If you don’t have a heart-shaped pan, bake one 8-inch round cake and one 8-inch square cake. Once cooled, cut the round cake in half. Place the square cake on a serving platter, then arrange the two half-circles against two adjacent sides of the square to form a heart shape. Frost as usual!
- Frosting Fundamentals: Crumb Coat for a Smooth Finish: Before your final layer of frosting, apply a thin layer of frosting (the ‘crumb coat’) to the cooled cake. Chill it for 15-20 minutes. This traps any loose crumbs, ensuring a perfectly smooth and professional-looking final frosting layer.
- Measure Flour Correctly: Spoon flour into your measuring cup and then level it off with a straight edge. Scooping directly from the bag can compact the flour, leading to too much flour and a dry cake.
What to Serve with Your Heart Shaped Cakes
Your beautiful Heart Shaped Cakes are a star on their own, but a few thoughtful accompaniments can elevate the experience even further!
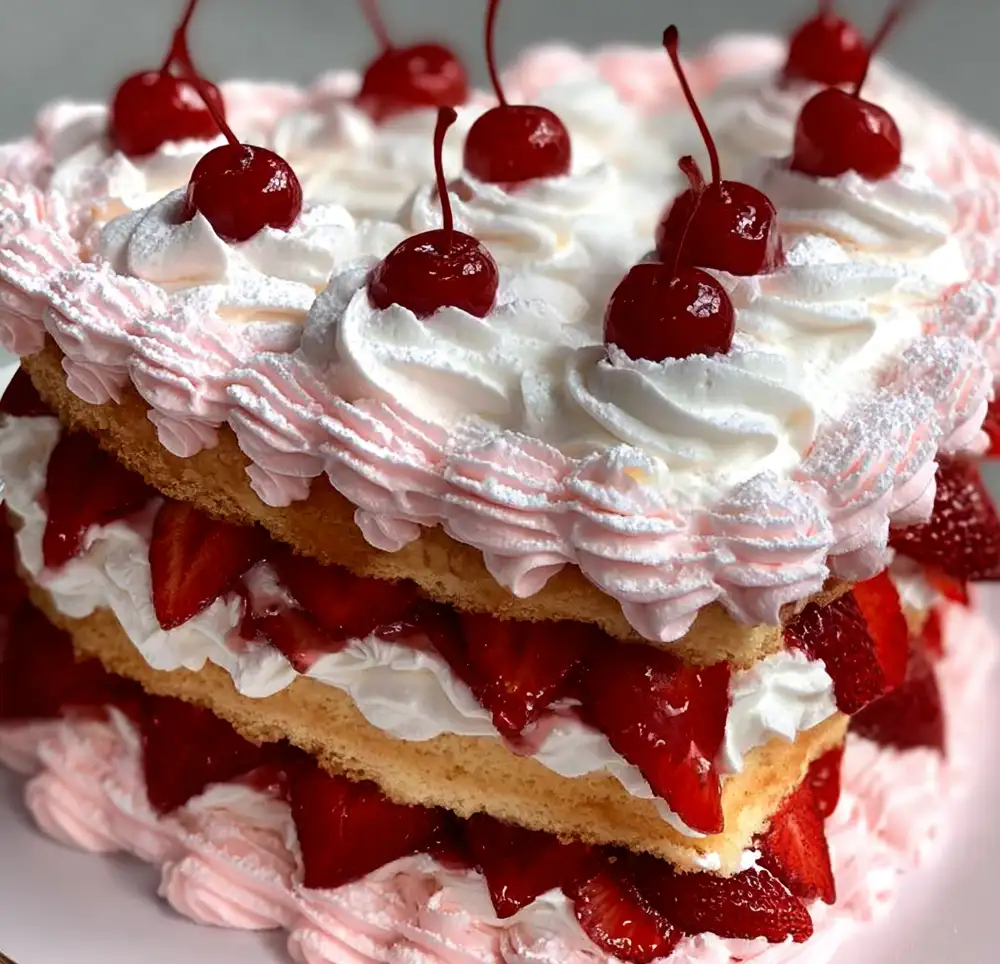
- Classic Pairings: Whipped Cream, Berries, and Ice Cream: A dollop of freshly whipped cream, a handful of vibrant mixed berries (strawberries, raspberries, blueberries), or a scoop of your favorite vanilla bean ice cream are timeless choices that complement the cake’s richness beautifully.
- Beverage Bliss: Coffee, Tea, or Sparkling Wine: For a cozy treat, pair a slice with a warm cup of coffee or a fragrant herbal tea. For a more celebratory occasion, a glass of sparkling rosé or a crisp Prosecco makes for an elegant pairing.
- Beyond Dessert: A Thoughtful Gift: These cakes aren’t just for serving! Wrap a small heart-shaped cake in cellophane with a pretty ribbon, and you have a truly heartfelt gift for a loved one, a teacher, or a neighbor.
Storing & Reheating Your Heart Shaped Cakes
To keep your delicious Heart Shaped Cakes fresh and delightful, follow these storage tips:
- Room Temperature Storage: When and For How Long: If unfrosted, the cake can be stored at room temperature, tightly wrapped in plastic wrap, for up to 2 days. Once frosted (especially with a buttercream containing dairy), it’s best to refrigerate.
- Refrigeration: Extending Freshness and Preventing Spoilage: Frosted cakes should be stored in an airtight container in the refrigerator for up to 4-5 days. Bring slices to room temperature for about 30 minutes before serving for the best flavor and texture.
- Freezing: Preparing for Future Cravings: You can freeze unfrosted cake layers for up to 2-3 months. Wrap each cooled layer tightly in plastic wrap, then in aluminum foil. For frosted cakes, freeze the whole cake uncovered until the frosting is firm, then wrap tightly in plastic wrap and foil. Thaw overnight in the refrigerator before bringing to room temperature and serving.
- Reviving Cake: Tips for Optimal Taste and Texture: If your cake seems a little dry after a day or two, a quick zap in the microwave for 10-15 seconds can sometimes revive its moisture. Alternatively, serving it with a warm sauce or a scoop of ice cream can also help.
Heart Shaped Cakes FAQ
Can I use a different type of flour?
How do I prevent my cake from sticking to the pan?
What’s the best way to get a perfectly flat cake top?
How can I make this cake gluten-free or dairy-free?
Can I prepare the batter ahead of time?
I hope you enjoy baking these delightful Heart Shaped Cakes as much as I do! Don’t forget to share your creations with me on social media. Happy baking! See more easy recipes
Classic Heart Shaped Cake
- Total Time: 58 minute
- Yield: 1 (8-inch) heart-shaped cake or 2 (6-inch) heart-shaped cakes
Description
Bake a tender, moist, and perfectly balanced heart shaped cake that’s ideal for any celebration. This recipe guarantees a beautiful presentation and an unforgettable flavor.
Ingredients
- 2 ½ cups (300g) cake flour (or all-purpose flour + cornstarch hack)
- 1 ½ cups (300g) granulated sugar
- 1 tablespoon baking powder
- ½ teaspoon baking soda
- ½ teaspoon salt
- 1 cup (226g) unsalted butter, softened to room temperature
- 1 cup (240ml) buttermilk, room temperature
- 2 teaspoons pure vanilla extract
- Optional: 1 teaspoon lemon or orange zest
Instructions
- 1. Prepare Pans & Preheat Oven: Preheat oven to 350°F (175°C). Grease and flour your heart-shaped cake pans. Line bottoms with parchment paper if desired.
- 2. Combine Dry Ingredients: In a large bowl, whisk together cake flour, sugar, baking powder, baking soda, and salt.
- 3. Combine Wet Ingredients: In a separate medium bowl, whisk together buttermilk, vanilla extract, and optional zest.
- 4. Mix Batter: Add softened butter to the dry ingredients. Beat on low speed until coarse crumbs form. Gradually add wet ingredients, mixing on low until just combined. Scrape bowl, then beat on medium for 1-2 minutes until smooth. Do not overmix.
- 5. Fill Pans & Bake: Divide batter evenly between prepared pans. Bake for 25-30 minutes, or until a toothpick inserted into the center comes out clean.
- 6. Cool Cakes: Let cakes cool in pans on a wire rack for 10-15 minutes, then invert onto the rack to cool completely before frosting.
- Prep Time: 20 mins
- Cook Time: 25-30 mins