
Homemade Marble Cake: 1 Easy Recipe, Max Flavor!
Table of Contents
- Introduction: The Swirly Sweetness of Homemade Marble Cake
- Why This Homemade Marble Cake Recipe is a Must-Try
- Gather Your Ingredients for a Perfect Marble Cake
- Step-by-Step Instructions: Baking Your Easy Marble Cake
- Pro Tips for the Best Marble Cake Ever
- Homemade Marble Cake: Serving Suggestions and Variations
- Storage: Keeping Your Marble Cake Fresh
- F.A.Q
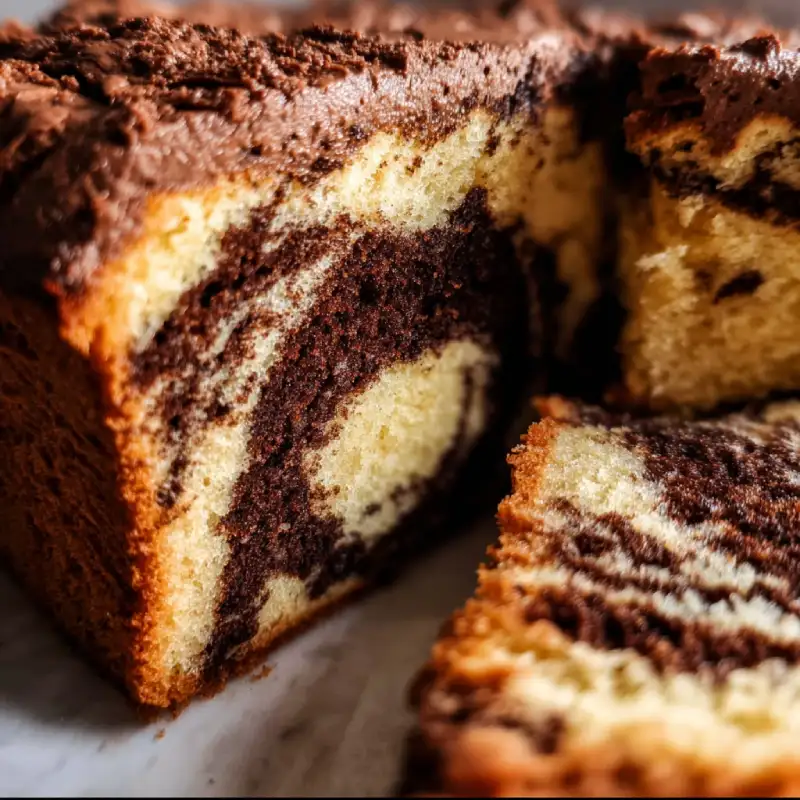
There’s nothing quite like the visual appeal and delicious taste of a truly good homemade marble cake recipe. This delightful baking project combines two classic cake flavors, vanilla and chocolate, into a beautiful, swirled masterpiece that’s perfect for any occasion. Get ready to impress your friends and family with this easy-to-follow guide!
Introduction: The Swirly Sweetness of Homemade Marble Cake
Marble cake has been a beloved dessert for generations, cherished for its striking appearance and balanced flavor. It’s a wonderful way to enjoy both rich chocolate and delicate vanilla in every bite. Our recipe ensures a moist, tender crumb every single time.
This guide will walk you through creating a stunning and delicious homemade cake that looks as good as it tastes. You’ll soon see why this easy marble cake recipe is a firm favorite!
Why This Homemade Marble Cake Recipe is a Must-Try
This particular homemade marble cake recipe stands out for its simplicity and consistently delicious results. We’ve fine-tuned it to ensure maximum flavor without complicated steps. You don’t need to be an expert baker to achieve beautiful swirls and a perfectly baked cake.
Whether you’re a beginner or an experienced baker, this recipe offers a rewarding experience. It’s truly an easy marble cake recipe that yields impressive outcomes.
Gather Your Ingredients for a Perfect Marble Cake
Having all your ingredients pre-measured and ready will make the baking process smooth and enjoyable. Be sure to use room temperature ingredients for the best texture.
- 2 ½ cups all-purpose flour
- 1 teaspoon baking powder
- ½ teaspoon baking soda
- ½ teaspoon salt
- 1 cup (2 sticks) unsalted butter, softened
- 1 ¾ cups granulated sugar
- 3 large eggs, at room temperature
- 1 cup buttermilk, at room temperature
- 2 teaspoons vanilla extract
- ¼ cup unsweetened cocoa powder
- 3 tablespoons hot water
Step-by-Step Instructions: Baking Your Easy Marble Cake
Follow these instructions closely to create a magnificent marble cake. Precision is key, especially when creating the swirl pattern.
Preparing Your Batter: Vanilla and Chocolate Bases
- Preheat your oven to 350°F (175°C). Grease and flour a 9×13 inch baking pan or two 8-inch round cake pans.
- In a medium bowl, whisk together the flour, baking powder, baking soda, and salt. Set aside.
- In a large bowl, cream the softened butter and granulated sugar together until light and fluffy, about 3-5 minutes.
- Beat in the eggs one at a time, mixing well after each addition. Stir in the vanilla extract.
- Gradually add the dry ingredients to the wet ingredients, alternating with the buttermilk, beginning and ending with the dry ingredients. Mix until just combined.
- Divide the batter evenly into two separate bowls.
- In one bowl, mix the cocoa powder with 3 tablespoons of hot water until smooth. Fold this chocolate mixture into one half of the cake batter until fully incorporated.
The Art of Swirling: Creating Beautiful Marble Patterns
- Dollop alternating spoonfuls of vanilla and chocolate batter into the prepared baking pan. Don’t worry too much about perfection at this stage.
- Once all the batter is in the pan, use a butter knife or skewer to gently swirl the batters together. Make sure not to overmix, as this will blend the colors too much, losing the beautiful marble effect. A few gentle swirls are all you need for an appealing pattern.
Baking to Golden Perfection
- Bake for 30-35 minutes for round pans, or 35-45 minutes for a 9×13 inch pan, or until a wooden skewer inserted into the center comes out clean.
- Remove the cake from the oven and let it cool in the pan for 10-15 minutes before transferring it to a wire rack to cool completely.
- Once completely cooled, you can frost your cake with your favorite vanilla or chocolate frosting.
Pro Tips for the Best Marble Cake Ever
Achieving the perfect homemade marble cake is easier with a few expert tricks. Always use room temperature ingredients; this ensures a smooth, emulsified batter and a tender crumb. For a vibrant swirl, avoid overmixing when creating the marble pattern. Less is more!
Another great tip is to slightly warm your buttermilk if it’s too cold, which helps with batter consistency. For more baking wisdom, check out these baking tips from King Arthur Baking.
Homemade Marble Cake: Serving Suggestions and Variations
This versatile homemade marble cake is delicious on its own, but also pairs wonderfully with various toppings. A simple dusting of powdered sugar or a dollop of whipped cream can elevate it. For a richer treat, consider a chocolate ganache or a classic buttercream frosting.
Want to experiment? Add a hint of coffee to the chocolate batter for a mocha marble cake, or use a touch of almond extract in the vanilla portion. Explore more ideas for your baked goods at Read our in-depth guide here.
Storage: Keeping Your Marble Cake Fresh
To keep your homemade marble cake fresh and moist, store it in an airtight container at room temperature for up to 3-4 days. If frosted with a perishable frosting, refrigerate it.
For longer storage, slices can be individually wrapped and frozen for up to 2-3 months. Thaw at room temperature before serving for the best texture.
F.A.Q
What makes a marble cake marbled?
Marble cake gets its unique marbled appearance by lightly swirling two different colored batters together, typically vanilla and chocolate, after they’ve been placed in the cake pan.
Can I make this marble cake recipe gluten-free?
Yes, you can often adapt this recipe by using a 1:1 gluten-free all-purpose flour blend. Ensure your blend contains xanthan gum, or add ½ teaspoon per cup of flour if it doesn’t.
How do I prevent my marble cake from drying out?
To keep your marble cake moist, avoid overmixing the batter, which can develop the gluten too much. Also, be careful not to overbake it; remove it from the oven as soon as a skewer comes out clean.