
Hot Cocoa Cookies: 5-Step Recipe for Delicious Treats
Table of Contents
- 1. Why You’ll Love This Hot Cocoa Cookies Recipe
- 2. Gather Your Ingredients for Hot Cocoa Cookies
- 3. Easy 5-Step Recipe for Delicious Hot Cocoa Cookies
- 4. Tips for Perfect Hot Cocoa Cookies Every Time
- 5. Serving Suggestions and Creative Variations
- Foire Aux Questions
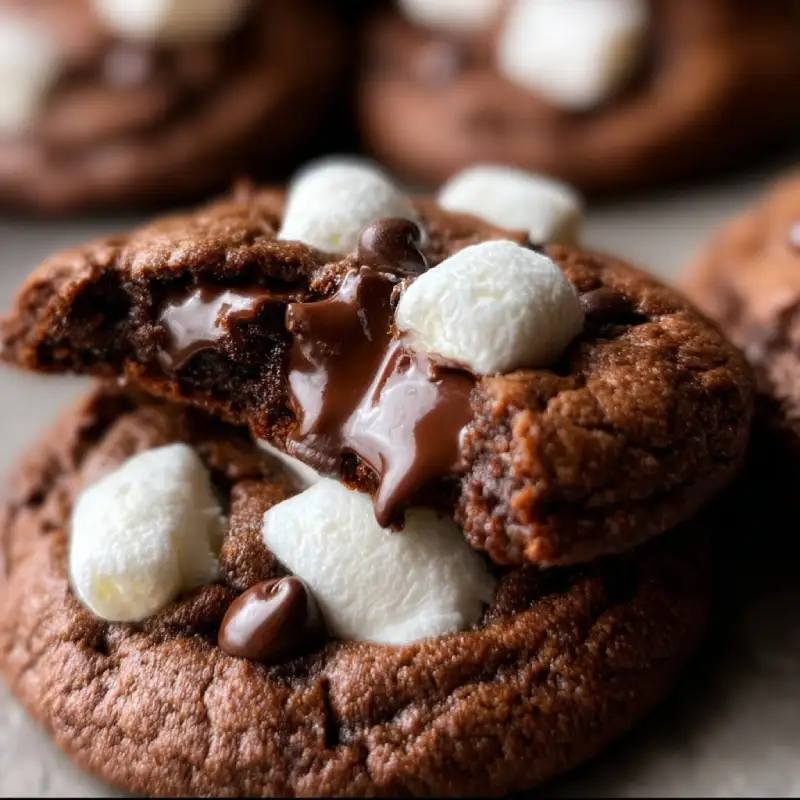
There’s nothing quite like a warm mug of hot chocolate on a chilly day. But what if you could capture that cozy, comforting feeling in a chewy, delicious cookie? Get ready to fall in love with these hot cocoa cookies, the perfect winter dessert that brings the best of both worlds together. This simple, 5-step recipe creates irresistibly rich and fudgy cookies packed with deep chocolate flavor and studded with soft marshmallows. They are the ultimate treat for any occasion!
These cookies taste exactly like a decadent cup of hot cocoa, complete with a gooey marshmallow surprise in every bite. They are incredibly easy to make and are sure to become a new family favorite for your holiday baking rotation. Let’s get our aprons on and start baking!
1. Why You’ll Love This Hot Cocoa Cookies Recipe
First and foremost, the flavor is absolutely divine! These aren’t just regular chocolate cookies; they have a unique, rich taste that comes from using actual hot cocoa mix in the dough. This gives them a distinct, sweet, and malty chocolate flavor that’s both nostalgic and incredibly satisfying.
This is also a wonderfully straightforward and easy cookie recipe. There are no complicated techniques or hard-to-find ingredients. Whether you’re a seasoned baker or just starting, you’ll find this recipe a joy to make. Plus, they are ready in under an hour, making them a perfect quick dessert for unexpected guests or a sudden craving.
2. Gather Your Ingredients for Hot Cocoa Cookies
Before we begin, let’s gather everything we need. Having all your ingredients measured and ready to go (a technique called ‘mise en place’) makes the baking process smooth and enjoyable. These simple pantry staples come together to create something truly magical.
- 1 cup (226g) unsalted butter, softened to room temperature
- 1 cup (200g) granulated sugar
- 1/2 cup (110g) packed light brown sugar
- 2 large eggs, at room temperature
- 1 teaspoon pure vanilla extract
- 2 cups (240g) all-purpose flour
- 1/2 cup (60g) unsweetened cocoa powder
- 2 packets (about 1/2 cup) of your favorite hot cocoa mix (with mini marshmallows is a plus!)
- 1 teaspoon baking soda
- 1/2 teaspoon salt
- 1 cup (170g) semi-sweet chocolate chips
- 1 cup mini marshmallows
2.1. Ingredient Notes and Substitutions
Hot Cocoa Mix: The star of the show! A quality mix makes a difference. You can use a classic Swiss Miss or a richer brand like Ghirardelli. If your mix doesn’t have mini marshmallows, don’t worry—we add more later!
Butter: Use unsalted butter so you can control the salt level. Make sure it’s properly softened, not melted, for the best cookie texture. If you only have salted butter, reduce the added salt in the recipe to 1/4 teaspoon.
Chocolate Chips: Semi-sweet chips provide a nice balance to the sweetness of the hot cocoa mix, but feel free to use milk chocolate, dark chocolate, or even white chocolate chips if you prefer.
3. Easy 5-Step Recipe for Delicious Hot Cocoa Cookies
Now for the fun part! Follow these five simple steps to create the most amazing hot cocoa cookies you’ve ever tasted. Preheat your oven to 350°F (175°C) and line two baking sheets with parchment paper.
-
3.1. Step 1: Prepare the Dough
In a large mixing bowl, use a hand mixer or stand mixer to cream the softened butter, granulated sugar, and brown sugar together on medium speed until light and fluffy, about 2-3 minutes. Beat in the eggs one at a time, then stir in the vanilla extract. In a separate bowl, whisk together the all-purpose flour, unsweetened cocoa powder, hot cocoa mix, baking soda, and salt. Gradually add the dry ingredients to the wet ingredients, mixing on low speed until just combined. Gently fold in the chocolate chips.
-
3.2. Step 2: Shape the Cookies
Using a medium cookie scoop (about 1.5 tablespoons), scoop the dough and roll it into a ball. Make a small indentation in the center of the ball with your thumb and place 3-4 mini marshmallows inside. Pinch the dough around the marshmallows to seal them completely. This little trick ensures you get a gooey, melted marshmallow center without them burning on the outside.
-
3.3. Step 3: Bake to Perfection
Place the dough balls about 2 inches apart on your prepared baking sheets. Bake for 10-12 minutes. The cookies will look slightly underdone in the center, but the edges will be set. This is the key to a perfectly soft and chewy cookie! Don’t overbake them.
-
3.4. Step 4: Cool the Cookies
Let the cookies cool on the baking sheet for 5 minutes before transferring them to a wire rack. As they cool, the centers will set up perfectly. This resting period on the hot pan is an essential part of the baking process.
-
3.5. Step 5: Garnish and Enjoy!
For that classic hot cocoa look, you can gently press a few extra mini marshmallows and chocolate chips on top of the warm cookies right after they come out of the oven. They’ll melt just slightly into the surface. Let them cool completely on the wire rack before serving. Enjoy your delicious homemade cookies!
4. Tips for Perfect Hot Cocoa Cookies Every Time
Want to ensure your cookies are bakery-quality? Here are a few pro tips. First, do not skip creaming the butter and sugars. This step incorporates air into the dough, which is crucial for a light texture. For a deeper understanding of this process, King Arthur Baking has a fantastic guide on the science behind it.
Second, chill the dough for at least 30 minutes before baking. This helps prevent the cookies from spreading too much and deepens the chocolate flavor. A colder dough means a thicker, chewier cookie.
Finally, if you want extra fudgy cookies, slightly underbake them. Pull them from the oven when the edges are firm but the centers still look soft. They will finish baking on the hot pan and have the most incredible texture.
5. Serving Suggestions and Creative Variations
These hot cocoa cookies are fantastic on their own, but they are even better when served warm with a tall glass of cold milk. For a truly decadent experience, sandwich a scoop of vanilla ice cream between two cookies for an epic ice cream sandwich.
Want to get creative? Try adding a pinch of cinnamon or a dash of peppermint extract to the dough for a festive twist. You can also drizzle the cooled cookies with melted white chocolate or sprinkle them with crushed candy canes for a beautiful holiday presentation. See others recipes here for more dessert inspiration!
Foire Aux Questions
How do I store leftover hot cocoa cookies?
Store your leftover cookies in an airtight container at room temperature for up to 5 days. For maximum freshness and chewiness, you can place a slice of bread in the container with the cookies. The cookies will absorb moisture from the bread, helping them stay soft.
Can I make the cookie dough ahead of time?
Absolutely! This dough is perfect for making ahead. You can prepare the dough, wrap it tightly in plastic wrap, and refrigerate it for up to 3 days. You can also freeze the dough balls for up to 3 months. When you’re ready to bake, just place the frozen dough balls on your baking sheet and add a few extra minutes to the baking time.
What is the best type of hot cocoa mix to use?
Any standard milk chocolate hot cocoa mix will work wonderfully in this recipe. Brands like Swiss Miss or Nestlé are great options. For a richer, deeper chocolate flavor, you could opt for a dark chocolate hot cocoa mix from a brand like Ghirardelli. The choice is yours, and both will result in delicious hot cocoa cookies!