
Table of Contents
- Unleash Your Inner Baker: Why Strawberry Crunch Cheesecake Tacos Are Your Next Must-Make Dessert
- Why This Recipe Delivers Pure Dessert Bliss
- Ingredients Demystified: Understanding Each Component’s Role
- Step-by-Step Assembly: Crafting Your Irresistible Tacos
- Expert Tips for Cheesecake Taco Triumph
- The Perfect Companions: What to Serve With Your Cheesecake Tacos
- Storage Solutions: Keeping Your Tacos Fresh and Delicious
- Frequently Asked Questions About Strawberry Crunch Cheesecake Tacos
Prepare your taste buds for an explosion of textures and flavors! Imagine a crispy, golden shell giving way to a lusciously creamy cheesecake filling, all crowned with a vibrant, sweet-tart strawberry crunch. This isn’t just a dessert; it’s an experience, a playful twist on classic cheesecake that promises to be the star of any gathering. Get ready to create the most irresistible Strawberry Crunch Cheesecake Taco you’ve ever tasted!
Unleash Your Inner Baker: Why Strawberry Crunch Cheesecake Tacos Are Your Next Must-Make Dessert
As a passionate home baker, I’m always on the hunt for recipes that combine innovation with undeniable deliciousness. My journey with cheesecake tacos began, as many great culinary adventures do, with a craving for something familiar yet exciting. I adored the nostalgic crunch of strawberry shortcake ice cream bars, and the rich creaminess of cheesecake is a perennial favorite. The idea of merging these two beloved desserts into a portable, fun ‘taco’ format felt like a stroke of genius. After countless experiments, tweaking ratios, and perfecting techniques, I’ve finally landed on a recipe that truly delivers an irresistible Strawberry Crunch Cheesecake Taco experience. This isn’t just a recipe; it’s a celebration of texture, flavor, and pure dessert joy!
Why This Recipe Delivers Pure Dessert Bliss
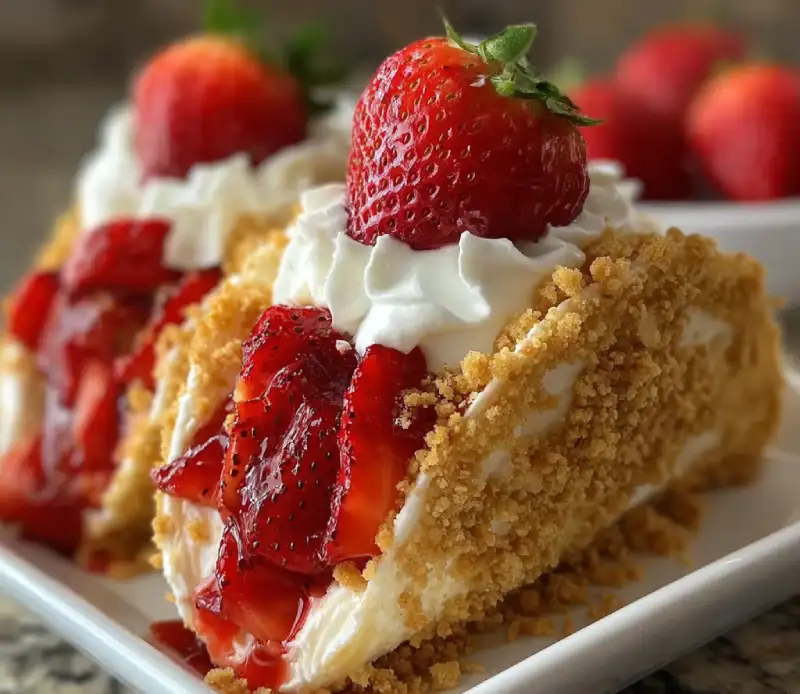
- The Magic of Textural Contrast: Crunchy, Creamy, and Chewy: This recipe is a symphony of textures. The crisp waffle cone shell, the smooth and velvety cheesecake filling, and the delightful chew and crunch of the strawberry topping create an unparalleled sensory experience in every single bite.
- Flavor Harmony: Sweet, Tart, and Rich in Every Bite: We’ve meticulously balanced the sweetness of the cheesecake with a hint of tang from the cream cheese and the vibrant tartness of the freeze-dried strawberries. It’s a perfectly harmonious flavor profile that keeps you coming back for more.
- Visual Appeal: A Treat for the Eyes as Well as the Palate: With its golden shell, creamy white filling, and speckled pink crunch, these tacos are as beautiful to look at as they are delicious to eat. They’re guaranteed to impress!
- Portability Perfected: Dessert You Can Hold: Forget plates and forks! These cheesecake tacos are designed for easy enjoyment, making them ideal for parties, picnics, or simply a delightful treat on the go.
Ingredients Demystified: Understanding Each Component’s Role
Here is what you need and why:
The ‘Taco Shell’ Foundation: Why Waffle Cones Work Best (and Smart Substitutions): We’re using store-bought waffle cones for their inherent crispness, subtle sweetness, and ease of shaping. They provide the perfect sturdy, edible vessel for our cheesecake. If you can’t find waffle cones, you could carefully shape thin, crisp pizzelle cookies or even use a very thin, pliable sugar cookie dough baked over a dowel to create a similar shape.
Creamy Cheesecake Filling: The Balance of Sweetness and Tang: Our filling relies on full-fat cream cheese for that signature rich, tangy flavor and velvety texture. Granulated sugar provides sweetness, while a touch of vanilla extract enhances the overall profile. A little heavy cream ensures it’s light and airy, not overly dense. For best results, ensure your cream cheese is at room temperature for a lump-free filling.
The Signature Strawberry Crunch: Achieving Maximum Flavor and Texture: This is where the magic happens! Freeze-dried strawberries are crucial here; they offer intense strawberry flavor without adding moisture, ensuring a crisp crunch. Vanilla wafers provide a buttery, sweet base, and a touch of melted butter binds it all together. A splash of strawberry extract can amplify the berry notes even further.
Optional Garnishes: Elevating Presentation and Taste: A drizzle of white chocolate, a sprinkle of extra freeze-dried strawberry powder, or even a fresh mint leaf can add an extra layer of elegance and flavor. Don’t underestimate the power of a beautiful garnish!
Step-by-Step Assembly: Crafting Your Irresistible Tacos
Follow these step-by-step photos:
1. Preparing the Cheesecake Filling: Smooth and Silky Every Time
In a large bowl, beat softened cream cheese with granulated sugar until light and fluffy, about 2-3 minutes. Scrape down the sides of the bowl. Add vanilla extract and beat until just combined. Gradually pour in the cold heavy cream, beating on medium-high speed until the mixture is thick, smooth, and holds soft peaks. Be careful not to overbeat, or it can become grainy. This ensures a perfectly smooth and silky filling for your irresistible Strawberry Crunch Cheesecake Taco.
2. Creating the Strawberry Crunch Topping: Your Texture Secret
In a food processor, pulse the vanilla wafers until they form fine crumbs. Add the freeze-dried strawberries and pulse again until they are finely crushed and well combined with the wafer crumbs. Transfer the mixture to a bowl, then stir in the melted butter and strawberry extract (if using) until everything is evenly moistened and clumpy. Spread this mixture onto a baking sheet and bake at 300°F (150°C) for 8-10 minutes, or until lightly toasted and fragrant. Let it cool completely; this step is key for maximum crunch!
3. Forming the ‘Taco’ Shells: Tips for Perfect Shape
Preheat your oven to 300°F (150°C). Place waffle cones on a baking sheet. Bake for 2-3 minutes, just until they are pliable. Immediately, and carefully (they will be hot!), drape each softened cone over the rungs of an upside-down cooling rack or a specialized taco holder to create the taco shape. Hold in place for a few seconds until they set. If they cool too much and become brittle, pop them back in the oven for another minute. This technique is essential for creating the perfect vessel for your irresistible Strawberry Crunch Cheesecake Taco.
4. Filling and Finishing: The Art of Assembly
Once the waffle cone shells are completely cool and firm, pipe or spoon the cheesecake filling into each shell. Don’t overfill! Gently press the cooled strawberry crunch topping onto both sides of the exposed cheesecake filling. You can also dip the edges of the filled taco into the crunch for full coverage. If desired, melt white chocolate and drizzle it artistically over the crunch. Place the finished tacos back on the cooling rack or in a taco holder and refrigerate for at least 30 minutes to allow the filling to set further.
Expert Tips for Cheesecake Taco Triumph
- Temperature Control: Why It Matters for Filling Consistency: Ensure your cream cheese is at room temperature. Cold cream cheese will result in a lumpy filling, no matter how much you beat it.
- Crunch Longevity: Keeping Your Topping Crispy: Bake the strawberry crunch until it’s truly dry and toasted. Store any leftover crunch in an airtight container at room temperature. For best results, add the crunch just before serving if making ahead.
- Making Ahead: Strategic Prep for Stress-Free Serving: You can prepare the cheesecake filling and the strawberry crunch topping a day in advance. Store them separately in airtight containers in the refrigerator. Form the taco shells and assemble closer to serving time for optimal freshness and crunch.
- Creative Variations: Beyond Strawberry Crunch: Don’t stop at strawberry! Experiment with other freeze-dried fruits like raspberries or blueberries, or even crushed Oreos for a cookies and cream version. The possibilities are endless!
The Perfect Companions: What to Serve With Your Cheesecake Tacos
These irresistible Strawberry Crunch Cheesecake Tacos are fantastic on their own, but pairing them can elevate the experience even further.
- Beverage Pairings: Refreshing Options to Complement Sweetness: A glass of cold milk, a light sparkling rosé, or even a chilled glass of iced tea would be delightful. For coffee lovers, a cold brew or a creamy latte would offer a lovely contrast.
- Dessert Table Integration: How They Fit Into a Spread: These tacos are perfect for a dessert bar! Arrange them on a platter with other mini desserts like mini cupcakes or fruit tarts. Their unique shape and vibrant color make them a standout.
Storage Solutions: Keeping Your Tacos Fresh and Delicious
Proper storage is key to enjoying your delicious creations!
- Refrigeration Best Practices: Preventing Soggy Shells: Store assembled cheesecake tacos in an airtight container in the refrigerator for up to 2-3 days. To help prevent the shells from becoming soggy, you can place a paper towel at the bottom of the container to absorb excess moisture.
- Freezing (and Why You Might Not Want To): Impact on Texture: While you technically *can* freeze these, I don’t highly recommend it. The texture of the waffle cone shell can become soft and lose its crispness upon thawing, and the cheesecake filling might become slightly grainy. If you must freeze, do so before adding the crunch, wrap individually in plastic wrap, and then foil. Thaw in the refrigerator.
Frequently Asked Questions About Strawberry Crunch Cheesecake Tacos
Can I Make These Gluten-Free?
What If I Don’t Have a Taco Holder?
How Long Do They Last?
Can I Use Fresh Strawberries Instead of Freeze-Dried?
Irresistible Strawberry Crunch Cheesecake Taco
- Total Time: 40 minutes
- Yield: 12 servings
Description
These delightful tacos combine a crispy waffle cone shell with a creamy cheesecake filling and a vibrant strawberry crunch topping. They are easy to make and offer an explosion of textures and flavors in every bite.
Ingredients
- 12 store-bought waffle cones
- 2 (8-ounce) packages full-fat cream cheese, softened
- 1/2 cup granulated sugar
- 1 teaspoon vanilla extract
- 1 cup cold heavy cream
- 2 cups vanilla wafer crumbs (about 40 wafers)
- 1 cup freeze-dried strawberries, crushed
- 4 tablespoons unsalted butter, melted
- 1/2 teaspoon strawberry extract (optional)
- White chocolate, melted (for drizzling, optional)
Instructions
- Prepare Cheesecake Filling: In a large bowl, beat softened cream cheese and granulated sugar until light and fluffy. Add vanilla extract. Gradually beat in cold heavy cream until thick and smooth. Refrigerate while preparing other components.
- Make Strawberry Crunch: In a food processor, pulse vanilla wafers until fine crumbs. Add freeze-dried strawberries and pulse until crushed. Transfer to a bowl, stir in melted butter and strawberry extract (if using). Spread on a baking sheet and bake at 300°F (150°C) for 8-10 minutes until lightly toasted. Let cool completely.
- Form Taco Shells: Preheat oven to 300°F (150°C). Bake waffle cones for 2-3 minutes until pliable. Immediately drape each softened cone over an upside-down cooling rack or taco holder to shape. Let cool and set.
- Assemble Tacos: Pipe or spoon cheesecake filling into each cooled waffle cone shell. Gently press the cooled strawberry crunch topping onto both sides of the exposed filling. Drizzle with melted white chocolate if desired.
- Chill and Serve: Refrigerate assembled tacos for at least 30 minutes to allow the filling to set. Serve chilled and enjoy your irresistible Strawberry Crunch Cheesecake Taco!
- Prep Time: 30 mins
- Cook Time: 10 mins