
Mini Pumpkin Pie: 5 Easy Steps to Perfect Bites
Table of Contents
- 1. Why These Mini Pumpkin Pies Are Irresistible
- 2. Key Ingredients for Your Perfect Mini Pumpkin Pies
- 3. How to Make Mini Pumpkin Pie: A 5-Step Guide
- 4. Tips for the Best Mini Pumpkin Pies Ever
- 5. Creative Variations and Add-ins
- 6. Serving and Storage Instructions
Welcome, fellow dessert lovers! If you’re looking for the ultimate autumn treat, you’ve found it. This recipe for mini pumpkin pie is about to become your go-to for every holiday gathering, cozy evening, and fall celebration. These adorable, single-serving desserts pack all the classic, warmly spiced flavor of a traditional pumpkin pie into a perfectly portioned bite. They are incredibly simple to make and even more fun to eat!
We’re going to walk through everything you need to know, from the essential ingredients to the final dollop of whipped cream. Get ready to fill your kitchen with the glorious aroma of cinnamon, nutmeg, and perfectly baked pumpkin. Let’s start baking!
1. Why These Mini Pumpkin Pies Are Irresistible
What’s not to love about a personal-sized dessert? These mini pumpkin pies are a certified crowd-pleaser for so many reasons. First, their size is perfect for parties and gatherings. No need for slicing and serving; guests can just grab one and enjoy, making them an ideal addition to any dessert table.
Beyond convenience, they offer perfect portion control. You get all the satisfaction of a rich, creamy pumpkin pie without overindulging. They are also incredibly versatile—great for a Thanksgiving dessert spread, a Halloween party, or just a sweet treat to enjoy with your afternoon coffee. This easy pumpkin pie recipe is a fall classic reinvented.
2. Key Ingredients for Your Perfect Mini Pumpkin Pies
The beauty of this recipe lies in its simplicity. You only need a handful of common pantry staples to create these delightful mini desserts. Here’s what you’ll need to gather before you begin:
- Refrigerated Pie Crusts: To keep things quick and easy, we’re using pre-made crusts. Feel free to use your favorite homemade recipe if you prefer! For a truly excellent from-scratch recipe, check out this Classic Single Pie Crust from King Arthur Baking.
- Pumpkin Purée: Be sure to grab 100% pure pumpkin purée, not pumpkin pie filling, which already contains sweeteners and spices.
- Sweetened Condensed Milk: This is our secret weapon for an ultra-creamy, rich, and perfectly sweet filling.
- Eggs: They provide structure and help the filling set beautifully.
- Pumpkin Pie Spice: A classic blend of cinnamon, nutmeg, ginger, and cloves that screams autumn. If you don’t have it, you can make your own!
- Salt: Just a pinch to balance the sweetness and enhance all the flavors.
3. How to Make Mini Pumpkin Pie: A 5-Step Guide
Ready to bake? This five-step process is practically foolproof. Just follow along, and you’ll have perfect mini pumpkin pie bites in no time. This is one of the best fall dessert recipes for bakers of all skill levels.
3.1. Step 1: Prepare Your Crusts & Pumpkin Filling
First things first, preheat your oven to 425°F (220°C). Lightly grease a 12-cup standard muffin tin. Unroll your refrigerated pie crusts onto a lightly floured surface. Using a 4-inch round cookie cutter (or the rim of a wide-mouth glass), cut out 12 circles. Gently press each circle into a muffin cup, making sure it’s snug against the bottom and sides.
In a large bowl, whisk together the pumpkin purée, sweetened condensed milk, eggs, pumpkin pie spice, and salt until the mixture is smooth and completely combined. Don’t overmix—just until everything is incorporated.
3.2. Step 2: Fill the Mini Pie Crusts
Carefully pour or spoon the pumpkin filling into each unbaked pie crust. Fill them about three-quarters of the way full. The filling will puff up slightly during baking but will settle as it cools. Be careful not to overfill, as this can cause them to spill over the sides of the crust.
3.3. Step 3: Bake to Golden Perfection
Place the muffin tin in the preheated oven. Bake at 425°F for 15 minutes. Then, reduce the oven temperature to 350°F (175°C) and continue to bake for another 10-15 minutes. The pies are done when a knife inserted near the center comes out clean and the crust is a beautiful golden brown.
3.4. Step 4: Cool Completely
This step is crucial for the perfect texture! Remove the muffin tin from the oven and place it on a wire cooling rack. Let the mini pumpkin pies cool completely in the tin, which usually takes about an hour. This allows the filling to set fully. Trying to remove them while they’re warm can cause them to fall apart.
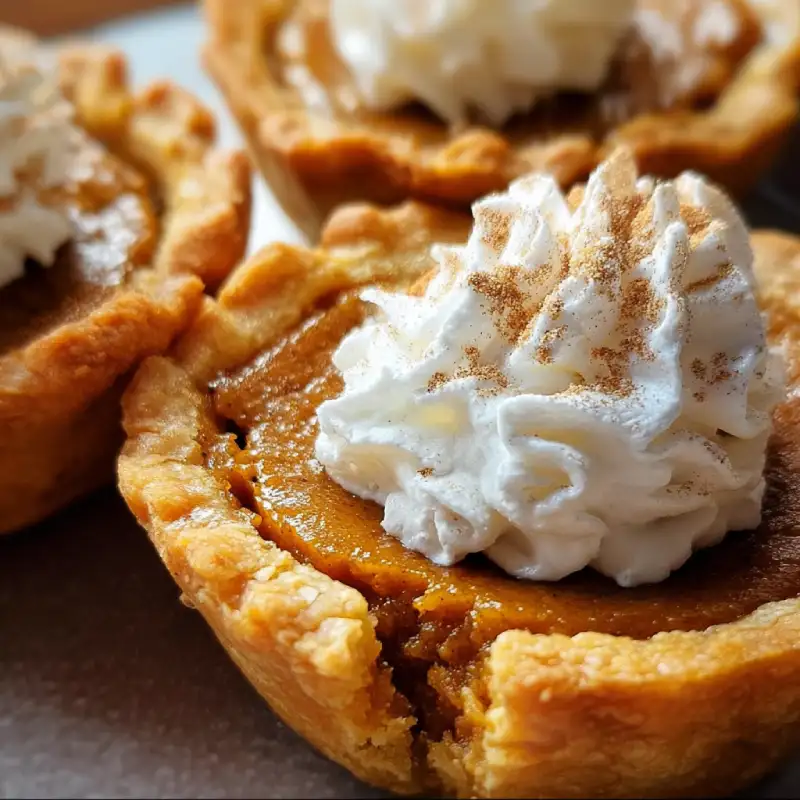
3.5. Step 5: Garnish and Serve
Once the pies are completely cool, you can carefully remove them from the muffin tin. Use a small offset spatula or a butter knife to gently loosen the edges if needed. Arrange them on a platter and get ready for the best part—decorating! A dollop of whipped cream and a sprinkle of cinnamon or pumpkin pie spice is the classic way to serve these treats.
4. Tips for the Best Mini Pumpkin Pies Ever
Want to take your mini pumpkin pie game to the next level? Here are a few pro tips for guaranteed success:
- Don’t Skip the Cooling Time: I can’t stress this enough! The filling needs time to set properly. Be patient, and you’ll be rewarded with a silky, firm texture.
- Crispy Crusts: For an extra-crisp crust, you can “blind bake” the mini crusts for about 5-7 minutes before adding the filling. Just be sure to prick the bottoms with a fork before baking.
- Room Temperature Ingredients: For the smoothest filling, make sure your eggs and sweetened condensed milk are at room temperature before mixing.
5. Creative Variations and Add-ins
While the classic recipe is divine, feel free to get creative! Here are a few fun ideas to switch things up:
- Pecan Streusel Topping: Before the final bake, sprinkle a mixture of chopped pecans, brown sugar, flour, and melted butter over the filling.
- Chocolate Drizzle: Once cooled, drizzle the tops with melted semi-sweet or white chocolate.
- Gingersnap Crust: Instead of pie dough, create a crust by pressing a mixture of crushed gingersnap cookies and melted butter into the muffin cups.
See others recipes here for more delicious dessert ideas!
6. Serving and Storage Instructions
These mini pumpkin pies are best served chilled or at room temperature. Top with a generous swirl of homemade whipped cream, a sprinkle of cinnamon, or even a small scoop of vanilla ice cream just before serving.
To store leftovers, place them in an airtight container in the refrigerator for up to 4 days. The crust may soften slightly over time, but they will still be absolutely delicious. For longer storage, you can freeze them for up to one month.
Foire Aux Questions
Can I make these mini pumpkin pies ahead of time?
Absolutely! These are a fantastic make-ahead dessert, which is perfect for holiday baking. You can bake them completely, let them cool, and then store them in an airtight container in the refrigerator for up to two days before your event. Just wait to add any whipped cream or garnishes until right before serving to keep them looking fresh.
Can I use a homemade pie crust for this recipe?
Yes, you certainly can! A homemade crust will make these mini pumpkin pies even more special. Simply prepare your favorite pie dough recipe, roll it out, and use a 4-inch round cutter to make the mini crusts. One standard 9-inch pie crust recipe should yield enough dough for 12 mini pies.
How do I prevent the crust edges from burning?
Because these are small, the crust edges can brown quickly. A great trick is to keep an eye on them during the first 15 minutes of baking at the higher temperature. If they start to get too dark, you can loosely cover the muffin tin with a sheet of aluminum foil for the remainder of the baking time. This will protect the edges while allowing the filling to cook through perfectly.