
Table of Contents
- Strawberry Earthquake Cake: A Dessert That Wows!
- Why This Strawberry Earthquake Cake Works Every Time
- Ingredients & Smart Substitutions
- Step-by-Step: Baking Your Strawberry Earthquake Cake
- Expert Tips for a Flawless Strawberry Earthquake Cake
- What to Serve With Your Earthquake Cake
- Storing & Reheating Your Leftovers
- Strawberry Earthquake Cake FAQ
Strawberry Earthquake Cake: A Dessert That Wows!
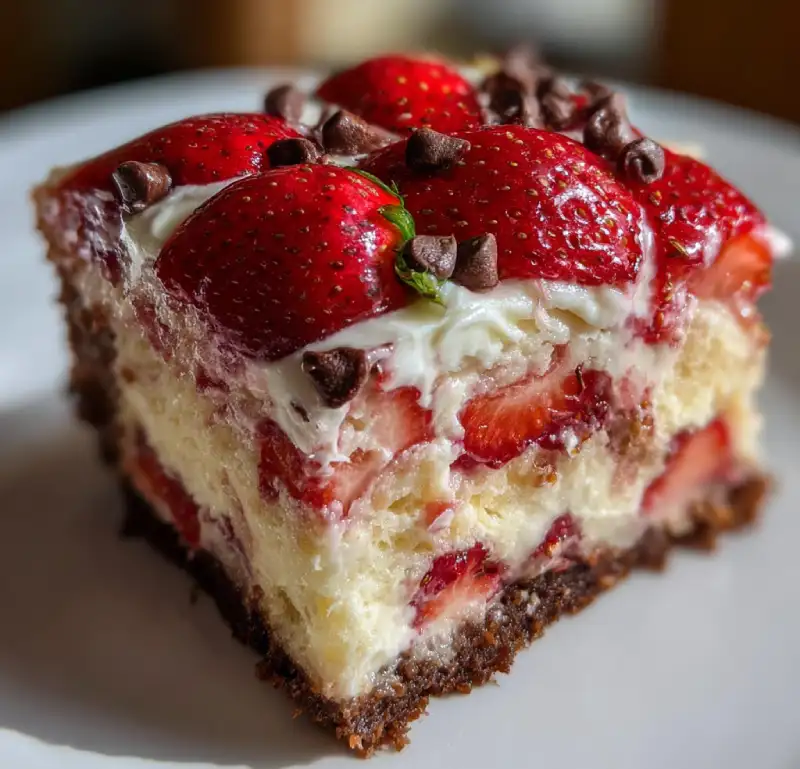
Prepare to be utterly captivated by a dessert that not only looks spectacular but delivers an explosion of flavor and an incredibly moist texture with every single bite. This Strawberry Earthquake Cake is a true showstopper, featuring a tender, strawberry-infused cake base, generously studded with fresh fruit, and crowned with a rich, tangy cream cheese swirl that sinks and cracks during baking, creating its signature ‘earthquake’ effect. It’s the kind of cake that makes people gasp when you bring it to the table, yet it’s surprisingly simple to achieve. Trust me, this will become your new go-to for an easy, impressive dessert that tastes like you spent hours in the kitchen!
Why This Strawberry Earthquake Cake Works Every Time
- Incredibly Moist & Flavorful: The combination of a quality cake mix base, fresh strawberries, and a rich cream cheese swirl ensures a cake that is never dry and always bursting with sweet, fruity goodness.
- Perfectly Swirled Topping: The cream cheese mixture is designed to be just the right consistency to create those beautiful, deep cracks and pockets that define an earthquake cake, allowing the strawberry cake to peek through.
- Visually Stunning with Minimal Effort: Despite its impressive appearance, this cake requires very little fuss. The ‘earthquake’ effect happens naturally in the oven, making you look like a baking genius without the extra work.
- Versatile & Adaptable: While strawberries are the star here, the base recipe is incredibly forgiving, allowing for easy substitutions and flavor variations to suit any occasion or preference.
Ingredients & Smart Substitutions
Here is what you need and why:
Cake Mix Base: For this Strawberry Earthquake Cake, we’re starting with a standard yellow or white cake mix. Why? Because it’s a fantastic shortcut that guarantees a consistent, tender crumb every time, allowing us to focus on the delicious additions. You can use a strawberry cake mix for an even more intense strawberry flavor, but a plain mix works beautifully as a canvas.
Cream Cheese & Butter: These are the heroes of our rich, tangy swirl. Use full-fat cream cheese for the best flavor and texture – it creates that luxurious, slightly dense, and utterly irresistible topping. Unsalted butter is preferred so you can control the salt content, but salted will work in a pinch; just omit any additional salt in the swirl mixture.
Fresh Strawberries: These are non-negotiable for the vibrant flavor and moisture they bring to the cake. Dice them into small, uniform pieces so they distribute evenly and don’t sink to the bottom. While fresh is best, you can use frozen strawberries if thawed and thoroughly drained to prevent excess moisture from making the cake soggy.
Powdered Sugar: Essential for creating a smooth, lump-free cream cheese topping. Sifting it is a good idea to ensure the silkiest texture. Granulated sugar would make the topping gritty, so stick to powdered!
Eggs, Oil, and Water/Milk: These are typically called for in your cake mix instructions. Always use large eggs at room temperature for better emulsification. Vegetable oil keeps the cake incredibly moist, and using milk instead of water (if your mix allows) adds richness to the cake batter.
Step-by-Step: Baking Your Strawberry Earthquake Cake
Follow these step-by-step photos:
1. Prepare the Cake Batter (Starting with the Mix)
Preheat your oven to 350°F (175°C) and grease and flour a 9×13 inch baking pan. In a large bowl, combine the cake mix, eggs, oil, and water (or milk, if using) according to package directions. Mix on low speed until just combined, then increase to medium and beat for 2 minutes until smooth. Gently fold in about 1 cup of your diced fresh strawberries. Be careful not to overmix; overmixing develops gluten, leading to a tougher cake.
2. Make the Cream Cheese Swirl
In a separate medium bowl, beat the softened cream cheese and softened butter together until light and fluffy. Gradually add the powdered sugar, beating until smooth and no lumps remain. Stir in the vanilla extract. This mixture should be thick but spreadable. If it’s too stiff, add a tiny splash of milk; if too thin, add a bit more powdered sugar.
3. Layering the Cake & Swirls
Pour the strawberry cake batter evenly into your prepared baking pan. Dollop spoonfuls of the cream cheese mixture over the cake batter. Don’t worry about being perfect; the ‘earthquake’ effect is all about imperfection! Sprinkle the remaining diced fresh strawberries over the top of the cream cheese dollops. Using a knife or skewer, gently swirl the cream cheese and strawberries into the cake batter, creating beautiful patterns and ensuring some of the cream cheese sinks into the cake.
4. Baking for a Perfect Texture
Place the pan in the preheated oven and bake for 40-50 minutes, or until a wooden skewer inserted into the center of the cake (avoiding a cream cheese pocket) comes out clean. The top should be golden brown, and the cream cheese swirl will have set and cracked, creating the signature ‘earthquake’ look. The aroma filling your kitchen will be absolutely divine!
5. Cooling & Final Touches
Once baked, remove the cake from the oven and place it on a wire rack to cool completely. This is crucial! Attempting to slice it warm will result in a messy cake. Once fully cooled, you can dust it lightly with extra powdered sugar for a beautiful finish, or even add a dollop of whipped cream when serving. The flavors meld and deepen as it cools, making it even more delicious.
Expert Tips for a Flawless Strawberry Earthquake Cake
- Don’t Overmix the Batter: Mix the cake batter only until the ingredients are just combined. Overmixing develops gluten, which can lead to a tough, dry cake. A few small lumps are perfectly fine!
- Achieve the Perfect Swirl: When dolloping the cream cheese mixture, leave some gaps. Then, when swirling, use a gentle hand. You want to create pockets and streaks, not fully incorporate the cream cheese into the batter.
- Test for Doneness (How to Know): Insert a wooden skewer or toothpick into the cake, making sure to avoid a large cream cheese pocket. If it comes out clean or with a few moist crumbs attached, your cake is done. If it’s wet, bake for a few more minutes.
- Cool Completely Before Serving: This is perhaps the most important tip! The cake needs time to set and for the flavors to fully develop. Slicing it warm will cause the cream cheese to be too soft and the cake to crumble.
- Room Temperature Ingredients: Ensure your cream cheese and butter for the swirl are at room temperature. This makes them much easier to beat into a smooth, lump-free mixture.
What to Serve With Your Earthquake Cake
This Strawberry Earthquake Cake is a star on its own, but a few simple accompaniments can elevate the experience even further. A light dusting of powdered sugar is always elegant. For a touch of indulgence, a dollop of freshly whipped cream or a scoop of vanilla bean ice cream makes a perfect pairing, especially if the cake is still slightly warm. A fresh mint sprig adds a pop of color and freshness. For a delightful beverage, consider a glass of iced tea or a light, fruity sparkling wine to complement the sweet and tangy notes of the cake. For more dessert inspiration, see more easy recipes!
Storing & Reheating Your Leftovers
This Strawberry Earthquake Cake stores beautifully, making it an excellent make-ahead dessert. Due to the cream cheese, it’s essential to refrigerate any leftovers. Simply cover the cake tightly with plastic wrap or transfer slices to an airtight container. It will stay fresh and delicious in the refrigerator for up to 3-4 days. If you prefer it slightly warm, you can gently heat individual slices in the microwave for 15-20 seconds. For longer enjoyment, this cake freezes surprisingly well! Wrap individual slices or the entire cooled cake tightly in plastic wrap, then in aluminum foil. It can be frozen for up to 2-3 months. Thaw overnight in the refrigerator before serving.
Frequently Asked Questions
Can I use frozen strawberries?
Why is it called an ‘Earthquake’ cake?
Can I make it gluten-free?
Strawberry Earthquake Cake
- Total Time: 1 hour 5 minutes
- Yield: 12-16 servings
Description
A stunning and incredibly moist cake featuring a tender strawberry base and a rich, tangy cream cheese swirl that creates a beautiful ‘earthquake’ effect. Perfect for any occasion, this cake is surprisingly easy to make and always impresses.
Ingredients
- 1 (15.25 oz) box yellow or white cake mix
- 1 cup water (or milk, for richer cake)
- 1/2 cup vegetable oil
- 3 large eggs
- 2 cups fresh strawberries, diced (divided)
- 1 (8 oz) package cream cheese, softened
- 1/2 cup (1 stick) unsalted butter, softened
- 2 cups powdered sugar, sifted
- 1 teaspoon vanilla extract
Instructions
- Preheat oven to 350°F (175°C). Grease and flour a 9×13 inch baking pan.
- In a large bowl, combine cake mix, water (or milk), oil, and eggs. Beat on low speed until just combined, then on medium for 2 minutes. Gently fold in 1 cup of diced strawberries. Pour batter into the prepared pan.
- In a separate bowl, beat softened cream cheese and butter until light and fluffy. Gradually add powdered sugar and vanilla extract; beat until smooth.
- Dollop spoonfuls of the cream cheese mixture over the cake batter. Sprinkle the remaining 1 cup of diced strawberries over the cream cheese.
- Using a knife or skewer, gently swirl the cream cheese and strawberries into the cake batter to create the ‘earthquake’ effect.
- Bake for 40-50 minutes, or until a wooden skewer inserted into the cake (avoiding cream cheese) comes out clean.
- Cool completely on a wire rack before serving. Dust with powdered sugar if desired.
- Prep Time: 20 mins
- Cook Time: 45 mins