
Table of Contents
Your New Favorite Strawberry Earthquake Cake
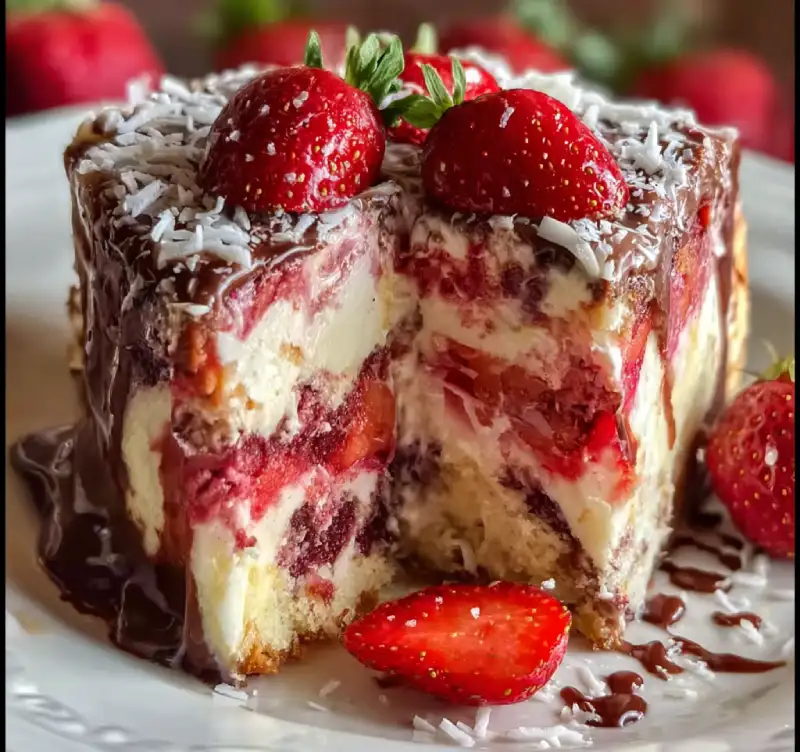
Prepare your taste buds for an experience that’s nothing short of extraordinary! This strawberry earthquake cake isn’t just a dessert; it’s a symphony of textures and flavors. Imagine a moist, tender cake base studded with sweet strawberries, topped with a rich, tangy cream cheese swirl that bakes down into delightful pockets of creamy goodness. Each bite offers a burst of fresh fruit, a hint of vanilla, and that irresistible cream cheese tang, all held together by a cake so tender it practically melts in your mouth. It’s the kind of cake that makes you close your eyes and savor every single crumb. Trust me, once you try this, it will become a staple in your baking repertoire.
Why This Recipe Works Every Time
- Foolproof Foundation: Starting with a quality cake mix ensures a consistent, tender crumb every single time, making this recipe accessible for bakers of all skill levels.
- Melted Butter Magic: Using melted butter in the cake batter adds unparalleled moisture and a rich, buttery flavor that oil simply can’t replicate.
- Perfectly Balanced Swirl: Our cream cheese mixture is designed to be just the right consistency – thick enough to create distinct pockets but thin enough to meld beautifully with the cake.
- Fresh Strawberry Burst: Incorporating fresh strawberries directly into the batter and swirl ensures a vibrant, natural fruit flavor and delightful pockets of juicy sweetness throughout the cake.
Essential Ingredients & Smart Substitutions
Here is what you need and why:
Cake Mix: The Foundation of Speed: For this incredible strawberry earthquake cake, we’re leaning on the convenience and reliability of a good quality yellow or white cake mix. This isn’t about cutting corners; it’s about creating a fantastic dessert with less fuss. You can absolutely use your favorite scratch cake recipe if you prefer, but a mix makes this a weeknight-friendly treat. Look for brands that use real ingredients for the best flavor.
Cream Cheese: For Tang and Texture: Full-fat cream cheese is non-negotiable here! It provides that signature tangy counterpoint to the sweet cake and strawberries, and its richness creates the luscious, creamy pockets that define an earthquake cake. Make sure it’s softened to room temperature for a smooth, lump-free swirl. Low-fat cream cheese won’t give you the same luxurious texture.
Strawberries: Fresh vs. Frozen Insights: Fresh, ripe strawberries are always my top recommendation for their vibrant flavor and texture. Hull and chop them into small pieces. If fresh aren’t available, frozen unsweetened strawberries can work in a pinch. Thaw them completely and pat them very dry with paper towels to prevent excess moisture from affecting your cake’s texture. You might lose a little of that fresh burst, but the flavor will still be there.
Sweetener Choices: Granulated and Powdered: We use granulated sugar in the cake batter for sweetness and structure, and powdered sugar (confectioners’ sugar) in the cream cheese swirl. Powdered sugar dissolves beautifully, ensuring a silky-smooth cream cheese topping without any grittiness. Don’t try to swap them; they serve different purposes!
Fats: Butter vs. Oil Considerations: For the cake batter, I strongly advocate for melted unsalted butter. It imparts a richer, more complex flavor than oil and contributes to a wonderfully tender crumb. While oil would make the cake moist, butter adds that extra layer of deliciousness. For the cream cheese swirl, a touch of butter helps with richness and texture. Always use unsalted butter so you can control the salt content.
Eggs: The Binder and Leavener: Large eggs are crucial for binding the ingredients, adding richness, and contributing to the cake’s rise and structure. Ensure they are at room temperature; this helps them emulsify better with the other ingredients, leading to a more uniform and tender cake. If you forget to take them out, place them in a bowl of warm water for 5-10 minutes.
Step-by-Step: Baking Your Strawberry Earthquake Cake
Follow these step-by-step photos:
1. Prepping Your Pan and Oven
First things first, preheat your oven to 350°F (175°C). This ensures your oven is at the correct temperature when the cake goes in, promoting even baking. Next, generously grease and flour a 9×13 inch baking pan. You can also use baking spray with flour. This step is crucial to prevent your beautiful strawberry earthquake cake from sticking. A well-prepped pan means an easy release and a perfect presentation.
2. Mixing the Cake Batter: Simplicity First
In a large mixing bowl, combine your yellow or white cake mix, melted butter, room temperature eggs, and milk. Using an electric mixer on low speed, mix until just combined, then increase to medium speed and beat for about 2 minutes. The batter should be smooth but don’t overmix! Overmixing develops gluten, which can lead to a tough cake. Gently fold in about half of your chopped fresh strawberries. Pour this delicious batter evenly into your prepared baking pan.
3. Preparing the Cream Cheese Swirl
In a separate medium bowl, beat together the softened cream cheese, powdered sugar, and vanilla extract until smooth and creamy. Make sure there are no lumps of cream cheese left. This mixture should be thick but spreadable. If it’s too stiff, add a tiny splash of milk (about a teaspoon at a time) until it reaches the right consistency. This is the heart of your strawberry earthquake cake‘s signature swirl!
4. Layering the Cake: The ‘Earthquake’ Effect
Now for the fun part! Dollop spoonfuls of the cream cheese mixture over the cake batter in the pan. Don’t worry about being too neat; the beauty of an earthquake cake is its rustic, ‘cracked’ appearance. Sprinkle the remaining chopped strawberries over the cream cheese dollops. Using a knife or a skewer, gently swirl the cream cheese and strawberries into the cake batter. Don’t overdo it; a few gentle swirls are all you need to create those delightful pockets and cracks.
5. Baking for Perfection
Place your pan in the preheated oven and bake for 45-55 minutes, or until a wooden skewer inserted into the center of the cake comes out with moist crumbs, but not wet batter. The top should be golden brown, and the cream cheese pockets will be set and slightly puffed. Keep an eye on it towards the end of the baking time, as oven temperatures can vary. This is where the magic happens, creating those signature ‘earthquake’ cracks!
6. Cooling Stages: The Patience Pays Off
Once baked, remove the strawberry earthquake cake from the oven and let it cool in the pan on a wire rack for at least 30 minutes. This initial cooling period allows the cake to set and prevents it from falling apart. After 30 minutes, you can carefully invert it onto the wire rack to cool completely. Cooling completely is essential for the best texture and for the cream cheese to fully set. Resist the urge to cut into it too soon!
Expert Tips for a Flawless Earthquake Cake
- Don’t Overmix! This is perhaps the most crucial tip for any cake. Overmixing develops gluten, leading to a tough, dry cake. Mix until just combined, then beat for the specified time, and stop.
- Room Temperature Ingredients Matter: Especially for the eggs and cream cheese. Room temperature ingredients emulsify better, creating a smoother batter and a more uniform, tender cake.
- Achieving the Perfect Swirl: When dolloping the cream cheese, aim for even distribution. For the swirl, use a gentle hand. Too much swirling will blend everything together, losing the distinct ‘earthquake’ effect. A few broad strokes are all you need.
- Knowing When It’s Done: The toothpick test is your best friend. Insert a wooden skewer into the center of the cake. It should come out with moist crumbs, not wet batter. If it’s completely clean, it might be slightly overbaked.
- Cooling Completely: A Must-Do: I know it’s tempting, but cutting into a warm cake can cause it to crumble and the cream cheese swirl to be too soft. Allow it to cool completely for the best texture and to let the flavors meld.
Serving Suggestions: Elevate Your Dessert
While this strawberry earthquake cake is absolutely divine on its own, a few simple additions can elevate it to an even more spectacular dessert:
- Classic Whipped Cream: A dollop of freshly whipped cream, lightly sweetened with a touch of vanilla, is a timeless pairing. Its lightness perfectly complements the rich cake.
- Fresh Fruit Pairings: Beyond the strawberries already in the cake, consider serving extra fresh berries on the side – raspberries, blueberries, or even sliced peaches would be wonderful.
- Ice Cream Combinations: A scoop of vanilla bean ice cream or even a strawberry swirl ice cream would be an indulgent treat alongside a slice of this cake. The contrast of warm cake and cold ice cream is always a winner.
Storing and Reheating Your Cake
Proper storage ensures your strawberry earthquake cake stays delicious for days!
- Room Temperature vs. Refrigeration: Because of the cream cheese, this cake is best stored in the refrigerator. Cover it tightly with plastic wrap or aluminum foil to prevent it from drying out. It will last for up to 3-4 days.
- Freezing for Longer Enjoyment: Yes, you can freeze this cake! Once completely cooled, wrap individual slices or the entire cake (if uncut) tightly in plastic wrap, then in aluminum foil. It can be frozen for up to 2-3 months.
- Reviving Leftovers: To enjoy a frozen slice, thaw it in the refrigerator overnight. If you prefer it warm, you can gently microwave individual slices for 15-30 seconds, or warm a larger piece in a low oven (around 250°F/120°C) for 10-15 minutes until just heated through.
Strawberry Earthquake Cake FAQs
Can I use other fruit?
How to prevent the swirl from sinking?
Is this cake better warm or cold?
For more delightful baking adventures, be sure to see more easy recipes on our site!
Strawberry Earthquake Cake
- Total Time: 1 hour 10 minutes
- Yield: 12-16 servings
Description
Bake the best strawberry earthquake cake with this easy-to-follow recipe, featuring a moist cake, fresh strawberries, and a tangy cream cheese swirl. Perfect for any occasion, this dessert is a guaranteed crowd-pleaser.
Ingredients
- 1 (15.25 ounce) box yellow or white cake mix
- 1/2 cup (1 stick) unsalted butter, melted
- 3 large eggs, room temperature
- 1 cup milk (whole or 2%)
- 1 teaspoon vanilla extract
- 2 cups fresh strawberries, hulled and chopped (divided)
- 8 ounces cream cheese, softened
- 1/2 cup powdered sugar
Instructions
- Preheat Oven & Prep Pan: Preheat your oven to 350°F (175°C). Grease and flour a 9×13 inch baking pan.
- Mix Cake Batter: In a large bowl, combine cake mix, melted butter, eggs, milk, and vanilla extract. Beat with an electric mixer on low until just combined, then on medium for 2 minutes. Gently fold in 1 cup of chopped strawberries. Pour batter into the prepared pan.
- Prepare Cream Cheese Swirl: In a separate bowl, beat softened cream cheese, powdered sugar, and 1/2 teaspoon vanilla extract until smooth and creamy.
- Layer & Swirl: Dollop spoonfuls of the cream cheese mixture over the cake batter. Sprinkle the remaining 1 cup of chopped strawberries over the cream cheese. Using a knife or skewer, gently swirl the cream cheese and strawberries into the cake batter to create an ‘earthquake’ effect.
- Bake: Bake for 45-55 minutes, or until a wooden skewer inserted into the center comes out with moist crumbs.
- Cool: Let the cake cool in the pan on a wire rack for at least 30 minutes before inverting to cool completely.
- Prep Time: 20 mins
- Cook Time: 50 mins