
Red Velvet Crinkle Cookies: 5-Step Delicious Recipe
Table of Contents
- 1. Introduction: The Magic of Red Velvet Crinkle Cookies
- 2. Why This Red Velvet Crinkle Cookies Recipe Will Be Your New Favorite
- 3. Gather Your Ingredients: What You’ll Need
- 4. How to Make Red Velvet Crinkle Cookies: Step-by-Step
- 5. Pro Tips for Perfect Crinkle Cookies Every Time
- 6. Variations: Customize Your Red Velvet Crinkle Cookies
- 7. Storing Your Delicious Crinkle Cookies
1. Introduction: The Magic of Red Velvet Crinkle Cookies
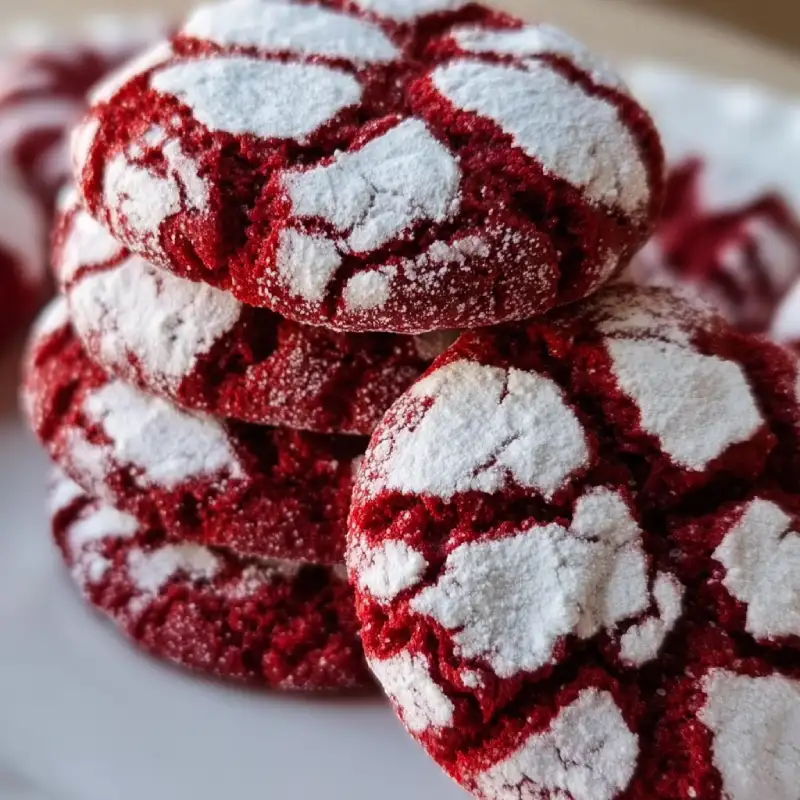
Get ready to fall in love with your new favorite dessert! This Red Velvet Crinkle Cookies recipe creates the most visually stunning and delicious treats imaginable. With their vibrant red hue, deep chocolate flavor, and a beautiful crackled top dusted with powdered sugar, these cookies are a true showstopper. They have a perfectly chewy center and slightly crisp edges, making every bite an absolute delight.
Whether you’re baking for a special occasion, a holiday gathering, or just a cozy afternoon, these cookies are guaranteed to impress. They bring together the classic, tangy flavor of red velvet cake with the satisfying texture of a soft-baked cookie. Let’s get baking!
2. Why This Red Velvet Crinkle Cookies Recipe Will Be Your New Favorite
There are countless cookie recipes out there, but this one truly stands out. First, it’s an incredibly easy cookie recipe that delivers bakery-quality results with minimal fuss. The steps are straightforward, making it perfect for bakers of all skill levels. You don’t need any fancy equipment, just a bowl and a whisk!
Secondly, the flavor is simply unbeatable. We use just enough cocoa powder to give it that subtle chocolatey depth, balanced by a hint of vanilla and the classic tang from a touch of vinegar. The end result is a batch of Red Velvet Crinkle Cookies that taste as amazing as they look. See others recipes here .
3. Gather Your Ingredients: What You’ll Need
Before you begin, gather all your ingredients to make the process smooth and enjoyable. Having everything measured and ready is the key to a stress-free baking experience. Here’s what you’ll need for these delightful Red Velvet Crinkle Cookies.
- 1 1/2 cups (180g) All-Purpose Flour
- 1/4 cup (21g) Unsweetened Cocoa Powder
- 1 teaspoon Baking Soda
- 1/4 teaspoon Salt
- 1/2 cup (113g) Unsalted Butter, melted
- 1 cup (200g) Granulated Sugar
- 2 Large Eggs
- 1 tablespoon Red Food Coloring (gel or liquid)
- 1 teaspoon Pure Vanilla Extract
- 1 teaspoon White Vinegar
- 1/2 cup (55g) Powdered Sugar, for rolling
4. How to Make Red Velvet Crinkle Cookies: Step-by-Step
Now for the fun part! Follow these five simple steps to create the most perfect Red Velvet Crinkle Cookies you’ve ever tasted. We’ll walk you through everything from mixing the dough to that final, beautiful bake.
4.1. Step 1: Prepare the Dough
In a medium bowl, whisk together the flour, cocoa powder, baking soda, and salt. Set this dry mixture aside. In a separate large bowl, combine the melted butter and granulated sugar, whisking until smooth. Add the eggs one at a time, mixing well after each addition. Stir in the red food coloring, vanilla extract, and white vinegar until the color is vibrant and uniform. Gradually add the dry ingredients to the wet ingredients and mix until just combined. Be careful not to overmix!
4.2. Step 2: Chill the Dough
This step is crucial for achieving that signature crinkle! Cover the bowl of dough with plastic wrap and refrigerate for at least 2 hours, or up to overnight. Chilling the dough prevents the cookies from spreading too much in the oven and makes it much easier to handle when rolling.
4.3. Step 3: Roll in Sugar
Once the dough is firm, preheat your oven to 350°F (175°C) and line a baking sheet with parchment paper. Place the powdered sugar in a shallow bowl. Scoop the chilled dough into 1-tablespoon-sized balls. Roll each ball generously in the powdered sugar, ensuring it’s completely coated with a thick layer. This heavy coating is what creates the beautiful cracks as the cookies expand.
4.4. Step 4: Bake to Perfection
Place the sugar-coated dough balls on the prepared baking sheet, about 2 inches apart. Bake for 10-12 minutes. The cookies should look set around the edges and have a soft, slightly underbaked center. The crinkles will form beautifully as they bake. For an in-depth look at how cocoa powder affects baking, check out this great resource from King Arthur Baking.
4.5. Step 5: Cool and Enjoy!
Let the Red Velvet Crinkle Cookies cool on the baking sheet for 5 minutes before transferring them to a wire rack to cool completely. This allows them to set up properly while remaining wonderfully chewy. Once cooled, they are ready to be devoured!
5. Pro Tips for Perfect Crinkle Cookies Every Time
Want to ensure your Red Velvet Crinkle Cookies turn out flawless? Here are a few expert tips to elevate your baking game.
- Don’t Skip the Chill: Chilling the dough is non-negotiable! It solidifies the fat, which helps control spreading and concentrates the flavor.
- Use Gel Food Coloring: For the most vibrant red color without adding extra liquid to the dough, gel food coloring is your best bet.
- Coat Generously: Be very generous with the powdered sugar coating. A thick layer is essential for creating those dramatic, high-contrast crinkles.
- Don’t Overbake: Pull the cookies from the oven when the centers still look a little soft. They will continue to bake on the hot pan and will set up to have the perfect chewy texture.
6. Variations: Customize Your Red Velvet Crinkle Cookies
While this classic recipe is amazing on its own, feel free to get creative! These cookies are a fantastic canvas for new flavors and are perfect for holiday baking. Here are a few ideas to try:
- White Chocolate Chip: Fold in 1/2 cup of white chocolate chips into the dough before chilling for a creamy, sweet addition.
- Cream Cheese Filling: Create a small indentation in each dough ball before baking and fill it with a small dollop of sweetened cream cheese frosting after they’ve cooled.
- Espresso Kick: Add 1 teaspoon of instant espresso powder to the dry ingredients to deepen the chocolate flavor.
7. Storing Your Delicious Crinkle Cookies
To keep your homemade cookies fresh and delicious, proper storage is key. Allow the cookies to cool completely before storing them to prevent them from becoming soggy.
Store your Red Velvet Crinkle Cookies in an airtight container at room temperature for up to 5 days. If you find them starting to firm up, placing a slice of bread in the container can help restore their softness. These cookies also freeze wonderfully, making them a great make-ahead treat!
Foire Aux Questions
Why didn’t my cookies crinkle?
The most common reason for a lack of crinkles is not chilling the dough long enough or not using enough powdered sugar. Chilling the dough helps it spread slower, giving the powdered sugar topcoat time to set and crack. A very thick, generous coating of powdered sugar is also essential to create that beautiful crackled effect as the cookie expands.
Can I make the dough ahead of time?
Absolutely! This dough is perfect for making ahead. You can prepare the dough and keep it wrapped tightly in the refrigerator for up to 3 days. When you’re ready to bake, just let it sit at room temperature for about 15-20 minutes to soften slightly before scooping and rolling in sugar.
Can I freeze these Red Velvet Crinkle Cookies?
Yes, these cookies freeze beautifully. You can freeze the unbaked dough balls (without the powdered sugar coating) for up to 3 months. When ready to bake, let them thaw slightly, roll them in powdered sugar, and bake as directed, adding an extra minute or two to the baking time. You can also freeze the fully baked and cooled cookies in an airtight container for up to a month.