
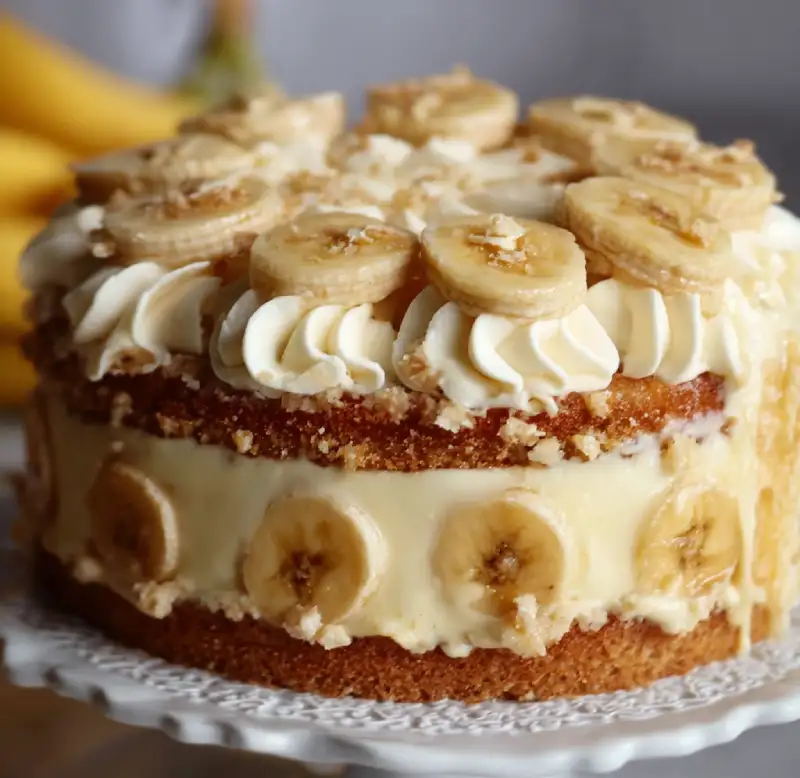
Bring Southern Comfort Home with This Banana Pudding Cake
Imagine a dessert that perfectly marries the comforting, nostalgic flavors of classic banana pudding with the delightful structure of a moist, tender cake. That’s precisely what our banana pudding cake delivers! Each forkful is a symphony of creamy, sweet banana pudding, soft vanilla cake, and the satisfying crunch of vanilla wafers. It’s a dessert that evokes warmth, celebration, and pure, unadulterated joy. Get ready to bake a masterpiece that will have everyone asking for the recipe!
Table of Contents
- Why This Banana Pudding Cake Always Delivers
- Essential Ingredients for Your Banana Pudding Cake
- Your Step-by-Step Guide to Baking Banana Pudding Cake
- Expert Tips for Banana Pudding Cake Success
- Perfect Pairings: What to Serve with Your Banana Pudding Cake
- Storing and Reheating Your Banana Pudding Cake
- Banana Pudding Cake FAQs
Why This Banana Pudding Cake Always Delivers
This isn’t just any banana cake; it’s a carefully constructed experience designed to maximize flavor and texture. The magic lies in its thoughtful layering and the quality of each component.
- Layered Comfort: The harmonious interplay between the moist cake, silky pudding, and crisp vanilla wafers creates an irresistible textural contrast that defines true banana pudding.
- Creamy Perfection: While we offer a convenient instant pudding option, the depth of flavor from a homemade vanilla pudding truly elevates this cake, providing that rich, custardy core.
- Moist and Flavorful Cake Base: The inclusion of ripe bananas directly into the cake batter ensures an incredibly moist crumb and infuses every bite with natural banana sweetness, making it the perfect foundation for our banana pudding cake.
- Effortless Elegance: Despite its impressive appearance, this recipe is designed for accessibility. Simple steps lead to a stunning dessert that looks like it took hours to create.
Essential Ingredients for Your Banana Pudding Cake (and Why They Matter)
Here is what you need and why:
Ripened Bananas: The ‘Why’ Behind Their Sweetness and Structure. For this banana pudding cake, you want bananas that are ripe, but not overly mushy. Look for bananas with a few brown spots, indicating peak sweetness and a soft texture that’s easy to mash and incorporate into the cake batter, contributing both moisture and flavor.
Yellow Cake Mix: Leveraging Convenience for a Consistent Base. A high-quality yellow cake mix is our secret weapon for a consistently tender and flavorful cake base without the fuss of measuring multiple dry ingredients. It provides a reliable foundation for our banana pudding cake.
Instant Vanilla Pudding: Achieving Creaminess with Speed (and why homemade is great too). Instant pudding is a fantastic shortcut for achieving that signature creamy, custardy layer quickly. If you have the time and inclination, a homemade vanilla pudding will offer an even richer, more nuanced flavor profile. For an excellent homemade pudding recipe, check out King Arthur Baking’s Classic Vanilla Pudding.
Milk: The Foundation of Your Pudding’s Consistency. Whole milk is recommended for the richest, creamiest pudding, but 2% milk will also work. It’s crucial for achieving the perfect set and texture for your pudding layers.
Whipped Topping/Heavy Cream: For a Light, Airy Finish and Stability. A good quality whipped topping (like Cool Whip) provides a light, stable, and easy-to-spread frosting. Alternatively, freshly whipped heavy cream offers a more luxurious, less sweet finish. Both provide that essential airy contrast to the dense cake and pudding.
Vanilla Wafer Cookies: The Crucial Textural Crunch and Iconic Flavor. These aren’t just a garnish; they’re integral to the banana pudding experience. They soften slightly as they sit, absorbing some of the pudding’s moisture, but still offer a delightful textural counterpoint to the soft cake and creamy layers.
Eggs and Oil: How They Contribute to Cake Moisture and Structure. Eggs provide structure and richness, while oil ensures a wonderfully moist and tender crumb for your cake, preventing it from drying out.
Substitutions That Work: Adapting for Dietary Needs or Pantry Staples. For a dairy-free version, use plant-based milk and whipped topping. Gluten-free yellow cake mixes are also widely available. Always check ingredient labels for specific dietary requirements.
Your Step-by-Step Guide to Baking Banana Pudding Cake
Follow these simple steps to create your show-stopping banana pudding cake:
1. Preparing Your Cake Base: Mixing, Baking, and Cooling for Success
Preheat your oven according to the cake mix package directions (usually 350°F / 175°C). Grease and flour a 9×13 inch baking pan. In a large bowl, combine the yellow cake mix, water, oil, and eggs as directed on the package. Mash your ripe bananas and gently fold them into the cake batter. Pour the batter into your prepared pan and bake for the recommended time, or until a wooden skewer inserted into the center comes out clean. Allow the cake to cool completely in the pan on a wire rack. This is crucial for preventing a soggy cake later!
2. Crafting the Creamy Pudding Layer: Achieving the Right Consistency
In a medium bowl, whisk together the instant vanilla pudding mix and cold milk for 2 minutes, or until the mixture begins to thicken. If you’re making homemade pudding, follow your recipe’s instructions. Ensure the pudding is well-chilled before assembling to guarantee it sets properly and provides that perfect creamy texture for your banana pudding cake.
3. Assembling Your Cake: The Art of Layering for Maximum Impact
Once your cake is completely cool, spread half of the prepared vanilla pudding evenly over the top. Arrange a single layer of vanilla wafers over the pudding, followed by a layer of thinly sliced fresh bananas. Repeat with the remaining pudding, another layer of vanilla wafers, and more banana slices. This layering creates the iconic look and ensures every bite has all the elements.
4. The Whipped Topping Finish: Spreading for an Even and Appealing Top
Gently spread the whipped topping or freshly whipped cream over the final layer of bananas and wafers, ensuring an even, smooth surface. Take your time to create a beautiful, inviting top layer for your banana pudding cake.
5. Garnishing with Vanilla Wafers and Banana Slices: The Final Flourish
For a professional and appealing finish, arrange whole vanilla wafers and a few fresh banana slices on top of the whipped topping. You can create a decorative pattern or simply scatter them artfully. This final touch signals the deliciousness within!
Expert Tips for Banana Pudding Cake Success
- The Banana Ripeness Sweet Spot: Avoid using green bananas (they lack flavor) or overly black, mushy bananas (they can make the cake too dense). Look for yellow bananas with a good amount of brown speckles for optimal sweetness and texture.
- Cooling Completely: Why Patience Prevents a Soggy Cake. Do NOT rush this step! A warm cake will melt the pudding and whipped topping, leading to a messy, soggy disaster. Ensure the cake is completely cool to the touch before adding any layers.
- Preventing Banana Browning: Simple Tricks for Freshness. To keep your sliced bananas looking fresh, toss them gently in a tiny amount of lemon juice or pineapple juice before layering. This helps prevent oxidation and browning.
- Chilling Time: The Secret to a Set and Flavorful Cake. This banana pudding cake needs at least 4-6 hours, or preferably overnight, in the refrigerator. This allows the pudding to fully set, the flavors to meld, and the wafers to soften just enough.
- Make-Ahead Strategies: How to Prepare Components in Advance. You can bake the cake a day ahead and store it covered at room temperature. The pudding can also be made a day in advance and kept chilled. Assemble the cake closer to serving time for the freshest results.
Perfect Pairings: What to Serve with Your Banana Pudding Cake
This delightful banana pudding cake is a star on its own, but a few thoughtful pairings can elevate the experience even further.
- Complementary Beverages: A hot cup of freshly brewed coffee or a soothing herbal tea makes a wonderful companion, cutting through the sweetness. For a more classic Southern feel, a tall glass of cold milk is always a winner.
- Simple Garnishes: While the cake is already beautifully garnished, a light dusting of cinnamon or a few delicate chocolate shavings can add an extra layer of flavor and visual appeal.
Storing and Reheating Your Banana Pudding Cake
Proper storage is key to enjoying your delicious banana pudding cake for days.
- Refrigerator Storage: Keeping It Fresh for Days. Store any leftover cake tightly covered with plastic wrap or in an airtight container in the refrigerator for up to 3-4 days. The flavors actually deepen over time!
- Freezing Instructions: Is It Possible? (And How to Do It Right). While technically possible, freezing is not recommended for this cake due to the fresh bananas and pudding layers. The texture of the bananas can become mushy, and the pudding may separate upon thawing.
- Best Practices for Leftovers: Maintaining Texture and Flavor. Always keep the cake chilled. If serving leftovers, allow them to sit at room temperature for about 15-20 minutes before serving to take the chill off, which can enhance the flavors.
Banana Pudding Cake FAQs
Can I use fresh bananas instead of slices?
Yes, absolutely! The recipe calls for mashed bananas in the cake batter for moisture and flavor, and then sliced fresh bananas for layering. Using fresh, ripe bananas is essential for the authentic banana pudding experience in this cake.
How do I prevent the cake from being too sweet?
If you’re concerned about sweetness, you can opt for a less sweet whipped cream (homemade with less sugar) instead of a pre-sweetened whipped topping. Also, ensure your bananas are ripe but not overly ripe, as very ripe bananas are sweeter. The balance of the cake, pudding, and wafers is designed to be sweet, but these adjustments can help.
What if my pudding doesn’t set properly?
The most common reasons for pudding not setting are using milk that isn’t cold enough, not whisking long enough, or using an expired pudding mix. Ensure your milk is ice-cold and whisk vigorously for the full 2 minutes. If using homemade pudding, ensure it’s cooked to the correct temperature and chilled thoroughly. Patience during chilling is key!
Can I make this dairy-free?
Yes, you can! Use a dairy-free yellow cake mix (check ingredients), substitute plant-based milk (like almond or soy milk) for the pudding, and use a dairy-free whipped topping or make your own whipped coconut cream. Ensure your vanilla wafers are also dairy-free if needed. See more easy recipes for adapting desserts!
Is this cake suitable for freezing?
While you can freeze the baked cake base on its own, the assembled banana pudding cake with its fresh bananas and pudding layers does not freeze well. The texture of the bananas can become mushy and discolored, and the pudding may separate upon thawing, compromising the overall quality of the dessert.
Delicious Banana Pudding Cake
- Total Time: 29 minute
- Yield: 12-16 servings
Description
This delightful banana pudding cake combines moist vanilla cake with creamy banana pudding layers and crunchy vanilla wafers. It’s a comforting dessert that’s surprisingly easy to make and perfect for any occasion.
Ingredients
- 1 (15.25 oz) box yellow cake mix
- 1 cup water (or as directed on cake mix)
- 1/2 cup vegetable oil (or as directed on cake mix)
- 3 large eggs (or as directed on cake mix)
- 2–3 ripe bananas, mashed (for cake batter)
- 2 (3.4 oz) packages instant vanilla pudding mix
- 4 cups cold milk (whole milk recommended)
- 1 (8 oz) container whipped topping, thawed (or 2 cups heavy cream, whipped)
- 1 (11 oz) box vanilla wafer cookies
- 2–3 ripe bananas, thinly sliced (for layering)
- Optional: 1 tsp lemon juice (for sliced bananas)
Instructions
- Prepare Cake: Preheat oven to 350°F (175°C). Grease and flour a 9×13 inch baking pan. In a large bowl, combine cake mix, water, oil, and eggs. Fold in mashed bananas. Pour batter into prepared pan and bake for 30-35 minutes, or until a wooden skewer comes out clean. Cool completely on a wire rack.
- Make Pudding: In a medium bowl, whisk instant vanilla pudding mix with cold milk for 2 minutes until thickened. Refrigerate for 5-10 minutes to set further.
- Assemble Layers: Once cake is completely cool, spread half of the pudding over the cake. Arrange a single layer of vanilla wafers over the pudding, followed by a layer of thinly sliced bananas (toss with lemon juice if desired to prevent browning).
- Repeat Layers: Spread the remaining pudding over the bananas, then add another layer of vanilla wafers and sliced bananas.
- Top with Whipped Cream: Gently spread the thawed whipped topping (or fresh whipped cream) evenly over the top layer.
- Garnish & Chill: Decorate with additional vanilla wafers and fresh banana slices. Cover and refrigerate for at least 4-6 hours, or preferably overnight, to allow flavors to meld and the cake to set.
- Prep Time: 30 mins
- Cook Time: 30-35 mins