
Table of Contents
- Make Impressive Chocolate Covered Strawberries at Home (Seriously, It’s Easy!)
- Why THIS Chocolate Covered Strawberry Recipe is Your New Go-To
- Ingredients: Quality Matters for the Best Results
- Your Step-by-Step Guide to Perfect Chocolate Covered Strawberries
- Expert Tips for Chocolate Covered Strawberry Success
- Serving Suggestions: What Pairs Well with Chocolate Covered Strawberries
- Storing Your Chocolate Covered Masterpieces
- Chocolate Covered Strawberries FAQ
Imagine biting into a perfectly ripe, juicy strawberry, its natural sweetness bursting forth, immediately followed by the satisfying snap of rich, glossy chocolate that melts luxuriously on your tongue. That, my friends, is the magic of homemade Chocolate Covered Strawberries. Forget those overpriced, sometimes underwhelming store-bought versions – today, we’re going to master the art of crafting these elegant treats right in your own kitchen. It’s easier than you think, and the results are infinitely more rewarding!
Make Impressive Chocolate Covered Strawberries at Home (Seriously, It’s Easy!)
Why bother making your own, you ask? Because the difference in freshness, quality, and sheer satisfaction is monumental! When you make them yourself, you control every ingredient, ensuring the ripest berries and the finest chocolate. Plus, there’s an undeniable joy in presenting a platter of these beauties, knowing you created them with your own hands. It’s a simple pleasure, yes, but one that, with a few expert tips, can be truly mastered.
Why THIS Chocolate Covered Strawberry Recipe is Your New Go-To
- Perfectly Set, Non-Cracking Chocolate: We’ll guide you through the right melting and tempering techniques (don’t worry, it’s simple!) to ensure your chocolate sets beautifully without any unsightly cracks.
- Intense Fruit Flavor, Not Watery: The secret lies in proper preparation of your strawberries, ensuring they’re dry and ready to embrace the chocolate without releasing excess moisture.
- Achieve That Glossy Finish: Learn the tricks to get that professional, mirror-like sheen on your chocolate, making your creations truly Instagram-worthy.
- Handles Well for Gifting or Display: Our method results in sturdy, elegant Chocolate Covered Strawberries that hold up wonderfully, whether you’re arranging them on a dessert table or packaging them as a thoughtful gift.
Ingredients: Quality Matters for the Best Results
Here is what you need and why:
The Right Chocolate Makes All the Difference (And Why): This is not the time for chocolate chips straight from the bag! For the best results, you want high-quality chocolate bars or couverture chocolate. Look for brands with a higher cocoa butter content (around 60-70% for dark, 35-40% for milk, and 28-35% for white). This higher cocoa butter content makes the chocolate melt smoother, set glossier, and gives it that satisfying snap. Chocolate chips often contain stabilizers that prevent them from melting smoothly, leading to a dull, thick coating. My personal favorite is Ghirardelli or Callebaut baking bars.
Choosing Your Strawberries: Size, Ripeness, and Condition: Opt for firm, bright red strawberries with fresh green caps. Medium to large berries work best for dipping, as they provide a good surface area and a substantial bite. Avoid any berries that are bruised, soft, or have mold. The riper they are, the sweeter they’ll be, but ensure they’re not overripe to prevent them from becoming mushy.
Optional: Enhancing Flavors (Coconut Oil, Flavor Extracts): A tiny bit of refined coconut oil (about 1/2 teaspoon per cup of chocolate) can help thin the chocolate slightly and add to the gloss, though it’s not strictly necessary with good quality chocolate. For an extra flavor kick, consider adding a few drops of pure vanilla extract, almond extract, or even a hint of orange zest to your melted chocolate. Just be sure to use oil-based extracts, as water-based ones can cause your chocolate to seize.
Substitutions for Dietary Needs: For dairy-free options, use a high-quality dark chocolate that is naturally dairy-free (check labels!). There are also excellent vegan white and milk chocolate alternatives available. For nut allergies, simply omit any nut toppings.
Your Step-by-Step Guide to Perfect Chocolate Covered Strawberries
Follow these step-by-step photos:
1. Preparation is Key (Washing, Drying, and Why)
Gently wash your strawberries under cool running water, keeping the green caps intact. This prevents water from seeping into the berry. The most crucial step here is drying! Lay them out on a paper towel-lined baking sheet and gently pat each one completely dry. Any moisture on the strawberries will cause your chocolate to seize or create a dull, clumpy coating. Let them air dry for at least 30 minutes, or even longer, to ensure they are bone dry. Room temperature strawberries are also ideal for dipping.
2. Melting Your Chocolate: The Double Boiler Method vs. Microwave (Pros & Cons)
Double Boiler Method (Recommended for best results): This method offers gentle, even heat, reducing the risk of burning or seizing. Place about an inch of water in a saucepan and bring it to a simmer. Place a heatproof bowl (glass or stainless steel) over the saucepan, ensuring the bottom of the bowl does not touch the water. Add your chopped chocolate to the bowl. Stir continuously with a rubber spatula until the chocolate is smooth and completely melted. Remove from heat immediately once melted.
Microwave Method (Quicker, but requires more attention): Place chopped chocolate in a microwave-safe bowl. Microwave on 50% power in 30-second intervals, stirring thoroughly after each interval. Continue until the chocolate is mostly melted, then stir vigorously until completely smooth. Be careful not to overheat, as chocolate can burn quickly in the microwave.
3. The Dipping Technique for Even Coverage
Hold a strawberry by its green cap. Dip it into the melted chocolate, rotating and tilting the bowl as needed to coat about two-thirds to three-quarters of the berry. Gently lift the strawberry, allowing excess chocolate to drip back into the bowl. You can lightly tap your wrist against the edge of the bowl to encourage dripping and create a smooth, even coating. Avoid scraping the bottom of the strawberry against the bowl, as this can create streaks.
4. Decorating Your Creations (Sprinkles, Drizzles, Nuts)
Once dipped, immediately place the strawberry on a parchment paper-lined baking sheet. If you’re adding sprinkles, chopped nuts, or other toppings, do so while the chocolate is still wet. For drizzling, let the first layer of chocolate set slightly, then melt a contrasting color of chocolate (white chocolate is great for this) and use a spoon or a piping bag with a very small hole to drizzle decorative patterns over the set chocolate. Get creative!
5. Allowing Them to Set Properly
Once decorated, place the baking sheet with the dipped strawberries in the refrigerator for about 15-30 minutes, or until the chocolate is completely firm to the touch. Do not leave them in the fridge for too long, as this can cause condensation (sweating) on the chocolate. Once set, they are ready to serve or store.
Expert Tips for Chocolate Covered Strawberry Success
- Temperature Control: Your Best Friend: Keep your melted chocolate at a consistent, warm temperature (around 90-92°F for dark, 86-88°F for milk/white). If it cools too much, it will become too thick to dip smoothly. If it gets too hot, it can burn or become grainy. A double boiler is excellent for maintaining this.
- Preventing Bloom and Cracking: Bloom (a grayish film) and cracking are often due to improper tempering or drastic temperature changes. Using good quality chocolate and allowing it to set at a cool room temperature (if possible) or briefly in the fridge helps. Avoid moving them from a very cold fridge to a very warm room too quickly.
- Achieving the Perfect Chocolate-to-Strawberry Ratio: Don’t overcoat! A thin, even layer of chocolate is more elegant and allows the strawberry’s flavor to shine. Aim for about 2/3 to 3/4 coverage.
- Troubleshooting Common Issues (Seizing, Dull Finish): If your chocolate seizes (becomes thick and clumpy), it’s likely due to a drop of water. Unfortunately, it’s hard to recover. Start fresh. A dull finish often means the chocolate wasn’t tempered correctly or was overheated. Ensure your strawberries are completely dry for a glossy finish.
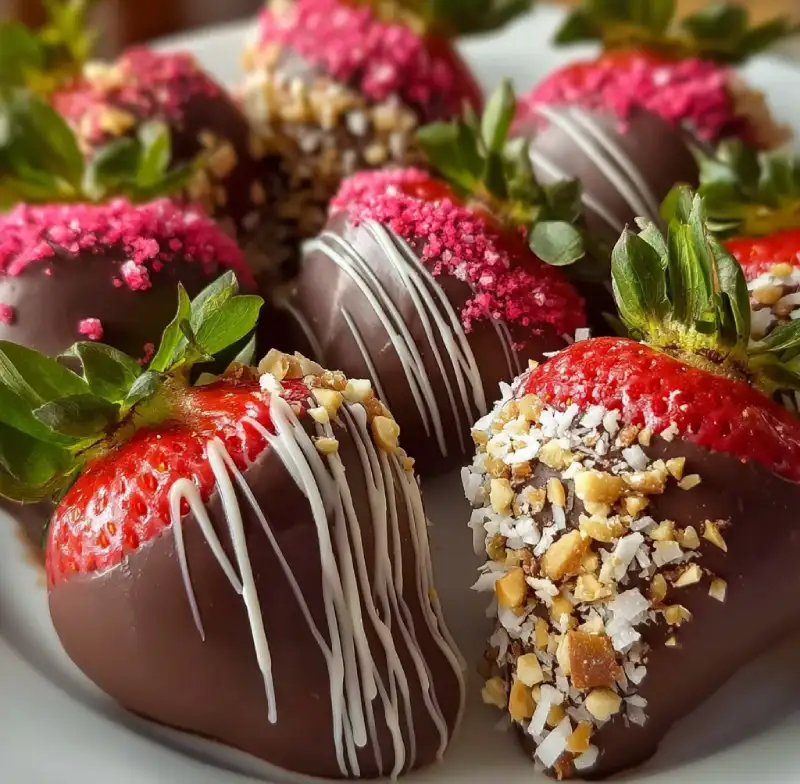
- Creative Decoration Ideas: Beyond sprinkles, consider finely chopped nuts (pistachios, almonds), shredded coconut, mini chocolate chips, edible glitter, or even a contrasting chocolate drizzle. For a truly elegant touch, try edible gold dust!
Serving Suggestions: What Pairs Well with Chocolate Covered Strawberries
These elegant treats are incredibly versatile and perfect for almost any occasion:
- Holiday Entertaining: A platter of Chocolate Covered Strawberries adds a touch of sophistication to any holiday spread, from Valentine’s Day to Christmas.
- Sweet Endings to Any Meal: They make a light yet satisfying dessert after dinner, especially when paired with a glass of sparkling wine or champagne.
- Gift-Giving Inspiration: Arrange them in a decorative box with tissue paper for a thoughtful, homemade gift that’s sure to impress. They’re perfect for birthdays, anniversaries, or just to say ‘thank you.’ See more easy recipes for giftable treats!
Storing Your Chocolate Covered Masterpieces
- Best Practices for Freshness: Store your Chocolate Covered Strawberries in a single layer in an airtight container in the refrigerator. Place a paper towel on the bottom of the container to absorb any excess moisture. They are best enjoyed within 1-2 days for optimal freshness and texture.
- Freezing for Later (If You Must!): While fresh is always best, you can freeze them. Place them in a single layer on a parchment-lined baking sheet and freeze until solid. Then transfer them to an airtight freezer-safe container or bag. Thaw in the refrigerator for a few hours before serving. Note that the texture of the strawberry may be slightly softer after freezing.
- When Not to Refrigerate: If your home is cool (below 70°F) and you plan to serve them within a few hours, you can leave them at room temperature. However, for longer storage or in warmer climates, refrigeration is necessary. Just be mindful of condensation when bringing them out of the cold. For more detailed information on chocolate storage, check out resources like King Arthur Baking’s guide to storing chocolate.
Chocolate Covered Strawberries FAQ
Why does my chocolate seize?
Can I use chocolate chips?
How long do they last?
Can I make them ahead of time?
Why are my strawberries sweating?
Delicious Chocolate Covered Strawberries
- Total Time: 25 minutes
- Yield: 12-16 servings
Description
Indulge in the best flavor of Chocolate Covered Strawberries with our easy-to-follow, step-by-step recipe. Perfect for any occasion, these glossy, rich treats are a simple pleasure to master at home.
Ingredients
- 1 lb (approx. 16-20) fresh, firm strawberries, with green caps intact
- 10–12 oz (280-340g) high-quality chocolate (dark, milk, or white), chopped
- Optional: 1/2 tsp refined coconut oil (for gloss and thinning)
- Optional: Sprinkles, chopped nuts, or contrasting chocolate for decoration
Instructions
- 1. Prepare Strawberries: Gently wash strawberries and pat them completely dry with paper towels. Ensure they are bone dry. Let them air dry for at least 30 minutes at room temperature.
- 2. Melt Chocolate: Using a double boiler method (recommended) or microwave, gently melt the chopped chocolate until smooth. If using, stir in coconut oil.
- 3. Dip Strawberries: Holding a strawberry by its green cap, dip it into the melted chocolate, coating about 2/3 to 3/4 of the berry. Allow excess chocolate to drip off.
- 4. Decorate: Immediately place dipped strawberries on a parchment paper-lined baking sheet. If decorating, add sprinkles or nuts while the chocolate is still wet.
- 5. Set: Refrigerate for 15-30 minutes, or until the chocolate is completely firm. Serve immediately or store as directed.
- Prep Time: 20 mins
- Cook Time: 5 mins