
The Easiest Festive Christmas Cookie Bars Recipe
Table of Contents
- 1. Why You’ll Love These Christmas Cookie Bars
- 2. Gather Your Ingredients: What You’ll Need
- 3. Making Christmas Cookie Bars: A Simple 5-Step Guide
- 4. Tips & Tricks for Perfect Christmas Cookie Bars Every Time
- 5. Variations: Spice Up Your Christmas Cookie Bars
- 6. Storing Your Delicious Christmas Cookie Bars
- 7. Frequently Asked Questions
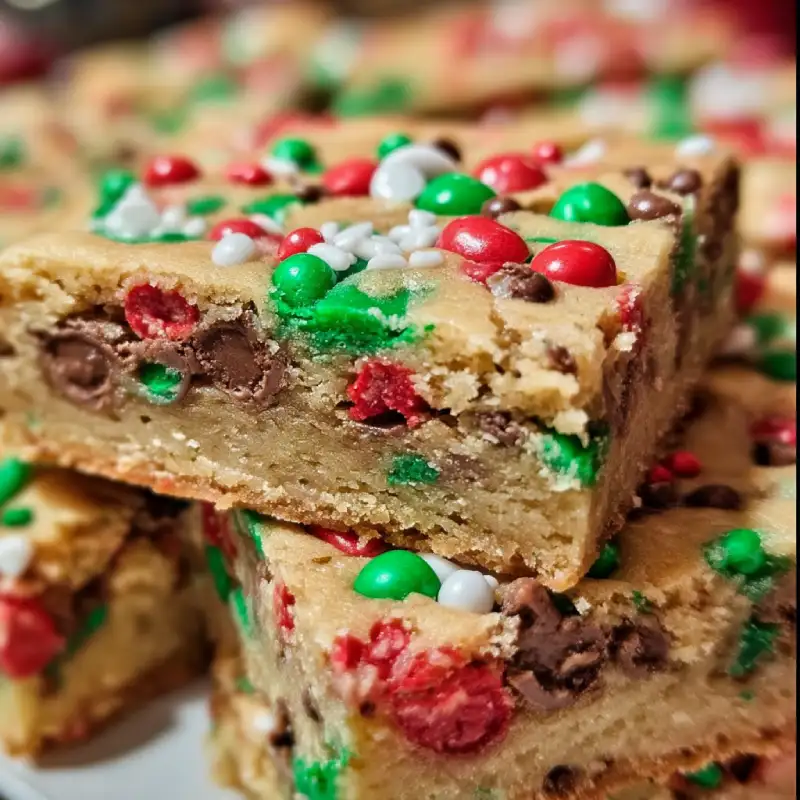
Welcome to your new favorite holiday tradition! If you’re looking for the ultimate no-fuss treat that screams holiday cheer, these Christmas Cookie Bars are your answer. They capture all the buttery, sweet goodness of classic Christmas cookies but without the hassle of chilling, rolling, and cutting out individual shapes. It’s the perfect recipe for busy bakers who still want to deliver show-stopping festive treats.
This recipe is designed to be simple, fun, and incredibly delicious. Just mix, press, bake, and decorate! You get a whole pan of soft, chewy cookie bars, loaded with colorful sprinkles and candies, ready to be sliced and shared. Let’s get baking!
1. Why You’ll Love These Christmas Cookie Bars
There are so many reasons to adore this recipe! First and foremost, it’s incredibly easy. It’s a fantastic recipe for baking with kids or for when you need a quick dessert for a holiday party. The “press-in-pan” method saves a ton of time and effort.
These cookie bars are also wonderfully versatile. You can customize them with your favorite sprinkles, M&M’s, or even chopped nuts. The result is a perfectly soft and chewy bar with a slightly crisp edge—a texture that everyone loves. They are truly one of the best easy Christmas dessert ideas for your holiday baking list.
2. Gather Your Ingredients: What You’ll Need
Before you begin your holiday baking adventure, gather these simple pantry staples. Using high-quality ingredients, especially good butter and vanilla, will make a big difference in the final flavor. Here’s what you need:
- 1 cup (226g) unsalted butter, softened
- 1 1/2 cups (300g) granulated sugar
- 2 large eggs
- 2 teaspoons pure vanilla extract
- 1/2 teaspoon almond extract (optional, but recommended!)
- 2 1/2 cups (300g) all-purpose flour
- 1 teaspoon baking powder
- 1/2 teaspoon salt
- 1 cup mixed red and green Christmas sprinkles, M&M’s, or other festive candies
3. Making Christmas Cookie Bars: A Simple 5-Step Guide
Ready to create some magic? This straightforward process will have a warm pan of delicious cookie bars out of your oven in no time. Follow these steps for perfect results.
3.1. Step 1: Prep & Preheat
First things first, preheat your oven to 350°F (175°C). Prepare a 9×13 inch baking pan by greasing it lightly and lining it with parchment paper, leaving a slight overhang on the sides. This overhang will act as “handles” to easily lift the bars out of the pan later.
3.2. Step 2: Creaming and Mixing the Dough
In a large mixing bowl, using a hand mixer or stand mixer, cream the softened butter and granulated sugar together on medium-high speed until light and fluffy, about 2-3 minutes. Scrape down the sides of the bowl. Beat in the eggs one at a time, followed by the vanilla and almond extracts.
3.3. Step 3: Adding the Christmas Sprinkles & Candies
In a separate bowl, whisk together the all-purpose flour, baking powder, and salt. Gradually add the dry ingredients to the wet ingredients, mixing on low speed until just combined. Be careful not to overmix! Gently fold in 3/4 cup of your Christmas sprinkles and candies, reserving the rest for the top.
3.4. Step 4: Baking to Golden Perfection
Evenly press the cookie dough into your prepared baking pan. An offset spatula or the back of a spoon works well for this. Sprinkle the remaining 1/4 cup of sprinkles and candies over the top. Bake for 22-26 minutes, or until the edges are lightly golden brown and a toothpick inserted into the center comes out with moist crumbs attached. The center should look just set.
3.5. Step 5: Cool, Cut & Enjoy!
Let the Christmas Cookie Bars cool completely in the pan on a wire rack. This is a crucial step! If you try to cut them while warm, they will fall apart. Once fully cooled, use the parchment paper overhang to lift them out of the pan, place on a cutting board, and slice into squares.
4. Tips & Tricks for Perfect Christmas Cookie Bars Every Time
Want to guarantee success? Don’t overbake! The key to a soft and chewy cookie bar is to pull them from the oven when they are just barely done. They will continue to cook in the hot pan as they cool.
Also, make sure your butter is properly softened to room temperature, not melted. This helps create the light, fluffy texture that makes these bars so irresistible. A properly creamed butter and sugar base is the foundation of great homemade cookies.
5. Variations: Spice Up Your Christmas Cookie Bars
The beauty of this recipe is its adaptability. Feel free to get creative! Here are a few ideas to get you started:
- White Chocolate Peppermint: Add 1/2 cup of white chocolate chips to the dough and top with crushed candy canes after baking.
- Holiday Spice: Mix in 1/2 teaspoon of cinnamon and a pinch of nutmeg with your dry ingredients for a warmer flavor profile.
- Chocolate Chip: Can’t go wrong with a classic! Add 1 cup of semi-sweet or milk chocolate chips to the dough.
For more inspiration on festive baking, you can See others recipes here !
6. Storing Your Delicious Christmas Cookie Bars
Your freshly baked Christmas Cookie Bars will stay fresh and delicious for days if stored properly. Keep them in an airtight container at room temperature for up to 5 days. You can place a slice of bread in the container to help keep them soft.
These bars also freeze wonderfully. Simply cut them into squares, wrap them individually or separate layers with wax paper in a freezer-safe container, and freeze for up to 3 months. Thaw at room temperature before enjoying.
7. Frequently Asked Questions
Can I make the dough for these Christmas Cookie Bars ahead of time?
Absolutely! You can prepare the cookie dough, press it into your prepared pan, cover it tightly with plastic wrap, and refrigerate for up to 2 days before baking. You may need to add a few extra minutes to the baking time since you’ll be starting with a chilled dough.
What are the best types of sprinkles to use?
For the best results, we recommend using jimmies (the long, skinny sprinkles) or nonpareils (the tiny balls). They hold their color and shape well during baking. Avoid using colored sanding sugar in the dough, as it tends to dissolve and can change the color of your cookie bars, but it’s great for sprinkling on top before baking!
How do I know when the cookie bars are perfectly baked?
The visual cues are key. The edges should be a light golden brown, and the center should look puffy and just set—it shouldn’t look wet or jiggly. A toothpick inserted into the center should come out with a few moist crumbs attached, not wet batter. It’s always better to slightly underbake than overbake for the chewiest texture.