
Table of Contents
- Why You’ll Love These Creamy Oven Baked Chicken Thighs
- Ingredients and Smart Substitutions: Beyond the List
- Step-by-Step: Your Visual Guide to Perfect Creamy Chicken Thighs
- Expert Tips for Success: Don’t Skip These!
- What to Serve With Your Creamy Chicken Thighs
- Storing and Reheating Your Creamy Chicken Thighs
- Creamy Oven Baked Chicken Thighs: Your Questions Answered
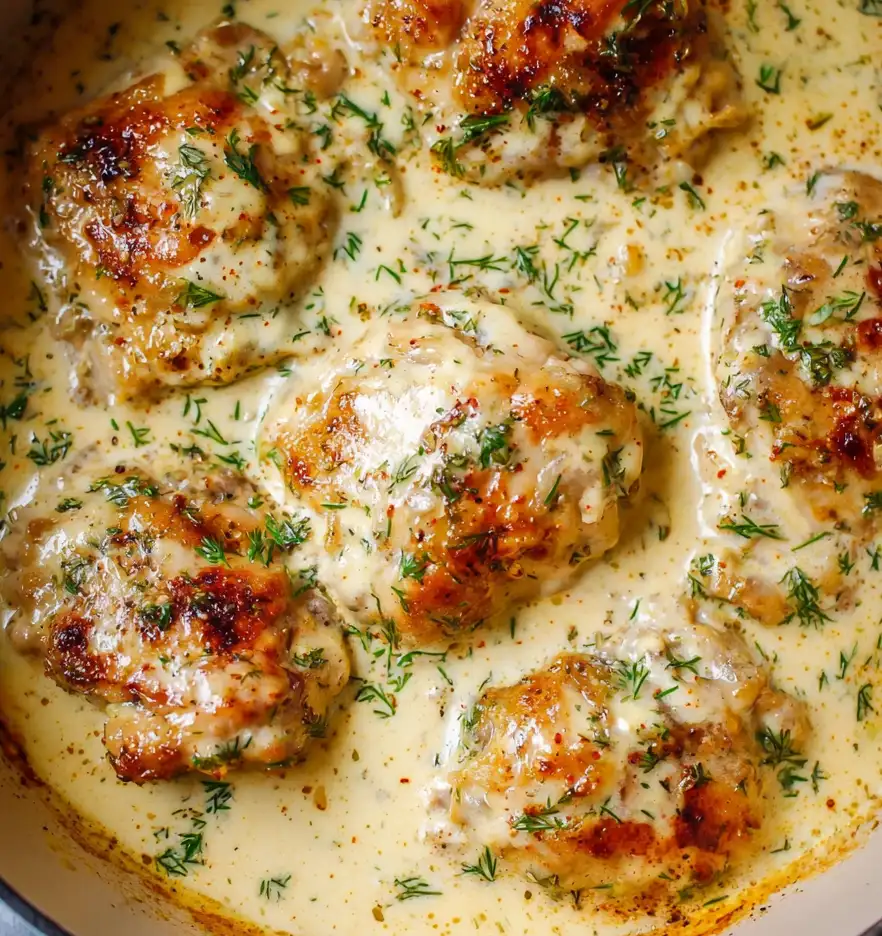
Prepare to have your dinner routine revolutionized! Imagine sinking your teeth into incredibly Creamy Oven Baked Chicken Thighs – chicken so tender it practically melts in your mouth, encased in a perfectly crispy skin, all swimming in a rich, savory, and utterly irresistible cream sauce. This isn’t just a meal; it’s a culinary experience that delivers on both comfort and gourmet flavor, all with surprisingly little effort. Get ready to discover your new favorite weeknight hero!
Why You’ll Love These Creamy Oven Baked Chicken Thighs
- Crispy Skin, Juicy Interior: We’ll unlock the secret to achieving that coveted golden-brown, crackling skin while ensuring the meat underneath remains incredibly moist and flavorful. No dry chicken here!
- Effortless Creamy Sauce: The magic happens right in your pan! This recipe builds a luxurious, velvety sauce directly from the pan drippings, meaning less cleanup and maximum flavor infusion.
- Versatile and Family-Friendly: Whether you’re feeding a crowd or enjoying a quiet dinner, these Creamy Oven Baked Chicken Thighs are a guaranteed hit. They pair beautifully with a variety of sides and are simple enough for any home cook.
- One-Pan Wonder: From searing to baking, this dish largely comes together in a single oven-safe skillet, minimizing dishes and maximizing your enjoyment.
Ingredients and Smart Substitutions: Beyond the List
Here is what you need and why:
Bone-in, Skin-on Chicken Thighs: These are the stars of our show! Bone-in thighs cook more evenly and stay juicier than boneless, while the skin renders down to create that glorious crispiness and adds a tremendous amount of flavor to our sauce. Don’t be tempted to remove the skin – it’s essential for this recipe’s success!
Heavy Cream: This is the foundation of our luscious sauce. Its high fat content prevents curdling and creates a wonderfully rich texture. For a slightly lighter option, you could try half-and-half, but the sauce won’t be quite as decadent. Avoid milk, as it’s more prone to curdling under heat.
Chicken Broth: Unsalted or low-sodium chicken broth is your best friend here. It adds depth of flavor without making the dish overly salty, allowing you to control the seasoning precisely. Vegetable broth can be used as a substitute if needed.
Garlic: Freshly minced garlic is non-negotiable for its pungent, aromatic kick. If you’re in a pinch, garlic powder can work, but use about 1/2 teaspoon for every clove of fresh garlic.
Herbs (Fresh vs. Dried): Fresh herbs like thyme, rosemary, or parsley elevate the dish significantly. If using dried, remember that dried herbs are more concentrated, so use about 1/3 the amount of fresh. A sprinkle of dried Italian seasoning can also be a great shortcut.
Seasoning Essentials: Salt and Freshly Ground Black Pepper: These are the bedrock of all good cooking. Season generously! For an extra flavor kick, consider adding a pinch of smoked paprika for warmth and color, or a touch of onion powder to complement the garlic.
Olive Oil: For searing the chicken. A good quality extra virgin olive oil will add a subtle fruity note, but any neutral cooking oil with a high smoke point will work.
Step-by-Step: Your Visual Guide to Perfect Creamy Chicken Thighs
Follow these simple steps to achieve culinary perfection:
1. Prep Like a Pro: Seasoning and Searing
Pat your chicken thighs thoroughly dry with paper towels – this is crucial for crispy skin! Season both sides generously with salt, pepper, and any additional spices like paprika or onion powder. Heat a large, oven-safe skillet (cast iron works wonderfully) over medium-high heat with a tablespoon of olive oil. Once shimmering, place the chicken thighs skin-side down in the hot pan. Sear for 6-8 minutes without moving them, until the skin is deeply golden brown and crispy. Flip and sear for another 2-3 minutes on the other side. Remove the chicken from the pan and set aside.
2. Building the Sauce: Deglazing and Creating Richness
Reduce the heat to medium. Add the minced garlic to the pan drippings and cook for about 30 seconds until fragrant, being careful not to burn it. Pour in the chicken broth, scraping up all those delicious browned bits from the bottom of the pan with a wooden spoon – this is called deglazing and it’s where a ton of flavor comes from! Let it simmer for 2-3 minutes to reduce slightly. Stir in the heavy cream and your chosen fresh or dried herbs. Bring the sauce to a gentle simmer, then reduce the heat to low.
3. Baking for Perfection: Temperature and Timing
Nestle the seared chicken thighs back into the skillet, skin-side up, ensuring they are partially submerged in the creamy sauce but the skin remains exposed. Transfer the skillet to a preheated oven at 375°F (190°C). Bake for 20-25 minutes, or until the chicken reaches an internal temperature of 175°F (80°C) when measured with an instant-read thermometer inserted into the thickest part of the thigh, avoiding the bone. The skin should be beautifully crisp and golden.
4. The Rest is Best: Why Letting It Sit Makes All the Difference
Once baked, remove the skillet from the oven. Loosely tent the chicken with foil and let it rest for 5-10 minutes. This resting period allows the juices to redistribute throughout the meat, resulting in incredibly tender and moist chicken. While the chicken rests, the sauce will also thicken slightly. Give the sauce a gentle stir before serving.
Expert Tips for Success: Don’t Skip These!
- Don’t Crowd the Pan: When searing the chicken, ensure there’s enough space between each thigh. If the pan is too crowded, the chicken will steam instead of sear, preventing that desirable crispy skin. Work in batches if necessary.
- Monitor Internal Temperature: The ultimate guide to perfectly cooked chicken is an instant-read thermometer. For chicken thighs, aim for 175°F (80°C). This ensures they are safe to eat and perfectly juicy.
- Adjusting Sauce Consistency: If your sauce is too thin, you can simmer it gently on the stovetop for a few extra minutes to reduce and thicken. If it’s too thick, add a splash more chicken broth until it reaches your desired consistency.
- Refrigerating and Freezing: These Creamy Oven Baked Chicken Thighs make fantastic leftovers! Store them in an airtight container in the refrigerator for up to 3-4 days. For longer storage, freeze the chicken and sauce separately in freezer-safe containers for up to 2-3 months.
- Use an Oven-Safe Skillet: A cast-iron skillet or any other oven-safe pan is essential for this recipe, as it transitions directly from stovetop to oven.
What to Serve With Your Creamy Chicken Thighs
These Creamy Oven Baked Chicken Thighs are incredibly versatile and pair beautifully with a variety of sides:
- Starchy Sides: Creamy mashed potatoes are a classic for soaking up every last drop of that delicious sauce. Fluffy white rice or even a simple pasta like fettuccine or penne also work wonderfully.
- Green Goodness: Balance the richness with some vibrant vegetables. Roasted asparagus, steamed broccoli, green beans almondine, or a simple side salad with a light vinaigrette are all excellent choices.
- Crusty Bread: Don’t forget a good loaf of crusty bread or garlic bread! It’s perfect for mopping up all that incredible creamy sauce.
Storing and Reheating Your Creamy Chicken Thighs
Making the most of your delicious leftovers is easy!
- Refrigerator Storage: Allow the chicken and sauce to cool completely before transferring them to an airtight container. Store in the refrigerator for up to 3-4 days.
- Reheating Methods: To reheat, gently warm the chicken and sauce in a skillet over medium-low heat on the stovetop, adding a splash of chicken broth or cream if the sauce seems too thick. You can also reheat in the oven at 300°F (150°C) until warmed through, covering with foil to prevent drying out. Avoid microwaving if possible, as it can sometimes make the chicken rubbery and the sauce separate.
Creamy Oven Baked Chicken Thighs: Your Questions Answered
Can I use boneless, skinless thighs?
How do I prevent the sauce from curdling?
What can I do if my sauce is too thin or too thick?
Can I make this recipe ahead of time?
I hope you enjoy these incredible Creamy Oven Baked Chicken Thighs as much as my family does! For more delicious and easy recipes, be sure to See more easy recipes on my blog!
Creamy Oven Baked Chicken Thighs
- Total Time: 45 minutes
- Yield: 4 servings
Description
Indulge in perfectly crispy-skinned, juicy chicken thighs bathed in a rich, savory cream sauce. This one-pan wonder is easy to make and delivers gourmet flavor every time.
Ingredients
- 4 bone-in, skin-on chicken thighs
- 1 tbsp olive oil
- 1 tsp salt, or to taste
- 1/2 tsp freshly ground black pepper, or to taste
- 1/2 tsp smoked paprika (optional)
- 1/4 tsp onion powder (optional)
- 3 cloves garlic, minced
- 1 cup chicken broth (low sodium preferred)
- 1/2 cup heavy cream
- 1 tbsp fresh thyme or 1 tsp dried thyme
- Fresh parsley, chopped, for garnish (optional)
Instructions
- Step 1: Prepare and Sear Chicken. Pat chicken thighs dry. Season generously with salt, pepper, paprika, and onion powder. Heat olive oil in a large oven-safe skillet over medium-high heat. Sear chicken skin-side down for 6-8 minutes until deeply golden and crispy. Flip and sear for 2-3 minutes on the other side. Remove chicken and set aside.
- Step 2: Build the Creamy Sauce. Reduce heat to medium. Add minced garlic to the pan and cook for 30 seconds until fragrant. Pour in chicken broth, scraping up any browned bits from the bottom of the pan. Simmer for 2-3 minutes to reduce slightly. Stir in heavy cream and thyme. Bring to a gentle simmer, then reduce heat to low.
- Step 3: Bake to Perfection. Return chicken thighs to the skillet, skin-side up, nestling them into the sauce. Transfer the skillet to a preheated oven at 375°F (190°C). Bake for 20-25 minutes, or until the internal temperature of the chicken reaches 175°F (80°C).
- Step 4: Rest and Serve. Remove from oven, tent loosely with foil, and let rest for 5-10 minutes. This allows juices to redistribute. Stir the sauce gently before serving. Garnish with fresh parsley if desired.
- Prep Time: 15 mins
- Cook Time: 30 mins