


Table of Contents
- Bake the Perfect Easy Madeira Cakes Every Time
- Why This Recipe Works
- Essential Ingredients for Your Easy Madeira Cakes (and Why They Matter)
- Your Step-by-Step Guide to Flawless Easy Madeira Cakes
- Expert Tips for Madeira Cake Success
- Serving Suggestions for Your Easy Madeira Cakes
- Storing and Reheating Your Madeira Cakes
- Frequently Asked Questions About Easy Madeira Cakes
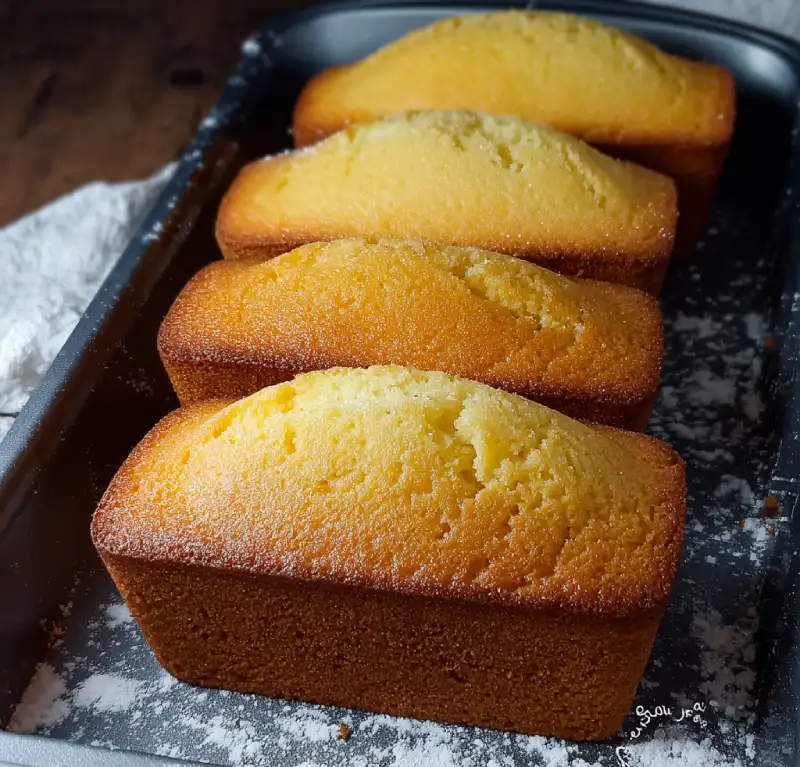
Welcome, fellow baking enthusiasts! Today, we’re diving into the delightful world of Easy Madeira Cakes – a true classic that promises a wonderfully firm yet tender crumb, a delicate lemon aroma, and a buttery richness that simply melts in your mouth. Forget dry, crumbly cakes; this recipe delivers a moist, perfectly balanced treat that’s robust enough to hold its shape, yet light enough to be utterly irresistible. Get ready to bake a cake that will become a staple in your kitchen!
Bake the Perfect Easy Madeira Cakes Every Time
The Madeira cake, often mistaken for a simple sponge, holds a unique place in the baking pantheon. It’s traditionally served with a glass of Madeira wine, hence its name, and is renowned for its slightly denser, yet incredibly moist texture compared to a typical sponge. Our Easy Madeira Cakes recipe is designed to demystify this classic, making it accessible for bakers of all skill levels.
Why This Madeira Cake Recipe Stands Out
This isn’t just another cake recipe; it’s the recipe for consistently perfect Easy Madeira Cakes. We focus on techniques that ensure a beautiful rise, a golden crust, and that signature close-textured crumb. It’s a cake that’s comforting in its simplicity but sophisticated in its flavor profile.
What Makes This Madeira Cake Recipe So Easy?
We’ve streamlined the process without sacrificing quality. From clear, concise instructions to emphasizing the importance of room temperature ingredients, every step is designed for success. You won’t find any overly complicated methods here, just straightforward baking that yields spectacular results.
The Magic Behind the Perfect Madeira Cake Texture
The secret lies in the balance of ingredients and the creaming method. This creates a cake that is substantial enough to slice cleanly, yet still possesses a delightful tenderness. It’s a cake that feels substantial, but never heavy, making it ideal for any occasion.
Why This Recipe Works
- Foolproof Method: Our step-by-step guide ensures success even for novice bakers.
- Perfect Texture: Achieves that signature firm yet tender crumb every time.
- Versatile Base: Delicious on its own, or a fantastic foundation for trifles and other desserts.
- Simple Ingredients: Uses common pantry staples, making it accessible and budget-friendly.
Essential Ingredients for Your Easy Madeira Cakes (and Why They Matter)
Here is what you need and why:
Flour Choice: The Foundation of Structure: For our Easy Madeira Cakes, I recommend using good quality all-purpose flour. Its protein content provides the necessary structure to hold the cake’s shape, giving it that characteristic firm crumb without being overly dense. While cake flour can be used for a lighter result, all-purpose flour truly delivers the traditional Madeira texture.
Butter vs. Margarine: Flavor and Texture Impact: Unsalted butter is my absolute preference here. Its rich, creamy flavor is paramount to the taste of a classic Madeira cake. Butter also contributes to a tender crumb and a beautiful golden crust. While margarine can be used, it often lacks the depth of flavor and can sometimes result in a slightly different texture. Always use room temperature butter for optimal creaming!
Sugar: Sweetness and Moisture: Granulated sugar not only provides sweetness but also plays a crucial role in the cake’s moisture and texture. When creamed with butter, it creates tiny air pockets, contributing to the cake’s rise and tender crumb. It also helps keep the cake moist by attracting and holding onto water.
Eggs: Binding and Leavening Power: Large eggs act as both a binder and a leavening agent. They emulsify the batter, bringing all the ingredients together, and when beaten, they incorporate air, which helps the cake rise and achieve its light structure. Again, room temperature eggs are key for a smooth, emulsified batter.
Lemon Zest (Optional but Recommended): A Flavor Brightener: A little finely grated lemon zest is the secret ingredient that elevates these Easy Madeira Cakes from good to extraordinary. It adds a bright, fragrant note that beautifully complements the buttery richness without overpowering it. Don’t skip it if you have a fresh lemon on hand!
Your Step-by-Step Guide to Flawless Easy Madeira Cakes
Follow these step-by-step photos:
1. Prep Your Ingredients and Tin
Before you even think about mixing, ensure all your ingredients (butter, eggs) are at room temperature. This is crucial for a smooth, emulsified batter. Preheat your oven to 160°C (325°F) and grease and line a 20cm (8-inch) round cake tin with baking parchment. A well-prepared tin prevents sticking and ensures an even bake.
2. Cream Butter and Sugar
In a large mixing bowl, cream together the softened butter and granulated sugar until the mixture is pale, light, and fluffy. This step incorporates air, which is vital for the cake’s texture and rise. Scrape down the sides of the bowl frequently to ensure everything is evenly combined. This should take about 3-5 minutes with an electric mixer.
3. Incorporate Eggs Gradually
Add the room temperature eggs one at a time, beating well after each addition until fully incorporated. If the mixture looks like it’s curdling, add a tablespoon of the flour with the next egg. The goal is a smooth, emulsified batter. Stir in the lemon zest at this stage.
4. Fold in Flour Gently
Sift the self-raising flour into the wet ingredients. Using a large metal spoon or spatula, gently fold the flour into the batter until just combined. Be careful not to overmix, as this can develop the gluten too much, resulting in a tough cake. A few streaks of flour are better than an overmixed batter.
5. Bake to Perfection
Pour the batter into your prepared cake tin and gently level the top. Bake in the preheated oven for 50-60 minutes, or until a wooden skewer inserted into the center comes out clean. The cake should be golden brown on top and spring back when lightly pressed. If it’s browning too quickly, you can loosely cover it with foil.
6. Cool Completely
Once baked, remove the cake from the oven and let it cool in the tin for about 10-15 minutes before turning it out onto a wire rack to cool completely. Cooling completely is essential before slicing to allow the cake’s structure to set properly. Patience truly pays off here!
Expert Tips for Madeira Cake Success
- Don’t Overmix: The Enemy of a Light Crumb: Once you add the flour, mix only until just combined. Overmixing develops gluten, leading to a tough, chewy cake rather than the desired tender crumb.
- Room Temperature Ingredients: Why It’s Crucial: Softened butter and room temperature eggs emulsify much better, creating a smoother, more stable batter that traps air effectively, leading to a lighter cake.
- Testing for Doneness: The Skewer Trick: Always insert a wooden skewer or toothpick into the center of the cake. If it comes out clean, your cake is done. If there’s wet batter, give it a few more minutes.
- Troubleshooting Common Madeira Cake Issues: What Went Wrong?: If your cake is dry, you might have overbaked it or used too much flour. If it’s sunken in the middle, it could be underbaked, the oven door was opened too early, or too much leavening agent was used.
- Accurate Measuring: Baking is a science! Use kitchen scales for flour and sugar for the most accurate results.
Serving Suggestions for Your Easy Madeira Cakes
Classic Tea Pairing Ideas
The beauty of Easy Madeira Cakes lies in their simplicity, making them the perfect accompaniment to a classic cup of tea. A robust English Breakfast or a delicate Earl Grey would be delightful. For a truly traditional experience, serve thin slices with a glass of Madeira wine. For more baking inspiration, see more easy recipes on our site!
Dessert Enhancements: Fruit and Cream
While delicious on its own, Madeira cake can be elevated with simple additions. A dollop of freshly whipped cream and a scattering of fresh berries (strawberries, raspberries, or blueberries) add a lovely freshness and visual appeal. A light lemon glaze or a dusting of icing sugar also works wonderfully.
Madeira Cake as a Base: Trifle and More
Its firm texture makes Madeira cake an excellent base for other desserts. It’s superb in a classic trifle, soaking up fruit juices and custard beautifully. You can also use it for individual dessert cups, layered with fruit compote and yogurt, or even as a sturdy base for a fruit tart.
Storing and Reheating Your Madeira Cakes
Keeping Your Cake Fresh: Airtight Storage
To keep your Easy Madeira Cakes at their best, store them in an airtight container at room temperature. This will prevent them from drying out and keep them fresh for up to 3-4 days. Avoid refrigerating, as this can dry out the cake.
Freezing for Later: Long-Term Solutions
Madeira cake freezes exceptionally well! Once completely cooled, wrap the whole cake or individual slices tightly in plastic wrap, then in aluminum foil. It can be frozen for up to 3 months. Thaw overnight in the refrigerator or at room temperature for a few hours.
Gentle Reheating Techniques
While typically enjoyed at room temperature, a slice of Madeira cake can be gently warmed in the microwave for 10-15 seconds for a ‘just baked’ feel. Be careful not to overheat, as this can make it dry. Alternatively, you can warm it briefly in a low oven (150°C/300°F) for about 5-7 minutes.
Frequently Asked Questions About Easy Madeira Cakes
Can I make this recipe gluten-free?
What’s the difference between Madeira cake and sponge cake?
Why is my Madeira cake dry?
Can I add raisins or other fruits?
How long does Madeira cake last?
Easy Madeira Cakes
- Total Time: 41 minute
- Yield: 8-10 servings
Description
Bake a classic, wonderfully firm yet tender Madeira cake with a delicate lemon aroma. This easy-to-follow recipe guarantees a moist, perfectly balanced treat every time.
Ingredients
- 200g (7 oz) unsalted butter, softened
- 200g (7 oz) granulated sugar
- 3 large eggs, room temperature
- 250g (9 oz) self-raising flour, sifted
- Zest of 1 lemon (optional, but recommended)
- Pinch of salt
Instructions
- 1. Prepare: Preheat oven to 160°C (325°F). Grease and line a 20cm (8-inch) round cake tin. Ensure all ingredients are at room temperature.
- 2. Cream: In a large bowl, cream softened butter and sugar until pale and fluffy (3-5 minutes with an electric mixer).
- 3. Add Eggs: Beat in eggs one at a time, incorporating fully after each. Stir in lemon zest.
- 4. Fold: Gently fold in the sifted self-raising flour until just combined. Do not overmix.
- 5. Bake: Pour batter into the prepared tin. Bake for 50-60 minutes, or until a skewer inserted into the center comes out clean.
- 6. Cool: Let cool in the tin for 10-15 minutes, then transfer to a wire rack to cool completely before slicing.
- Prep Time: 15 mins
- Cook Time: 50-60 mins