
Are you tired of gluten-free pancakes that taste like cardboard or fall flat faster than a deflating balloon? Do you dream of light, airy, and truly fluffy pancakes that rival their gluten-filled counterparts? Well, my friend, your search ends here! As an expert food blogger and a passionate home baker, I’ve spent countless hours in my kitchen, experimenting, tweaking, and tasting, all to bring you the ultimate recipe for fluffy gluten-free pancakes. Prepare to have your breakfast world rocked!
Table of Contents
- Stop Settling for Dense Gluten-Free Pancakes: This Recipe Changes Everything
- Why This Recipe Delivers Truly Fluffy Pancakes
- Ingredients Explained: The ‘Why’ Behind Each Choice
- Step-by-Step: Your Guide to Perfect Fluffy Gluten-Free Pancakes
- Expert Tips for Gluten-Free Pancake Success
- What to Serve with Your Fluffy Gluten-Free Pancakes
- Storing and Reheating Your Pancakes
- Fluffy Gluten-Free Pancakes: Your Questions Answered
Stop Settling for Dense Gluten-Free Pancakes: This Recipe Changes Everything
My journey to the perfect gluten-free pancake has been a long and, at times, frustrating one. For years, I struggled with recipes that promised fluffiness but delivered hockey pucks. The texture was always off – either too gummy, too crumbly, or just plain heavy. I refused to believe that going gluten-free meant sacrificing the joy of a truly light and airy pancake breakfast. So, I embarked on a mission.
What makes this recipe different (and better)? It’s a culmination of understanding the science behind gluten-free baking, meticulous ingredient selection, and a few key techniques that ensure maximum loft and tenderness. We’re not just swapping out flour; we’re building a pancake from the ground up to be inherently light and delicious, without any compromise on flavor or texture. This isn’t just a recipe; it’s a revelation for anyone who loves pancakes but needs them to be gluten-free.
Why This Recipe Delivers Truly Fluffy Pancakes
- Achieving light texture without gluten: We utilize a specific blend of leavening agents and a crucial resting period for the batter, allowing the starches to fully hydrate and create a structure that traps air, resulting in an incredibly light crumb.
- Flavor profile: balanced and satisfying: This recipe focuses on a balanced sweetness that complements, rather than overwhelms, the subtle notes of vanilla and butter. Each bite is satisfyingly rich without being heavy.
- Consistency: thick, spreadable batter, even browning: The batter is designed to be thick enough to hold its shape on the griddle, yet spreadable for perfect circles. This consistency, combined with the right fat, ensures beautiful, even golden-brown pancakes every time.
- Uses melted butter for moisture: Melted butter not only adds incredible flavor but also contributes to the tender texture, ensuring your pancakes are moist and never dry.
Ingredients Explained: The ‘Why’ Behind Each Choice
Here is what you need and why:
Gluten-Free Flour Blend: This is the cornerstone of our fluffy gluten-free pancakes. I highly recommend using a good quality, all-purpose gluten-free flour blend that contains xanthan gum. Brands like King Arthur Baking’s Gluten-Free Measure for Measure Flour or Bob’s Red Mill 1-to-1 Baking Flour work wonderfully. The blend of different flours (rice, tapioca, potato) provides the necessary structure and tenderness that gluten usually offers, while xanthan gum acts as a binder, preventing crumbling.
Leavening Agents: Baking powder and soda for loft: We use both baking powder and baking soda. Baking powder provides the initial lift, while baking soda reacts with the buttermilk (or acidic milk substitute) to create additional carbon dioxide bubbles, ensuring maximum fluffiness and a tender crumb. Don’t skip either!
Sugar: Sweetness and browning: A touch of granulated sugar not only adds a pleasant sweetness but also aids in browning, giving your pancakes those beautiful golden edges. It also helps keep them moist.
Eggs: Binding and richness: Eggs are crucial for binding the ingredients together, providing structure, and adding richness to the batter. They also contribute to the overall tenderness and help create that desirable fluffy texture.
Milk: Moisture and texture (dairy/non-dairy options): Buttermilk is my top choice for its acidity, which reacts with the baking soda for extra lift and a subtle tang. If you don’t have buttermilk, you can make your own by adding 1 tablespoon of lemon juice or white vinegar to regular milk and letting it sit for 5 minutes. For dairy-free, unsweetened almond milk or oat milk with a tablespoon of apple cider vinegar works perfectly.
Fat: Melted butter for flavor and tenderness: Melted unsalted butter adds incredible flavor and richness, contributing to a tender, moist pancake. If dairy-free, use melted vegan butter or a neutral oil like avocado oil.
Step-by-Step: Your Guide to Perfect Fluffy Gluten-Free Pancakes
Follow these step-by-step instructions to achieve pancake perfection:
1. Prepare Your Dry Ingredients
In a large bowl, whisk together your gluten-free flour blend, sugar, baking powder, baking soda, and salt. Sifting the dry ingredients is highly recommended, especially for gluten-free flours, to ensure there are no lumps and everything is evenly distributed. This step is key for consistent texture in your fluffy gluten-free pancakes.
2. Combine Wet Ingredients
In a separate medium bowl, whisk together the buttermilk (or milk substitute), eggs, and melted butter until well combined. Ensure the melted butter isn’t too hot, as it can scramble the eggs. A gentle mix is all you need here.
3. Merge Wet and Dry: Avoid Overmixing
Pour the wet ingredients into the dry ingredients. Using a whisk or a spatula, mix just until combined. A few lumps are perfectly fine and even desirable! Overmixing develops any gluten present (even in GF flours, some blends have trace amounts or can become gummy), leading to tough pancakes. Stop mixing as soon as you no longer see streaks of dry flour.
4. Rest the Batter: Why it’s Crucial for Gluten-Free
Cover the bowl with plastic wrap and let the batter rest at room temperature for 10-15 minutes. This step is absolutely crucial for gluten-free pancakes! It allows the starches in the gluten-free flour to fully hydrate, resulting in a thicker batter and a much lighter, fluffier end product. Don’t skip this!
5. Cook on the Griddle
Heat a lightly oiled griddle or non-stick pan over medium heat. You want it hot enough that a drop of water sizzles, but not smoking. Pour about 1/4 cup of batter per pancake onto the griddle. Cook for 2-3 minutes per side, or until bubbles appear on the surface and the edges look set. Flip carefully with a thin spatula and cook for another 1-2 minutes until golden brown and cooked through. Maintain consistent temperature throughout cooking for best results.
Expert Tips for Gluten-Free Pancake Success
- Don’t overmix: Lumps are okay! Seriously, resist the urge to whisk until smooth. A slightly lumpy batter is a happy batter for fluffy gluten-free pancakes.
- Proper batter consistency: Adjusting with milk. After resting, your batter should be thick but pourable. If it seems too thick, add a tablespoon or two of milk (dairy or non-dairy) until it reaches the right consistency.
- The importance of a hot griddle. A properly heated griddle ensures even cooking and that beautiful golden-brown crust. Too cool, and they’ll be pale and dense; too hot, and they’ll burn before cooking through.
- Knowing when to flip. Look for bubbles forming on the surface and the edges starting to set and look dry. This is your cue!
- Keeping pancakes warm. To keep your pancakes warm while you cook the rest, place them on a baking sheet in a single layer in a preheated oven at 200°F (95°C).
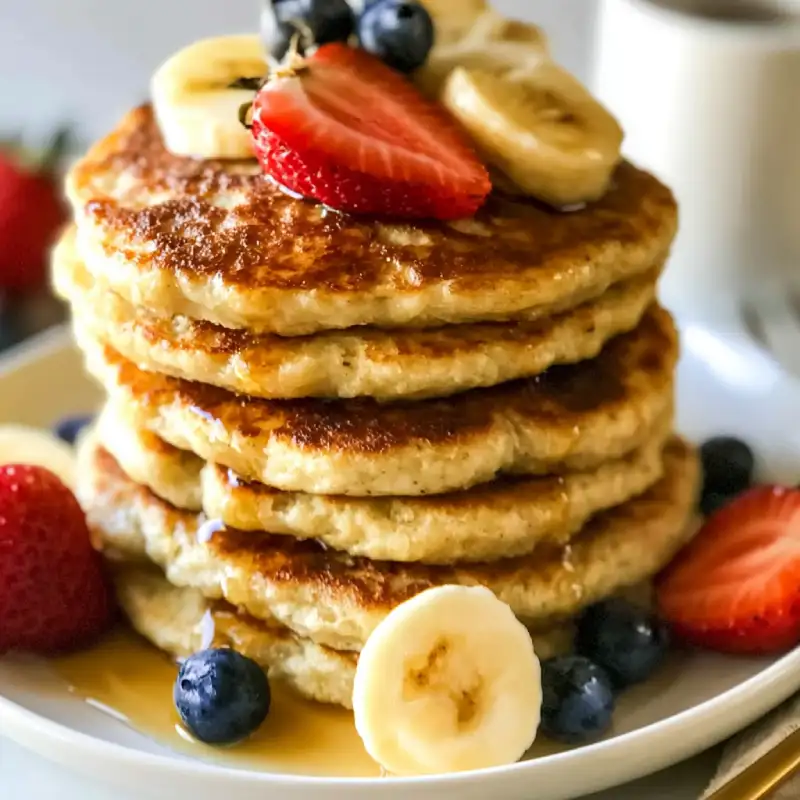
What to Serve with Your Fluffy Gluten-Free Pancakes
These fluffy gluten-free pancakes are a canvas for deliciousness! Here are some ideas:
- Classic maple syrup and fresh fruit: A drizzle of pure maple syrup and a handful of fresh berries (strawberries, blueberries, raspberries) is always a winner.
- Savory options: bacon or sausage: For a hearty breakfast, pair your pancakes with crispy bacon or savory breakfast sausage. The sweet and salty combination is irresistible.
- Creative toppings: whipped cream, compotes, nuts: Elevate your pancakes with homemade whipped cream, a warm fruit compote (berry or apple), a sprinkle of chopped nuts (pecans, walnuts), or even a dollop of Greek yogurt.
Storing and Reheating Your Pancakes
Made too many? No problem! These fluffy gluten-free pancakes store and reheat beautifully, making them perfect for meal prep.
- Best practices for refrigeration: Allow pancakes to cool completely. Store them in an airtight container or a resealable bag in the refrigerator for up to 3-4 days. Place parchment paper between layers to prevent sticking.
- Freezing for future breakfasts: For longer storage, flash freeze cooled pancakes in a single layer on a baking sheet until solid (about 30 minutes). Then transfer them to a freezer-safe bag or container, again with parchment paper between layers. They’ll keep for up to 2-3 months.
- Reheating methods: microwave, oven, toaster:
- Microwave: Reheat individual pancakes for 30-60 seconds until warm.
- Oven: Place frozen or refrigerated pancakes on a baking sheet and warm in a preheated oven at 350°F (175°C) for 5-10 minutes, or until heated through.
- Toaster: For a crispy edge, pop individual pancakes into a toaster or toaster oven until warm and lightly browned.
Fluffy Gluten-Free Pancakes: Your Questions Answered
Can I make this dairy-free?
What’s the best gluten-free flour blend?
Why are my pancakes falling flat?
Can I add mix-ins like chocolate chips or blueberries?
Fluffy Gluten-Free Pancakes
- Total Time: 35 minutes
- Yield: 8-10 pancakes (2-3 servings)
Description
Discover the best fluffy gluten-free pancakes recipe! Our step-by-step guide makes it easy to bake these delicious pancakes with the best flavor.
Ingredients
- 1 ½ cups (180g) gluten-free all-purpose flour blend (with xanthan gum)
- 2 tablespoons granulated sugar
- 1 tablespoon baking powder
- ½ teaspoon baking soda
- ½ teaspoon salt
- 1 ¼ cups (300ml) buttermilk (or milk + 1 tbsp lemon juice/vinegar)
- 1 large egg
- 3 tablespoons unsalted butter, melted and slightly cooled (or vegan butter/oil)
- 1 teaspoon vanilla extract
Instructions
- 1. Prepare Dry Ingredients: In a large bowl, whisk together gluten-free flour, sugar, baking powder, baking soda, and salt.
- 2. Combine Wet Ingredients: In a separate medium bowl, whisk together buttermilk, egg, melted butter, and vanilla extract.
- 3. Merge Wet and Dry: Pour the wet ingredients into the dry ingredients. Mix gently with a whisk or spatula until just combined. A few lumps are okay; do not overmix.
- 4. Rest the Batter: Cover the bowl and let the batter rest at room temperature for 10-15 minutes. This is crucial for gluten-free flours.
- 5. Cook Pancakes: Heat a lightly oiled griddle or non-stick pan over medium heat. Pour about 1/4 cup of batter per pancake. Cook for 2-3 minutes per side, or until bubbles appear on the surface and edges are set. Flip and cook for another 1-2 minutes until golden brown.
- 6. Serve Warm: Serve immediately with your favorite toppings, or keep warm in a 200°F (95°C) oven while you cook the remaining batter.
- Prep Time: 15 mins
- Cook Time: 20 mins