
Table of Contents
- From Backyard BBQs to Your Kitchen: My Huli Huli Chicken Journey
- Why This Huli Huli Chicken Recipe Delivers Every Time
- The Essentials: Ingredients and Their Purpose
- Your Step-by-Step Guide to Huli Huli Chicken Perfection
- Expert Tips for Huli Huli Chicken Success
- What to Serve with Your Hawaiian Huli Huli Chicken
- Storing and Reheating Huli Huli Chicken
- Your Huli Huli Chicken FAQs Answered
From Backyard BBQs to Your Kitchen: My Huli Huli Chicken Journey
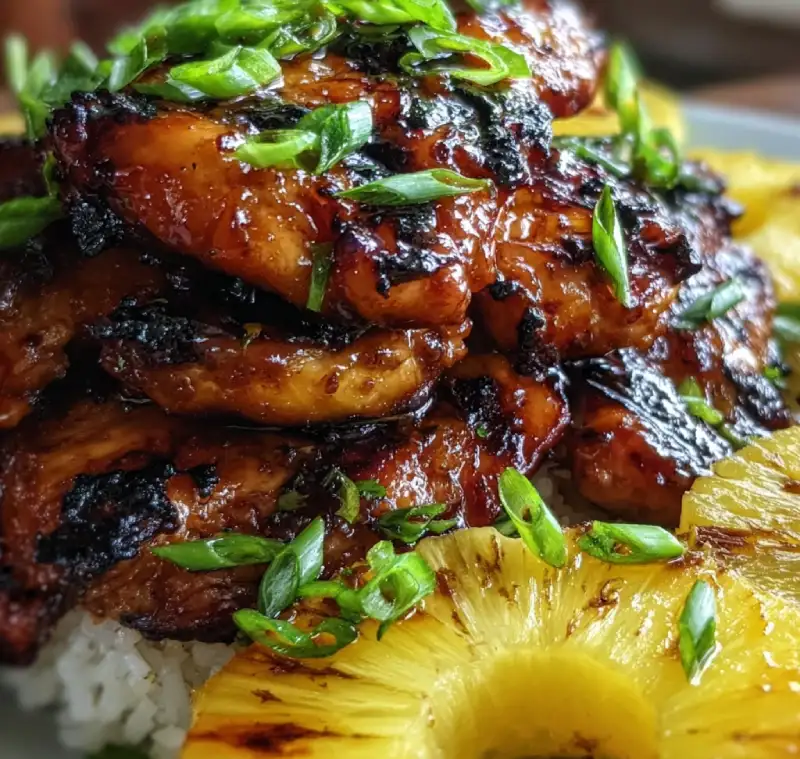
There’s something truly magical about the aroma of Huli Huli Chicken wafting through the air. That perfect balance of sweet, savory, and tangy, with a hint of smoky char, instantly transports me to sun-drenched Hawaiian beaches and lively backyard luaus. The skin, caramelized to a beautiful mahogany, gives way to incredibly juicy, tender meat that practically melts in your mouth. It’s a dish that promises a burst of tropical flavor with every bite, and I’m thrilled to share my perfected recipe for this iconic Hawaiian Huli Huli Chicken with you.
A Personal Nod to Island Flavors
My love affair with Huli Huli Chicken began years ago during a trip to Oahu. I remember stumbling upon a roadside stand, drawn in by the intoxicating scent. The chicken, rotating slowly over an open flame, was a sight to behold. One bite, and I was hooked. Since then, I’ve been on a mission to recreate that authentic, unforgettable taste in my own kitchen. After countless experiments and tweaks, I’ve finally landed on a recipe that captures the essence of those island flavors, bringing the spirit of aloha right to your dinner table. This isn’t just a recipe; it’s a culinary journey to paradise.
Why This Huli Huli Chicken Recipe Delivers Every Time
- Perfectly Caramelized Skin, Juicy Meat: Our marinade, rich in sugars, creates an incredible glaze that caramelizes beautifully, while the pineapple juice ensures the chicken remains incredibly moist and tender.
- Balanced Sweet and Savory Profile: We strike the ideal harmony between the sweetness of brown sugar and pineapple, the umami of soy sauce, and the tang of vinegar, resulting in a complex yet approachable flavor.
- Simple Ingredients, Big Flavor Impact: You won’t need obscure ingredients for this recipe. Common pantry staples come together to create an explosion of authentic Hawaiian taste.
- Versatile Cooking Methods: Whether you prefer the smoky char of the grill, the ease of the oven, or the quick crisp of the broiler, this recipe adapts beautifully to your preferred cooking style.
The Essentials: Ingredients and Their Purpose
Here is what you need and why:
Chicken: Cut Matters for Even Cooking: I highly recommend using bone-in, skin-on chicken thighs and drumsticks. The bone helps conduct heat evenly, keeping the meat moist, and the skin crisps up beautifully, holding onto that delicious glaze. You can use a whole cut-up chicken, but ensure pieces are roughly similar in size for even cooking.
Pineapple Juice: The Tenderizer and Sweet Base: This is a cornerstone of Huli Huli. The enzymes in pineapple juice (bromelain) naturally tenderize the chicken, while its sweet and tangy notes form the tropical heart of our marinade.
Soy Sauce: Depth of Umami and Salt: A good quality soy sauce provides essential umami, a savory depth that balances the sweetness, and the necessary saltiness to season the chicken from within.
Brown Sugar: For that Signature Caramelization: Dark brown sugar is my preference here. Its molasses content not only adds a rich, deep sweetness but also contributes significantly to that gorgeous, sticky, caramelized crust we all crave.
Ginger & Garlic: Aromatic Foundation: Freshly grated ginger and minced garlic are non-negotiable. They provide a pungent, aromatic base that elevates all the other flavors, adding warmth and complexity.
Ketchup/Tomato Paste: Tang and Body to the Sauce: Ketchup adds a touch of sweetness, tang, and a lovely red hue, while also helping to thicken the marinade slightly. Tomato paste can be used for a more concentrated tomato flavor and deeper color.
Rice Vinegar: Brightness and Balance: A splash of rice vinegar cuts through the richness and sweetness, adding a crucial bright, acidic note that makes the entire dish sing. It prevents the sauce from being cloyingly sweet.
Optional: Sesame Oil and Red Pepper Flakes for Extra Kick: For an extra layer of nutty aroma, a dash of toasted sesame oil is fantastic. If you like a little heat, red pepper flakes will give it a subtle, pleasant warmth without overpowering the other flavors.
Your Step-by-Step Guide to Huli Huli Chicken Perfection
Follow these step-by-step instructions to achieve Huli Huli Chicken perfection:
1. Marinate for Max Flavor
In a large bowl or a resealable plastic bag, combine the pineapple juice, soy sauce, brown sugar, grated ginger, minced garlic, ketchup (or tomato paste), and rice vinegar. Whisk until the sugar is dissolved. Add your chicken pieces, ensuring they are fully submerged in the marinade. Seal the bag or cover the bowl and refrigerate for at least 4 hours, or ideally, overnight (up to 24 hours). The longer it marinates, the more flavor the chicken will absorb, and the more tender it will become.
2. Grilling: The Traditional Method
Preheat your grill to medium-high heat (around 375-400°F or 190-200°C). Lightly oil the grates. Remove the chicken from the marinade, reserving the marinade for basting. Place the chicken skin-side down on the hot grill. Grill for 6-8 minutes per side, turning frequently and basting generously with the reserved marinade during the last 10-15 minutes of cooking. Continue grilling until the internal temperature reaches 165°F (74°C) and the skin is beautifully caramelized and slightly charred. Discard any remaining marinade that has come into contact with raw chicken.
3. Baking: An Easy Oven Alternative
Preheat your oven to 400°F (200°C). Line a baking sheet with foil for easy cleanup and place a wire rack on top. Arrange the marinated chicken pieces on the wire rack, skin-side up. Bake for 30-40 minutes, flipping halfway through. During the last 15 minutes, baste the chicken every 5-7 minutes with the reserved marinade until the chicken is cooked through (165°F/74°C) and the glaze is sticky and browned. For extra crispiness, you can finish under the broiler for 2-3 minutes, watching carefully to prevent burning.
4. Broiling: For Crispy Finish
If you’re short on time or want an extra crispy finish, broiling is a great option. Preheat your broiler to high. Place chicken on a foil-lined baking sheet with a wire rack. Broil for 15-20 minutes, turning and basting frequently with the reserved marinade, until cooked through and deeply caramelized. Keep a close eye on it, as broilers can burn quickly!
5. Bastings: Building Layers of Flavor
The key to that signature Huli Huli glaze is consistent basting. Whether grilling, baking, or broiling, make sure to brush the chicken generously with the reserved marinade during the final stages of cooking. This builds up layers of flavor and creates that irresistible sticky, sweet, and savory crust. Remember to discard any marinade that has touched raw chicken once you’re done basting.
Expert Tips for Huli Huli Chicken Success
- Don’t Rush the Marinade: While 4 hours is good, an overnight marinade (12-24 hours) truly allows the flavors to penetrate the chicken, resulting in a more tender and flavorful final product.
- Temperature Control is Key for Grilling: Maintain a medium-high heat. Too high, and the sugar in the marinade will burn before the chicken cooks through. Too low, and you won’t get that beautiful caramelization.
- Basting Strategy for Maximum Glaze: Start basting only during the last 10-15 minutes of cooking. If you baste too early, the sugars can burn. Frequent basting in the final stages builds up that thick, glossy glaze.
- Rest Your Chicken for Juiciness: Once cooked, transfer the Huli Huli Chicken to a cutting board and tent loosely with foil. Let it rest for 5-10 minutes before serving. This allows the juices to redistribute, ensuring every bite is incredibly moist.
- Make Extra Sauce: Consider simmering a portion of the reserved marinade (that hasn’t touched raw chicken) in a small saucepan until thickened. This makes a fantastic dipping sauce or extra glaze for serving.
Storing and Reheating Huli Huli Chicken
Refrigeration Best Practices: Leftover Huli Huli Chicken can be stored in an airtight container in the refrigerator for up to 3-4 days. Ensure it cools completely before storing to prevent condensation.
Freezing for Future Meals: Cooked Huli Huli Chicken freezes beautifully! Once cooled, wrap individual pieces tightly in plastic wrap, then place them in a freezer-safe bag or container. It can be frozen for up to 2-3 months. Thaw overnight in the refrigerator before reheating.
Reheating Without Drying Out: To reheat, the oven is your best friend. Preheat to 300-325°F (150-160°C). Place the chicken on a baking sheet, perhaps with a splash of water or chicken broth at the bottom of the pan to create some steam, and cover loosely with foil. Reheat for 15-20 minutes, or until warmed through. This gentle heat prevents the chicken from drying out. You can also microwave individual portions, but be mindful that the skin might not be as crispy.
What to Serve with Your Hawaiian Huli Huli Chicken
This Hawaiian Huli Huli Chicken is a star on its own, but it truly shines when paired with complementary sides that enhance its tropical flair. For more culinary inspiration, see more easy recipes!
Classic Rice Pairings
- Steamed White Rice: The ultimate classic. Its neutral flavor perfectly soaks up all the delicious Huli Huli sauce.
- Coconut Rice: For an extra layer of tropical indulgence, coconut rice is a fantastic choice.
- Brown Rice: A healthier alternative that still provides a great base for the chicken.
Fresh Sides: Salads and Slaws
- Macaroni Salad: A staple of Hawaiian plate lunches, a creamy mac salad is a must-try.
- Coleslaw: A crisp, tangy coleslaw provides a refreshing contrast to the rich chicken.
- Green Salad with a Vinaigrette: A simple green salad with a light, citrusy dressing can balance the meal beautifully.
Tropical Fruit Accents
- Grilled Pineapple Slices: Grilling pineapple brings out its sweetness and adds another layer of smoky flavor that pairs wonderfully with the chicken.
- Fresh Mango Salsa: A vibrant salsa made with fresh mango, red onion, cilantro, and lime juice adds a burst of freshness and acidity.
- Avocado: Sliced avocado offers a creamy, rich counterpoint.
Your Huli Huli Chicken FAQs Answered
Can I use chicken breasts?
How can I make it spicier?
Is this recipe gluten-free?
Can I prepare the marinade ahead of time?
For more expert baking tips and delicious recipes, be sure to visit King Arthur Baking!
Delicious Hawaiian Huli Huli Chicken
- Total Time: 59 minute
- Yield: 6-8 servings
Description
Discover the delicious Hawaiian Huli Huli Chicken with our step-by-step recipe. Get the best flavor with this easy-to-cook dish.
Ingredients
- 2–3 lbs bone-in, skin-on chicken pieces (thighs, drumsticks, or a mix)
- 1 cup pineapple juice
- 1/2 cup soy sauce (or tamari for GF)
- 1/4 cup packed brown sugar
- 2 tbsp fresh ginger, grated
- 4 cloves garlic, minced
- 2 tbsp ketchup (or tomato paste)
- 1 tbsp rice vinegar
- 1 tsp sesame oil (optional)
- 1/2 tsp red pepper flakes (optional)
Instructions
- Prepare Marinade: In a large bowl or resealable bag, combine pineapple juice, soy sauce, brown sugar, ginger, garlic, ketchup, and rice vinegar. Whisk well.
- Marinate Chicken: Add chicken pieces to the marinade, ensuring they are fully coated. Refrigerate for at least 4 hours, or preferably overnight (up to 24 hours).
- Preheat & Cook (Grill): Preheat grill to medium-high (375-400°F). Remove chicken from marinade, reserving marinade for basting. Grill chicken for 6-8 minutes per side, turning frequently.
- Baste & Finish: During the last 10-15 minutes of grilling, baste generously with reserved marinade until internal temperature reaches 165°F (74°C) and skin is caramelized. Discard remaining marinade.
- Preheat & Cook (Oven): Preheat oven to 400°F (200°C). Place chicken on a wire rack over a foil-lined baking sheet. Bake for 30-40 minutes, flipping halfway.
- Baste & Finish (Oven): During the last 15 minutes, baste every 5-7 minutes with reserved marinade until cooked through (165°F/74°C) and glazed. Broil for 2-3 minutes for extra crispiness, if desired.
- Rest & Serve: Let chicken rest for 5-10 minutes before serving. Enjoy with rice and your favorite sides!
- Prep Time: 15 mins
- Cook Time: 30-40 mins