
Table of Contents
Introduction: Your New Favorite Dessert Awaits
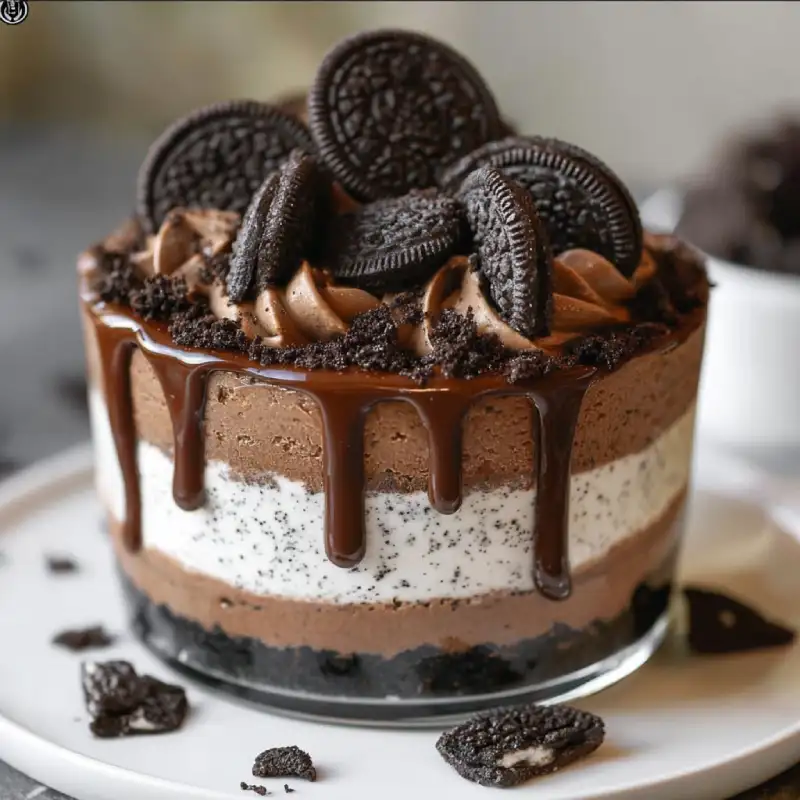
Prepare your taste buds for an experience that transcends the ordinary dessert. This Oreo chocolate cheesecake isn’t just a recipe; it’s a journey into pure indulgence, a symphony of textures and flavors that will leave you utterly captivated. Imagine a rich, velvety smooth chocolate cheesecake, nestled atop a perfectly crunchy Oreo crust, all crowned with even more delightful Oreo pieces. It’s the kind of dessert that makes you close your eyes and savor every single bite, a true showstopper for any occasion.
From a simple craving for something decadent, I embarked on a mission to create the ultimate Oreo chocolate cheesecake. After countless experiments and tweaks, I’ve perfected a recipe that consistently delivers a cheesecake that’s both luxurious and surprisingly achievable for the home baker. This isn’t just another cheesecake; it’s the cheesecake you’ll be asked to make again and again. Its irresistible combination of deep chocolate, creamy tang, and satisfying crunch makes it an absolute must-make for anyone who appreciates truly exceptional desserts. For more baking inspiration, you can always check out my other easy recipes!
Why This Recipe Works
- The ‘Why’ Behind the Irresistible Oreo Crust: We’re not just crushing Oreos; we’re binding them with just the right amount of melted butter to create a sturdy, flavorful base that holds up beautifully without being too crumbly or too hard. It’s the perfect counterpoint to the creamy filling.
- Achieving That Velvety Smooth Chocolate Cheesecake Center: Our method ensures a crack-free, silky-smooth texture every single time. We focus on gentle mixing and the crucial water bath to create a cheesecake that melts in your mouth with every forkful.
- The Perfect Balance of Sweetness and Richness: This recipe masterfully balances the sweetness of the Oreos and chocolate with the slight tang of cream cheese, preventing it from being overly cloying. It’s rich, but in the most delightful way.
- Crunchy Oreo Topping: A Textural Delight: The final flourish of crushed Oreos on top isn’t just for looks; it adds another layer of satisfying crunch that elevates the entire dessert, making each bite a multi-sensory experience.
Ingredients and Substitutions
Here is what you need and why:
Oreo Cookies: These are the star! For the crust, you’ll want finely crushed crumbs. For the topping and mix-ins, a coarser chop works wonderfully. Don’t skimp on the original; their distinct flavor is key to a true Oreo chocolate cheesecake. You can experiment with different Oreo flavors, but the classic is always a winner.
Cream Cheese: Full-fat cream cheese is non-negotiable here. It provides the essential richness, body, and creamy texture that defines a great cheesecake. Reduced-fat versions contain more water, which can lead to a rubbery or cracked cheesecake. Ensure it’s at room temperature for a lump-free filling.
Granulated Sugar: This balances the tang of the cream cheese and enhances the chocolate flavor. We use just enough to sweeten without overpowering the other elements. For a slightly deeper flavor, you could use a small amount of brown sugar, but stick to granulated for the classic profile.
Large Eggs: Eggs act as the primary binder, setting the cheesecake and contributing to its smooth, custardy texture. They also help prevent cracks. Like cream cheese, ensure they are at room temperature for even incorporation.
Chocolate: For the best flavor depth in your Oreo chocolate cheesecake, I recommend using high-quality semi-sweet or bittersweet chocolate (around 60-70% cocoa solids), melted and cooled. Chocolate chips can work, but a good baking bar will yield a superior flavor and smoother texture. King Arthur Baking has a great guide on baking with different types of chocolate.
Unsalted Butter: Melted unsalted butter is crucial for binding the Oreo crust crumbs together, creating a firm yet tender base. Using unsalted butter allows you to control the overall salt content of the recipe.
Heavy Cream or Sour Cream: A touch of heavy cream or sour cream adds moisture, richness, and a subtle tang that brightens the cheesecake’s flavor profile. Sour cream will give a slightly more pronounced tang, while heavy cream contributes to a silkier texture. Both work beautifully.
Vanilla Extract and Salt: These are flavor enhancers. Pure vanilla extract adds warmth and depth, while a pinch of salt balances the sweetness and brings out the chocolate notes. Don’t skip them!
Ingredient Swaps and Adaptations: For a dairy-free version, you can try dairy-free cream cheese alternatives and plant-based butter, though results may vary slightly in texture. You could also experiment with different cookie crumbs for the crust, like chocolate wafers or graham crackers, but then it wouldn’t be an Oreo chocolate cheesecake, would it?
How to Make Delicious Oreo Chocolate Cheesecake
Follow these step-by-step instructions to create your masterpiece:
1. Prep Work: Ovens, Pans, and Water Baths
Preheat your oven to 325°F (160°C). Wrap the bottom and sides of a 9-inch springform pan tightly with heavy-duty aluminum foil, ensuring no water can seep in. This is crucial for the water bath. Have all your ingredients at room temperature – this is key for a smooth, lump-free batter.
2. Crust Creation: Crushing and Pressing for Perfection
Finely crush about 25-30 Oreo cookies (filling included) in a food processor until they resemble fine crumbs. In a medium bowl, combine the Oreo crumbs with 6 tablespoons of melted unsalted butter. Mix until the crumbs are evenly moistened. Press this mixture firmly and evenly into the bottom of your prepared springform pan. You can use the bottom of a glass or your fingers. Bake the crust for 8-10 minutes, then remove and let it cool slightly while you prepare the filling.
3. Cheesecake Filling: Mixing Method for No Cracks
In a large bowl, using an electric mixer on low speed, beat the softened full-fat cream cheese until smooth and creamy, about 2-3 minutes. Gradually add the granulated sugar, beating until just combined and smooth. Scrape down the sides of the bowl. Beat in the melted and cooled chocolate, vanilla extract, and salt. Then, add the eggs one at a time, beating on low speed just until each egg is incorporated. Do not overmix! Overmixing incorporates too much air, which can lead to cracks. Finally, gently fold in the heavy cream or sour cream and about 1 cup of coarsely chopped Oreos.
4. Baking Right: Low and Slow for Even Cooking
Pour the cheesecake filling over the cooled Oreo crust in the springform pan. Place the springform pan inside a larger roasting pan. Carefully pour hot water into the roasting pan, reaching about halfway up the sides of the springform pan. This water bath creates a moist, even baking environment. Bake for 60-75 minutes, or until the edges are set but the center still has a slight jiggle when gently shaken. The internal temperature should be around 150°F (65°C).
5. Cooling Down: The Gradual Transition to Doneness
Once baked, turn off the oven and leave the cheesecake in the water bath with the oven door ajar for 1 hour. This gradual cooling prevents sudden temperature changes that can cause cracks. After an hour, carefully remove the cheesecake from the water bath and remove the foil. Let it cool completely on a wire rack at room temperature for another 1-2 hours.
6. Chilling Out: The Essential Step for Setting
Once completely cooled to room temperature, cover the cheesecake loosely with plastic wrap and refrigerate for at least 6-8 hours, or preferably overnight. This chilling time is absolutely essential for the cheesecake to fully set, firm up, and develop its optimal flavor and texture. Don’t rush this step!
Expert Tips for Success
- Preventing Cracks: Temperature Control and Over-Mixing: The two biggest culprits for cheesecake cracks are sudden temperature changes and over-mixing. Ensure all dairy ingredients are at room temperature, mix on low speed, and follow the gradual cooling process.
- The Water Bath: Why It’s Non-Negotiable: A water bath provides gentle, even heat, preventing the edges from baking faster than the center and keeping the cheesecake moist. It’s the secret to that perfectly smooth, creamy texture.
- Room Temperature Ingredients: The Key to Smoothness: Cold cream cheese and eggs will result in a lumpy batter. Allow them to sit out for at least an hour before mixing for a perfectly smooth, homogenous filling.
- Don’t Overbake: Look for the Jiggle: An overbaked cheesecake will be dry and prone to cracking. The center should still have a slight, custardy jiggle when gently shaken. It will continue to set as it cools.
- Patience is a Virtue: Chilling Time Matters: Resist the urge to cut into your cheesecake early! The long chill time allows the flavors to meld and the texture to firm up, resulting in a much more enjoyable dessert.
Storing and Reheating Your Cheesecake
Refrigeration: The Proper Way to Store: Once your Oreo chocolate cheesecake is fully chilled, cover it tightly with plastic wrap or place it in an airtight container. It will stay fresh and delicious in the refrigerator for up to 5-7 days. For best results, store it in the back of the fridge where temperatures are most consistent.
Freezing for Later: Techniques for Longevity: Yes, you can freeze cheesecake! For best results, freeze individual slices or the whole cheesecake (after it’s fully chilled) on a baking sheet until firm. Then, wrap each slice or the entire cheesecake tightly in plastic wrap, followed by a layer of aluminum foil. This double layer protects against freezer burn. It can be stored in the freezer for up to 1-2 months.
Thawing and Serving: Bringing it Back to Life: To thaw frozen cheesecake, transfer it to the refrigerator and let it thaw slowly overnight. Avoid thawing at room temperature, as this can affect the texture. Once thawed, it’s ready to serve and enjoy!
What to Serve With Delicious Oreo Chocolate Cheesecake
This Oreo chocolate cheesecake is a showstopper on its own, but a few simple additions can elevate the experience even further:
- Simple Garnishes: A dollop of freshly whipped cream, a scattering of fresh raspberries or strawberries, or a sprinkle of chocolate shavings add visual appeal and a delightful contrast in flavor and texture. A drizzle of chocolate ganache or caramel sauce is also divine.
- Beverage Pairings: A strong cup of freshly brewed coffee or espresso cuts through the richness beautifully. For an adult pairing, consider a glass of port wine, a coffee liqueur, or even a rich stout beer. And for the ultimate nostalgic treat, a cold glass of milk is always a perfect match for anything Oreo!
Frequently Asked Questions
Can I use reduced-fat cream cheese?
How do I know when my cheesecake is done?
Why did my cheesecake crack?
Can I make this cheesecake ahead of time?
What’s the best way to cut clean slices?
Delicious Oreo Chocolate Cheesecake
- Total Time: 1 hour 45 minutes
- Yield: 12 servings
Description
Indulge in this rich, velvety smooth chocolate cheesecake featuring a crunchy Oreo crust and delightful Oreo topping. It’s the ultimate dessert for any chocolate and cookie lover.
Ingredients
- 25–30 Oreo cookies (for crust)
- 6 tbsp unsalted butter, melted
- 3 (8-ounce) packages full-fat cream cheese, softened
- 1 cup granulated sugar
- 4 large eggs, room temperature
- 8 ounces semi-sweet or bittersweet chocolate, melted and cooled
- 1 tsp pure vanilla extract
- 1/4 tsp salt
- 1/2 cup heavy cream or sour cream
- 1 cup coarsely chopped Oreo cookies (for filling and topping)
Instructions
- 1. Prepare Pan & Oven: Preheat oven to 325°F (160°C). Wrap a 9-inch springform pan with heavy-duty foil.
- 2. Make Crust: Finely crush 25-30 Oreos. Mix with melted butter. Press into the bottom of the prepared pan. Bake 8-10 minutes; cool.
- 3. Prepare Filling: Beat softened cream cheese on low until smooth. Gradually add sugar, then melted chocolate, vanilla, and salt. Beat in eggs one at a time until just combined. Gently fold in heavy cream/sour cream and 1 cup chopped Oreos.
- 4. Bake Cheesecake: Pour filling over crust. Place springform pan in a larger roasting pan. Pour hot water into the roasting pan, halfway up the sides of the springform. Bake 60-75 minutes, until edges are set and center jiggles slightly.
- 5. Cool Gradually: Turn off oven, leave cheesecake in water bath with door ajar for 1 hour. Remove from water bath, cool completely on a wire rack for 1-2 hours.
- 6. Chill Thoroughly: Cover and refrigerate for at least 6-8 hours, or preferably overnight, before serving.
- Prep Time: 30 mins
- Cook Time: 75 mins