
Table of Contents
- From Our Kitchen to Yours: Why Peach Pie Bars Are a Must-Make
- Why These Peach Pie Bars Stand Out
- Understanding Your Ingredients: What You Need and Why
- Step-by-Step: Crafting Your Peach Pie Bars
- Expert Tips for Peach Pie Bar Success
- Pairing Perfection: What to Serve with Peach Pie Bars
- Storing and Reheating Your Peach Pie Bars
- Frequently Asked Questions About Peach Pie Bars
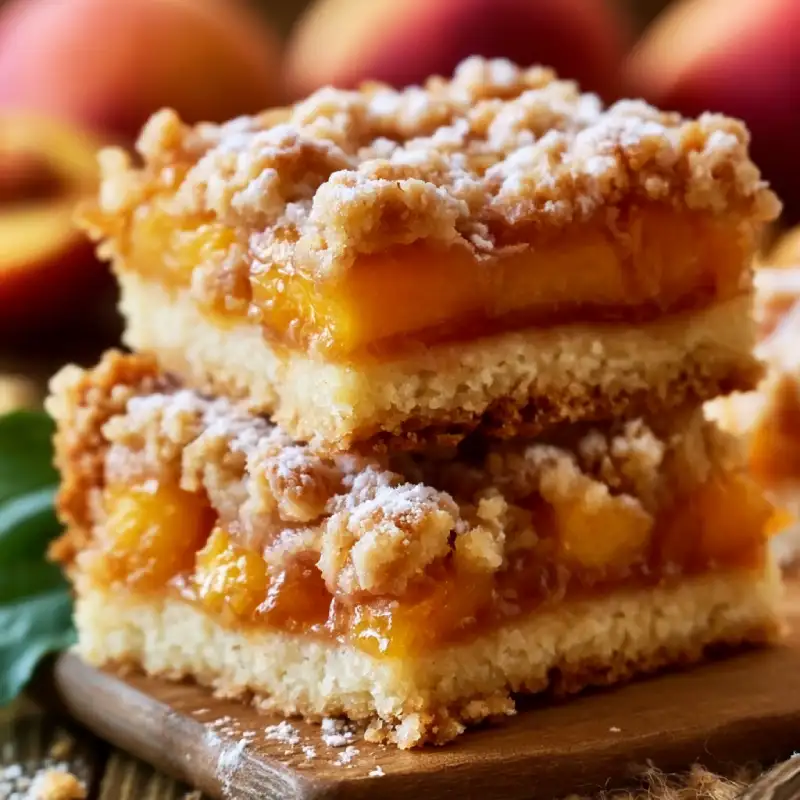
There’s nothing quite like the taste of summer, and for me, that taste is perfectly encapsulated in a juicy, ripe peach. But what if you could take that quintessential summer fruit and transform it into a portable, utterly irresistible dessert that boasts a buttery, tender crust and a sweet, spiced filling that doesn’t ooze all over the place? Enter these incredible Peach Pie Bars. Imagine a dessert that delivers all the comforting flavors of a classic peach pie, but in a convenient, sliceable bar form, perfect for picnics, potlucks, or simply enjoying on your porch with a cup of coffee. Each bite offers a delightful contrast: the crisp, crumbly topping, the soft, sweet peaches, and the sturdy, yet melt-in-your-mouth base. These aren’t just any peach bars; they are the culmination of years of perfecting the balance between flavor, texture, and ease, ensuring every batch is a resounding success.
From Our Kitchen to Yours: Why Peach Pie Bars Are a Must-Make
Summer’s Sweetest Treat, Simplified: As a passionate home baker, I’m always looking for ways to capture the essence of seasonal produce in a way that’s both delicious and approachable. Peach pie is a beloved classic, but let’s be honest, making a traditional pie can be a bit of an undertaking. These Peach Pie Bars offer all the nostalgic charm and incredible flavor of a homemade pie, but with significantly less fuss. They’re designed for ease, allowing you to spend less time in the kitchen and more time savoring the sweet rewards of your labor.
My Go-To for Ripe Peaches: When peach season hits, my kitchen transforms into a peach-centric wonderland. While I love a good fresh peach, there’s something magical about baking with them. These bars are my absolute favorite way to utilize those perfectly ripe, fragrant peaches. The baking process concentrates their natural sweetness and enhances their delicate flavor, making every bite a celebration of summer’s bounty. Whether you’ve just returned from the farmer’s market with a basket full of peaches or found a great deal at your local grocery store, this recipe is the perfect vehicle to showcase their deliciousness.
Why These Peach Pie Bars Stand Out
- Perfectly Balanced Sweet-Tartness: We strike the ideal balance between the natural sweetness of the peaches and a hint of tartness, preventing the bars from being overly cloying.
- Irresistibly Tender, Yet Firm Crust: Our crust recipe ensures a buttery, flaky base that holds its shape beautifully, providing the perfect foundation for the juicy filling without becoming soggy.
- Generous Fruit Filling That Doesn’t Ooze: Thanks to careful thickening, the peach filling is lush and flavorful, staying perfectly contained within the crust, making for clean slices every time.
- Easy to Transport and Serve: Unlike a traditional pie, these bars are inherently portable, making them ideal for picnics, potlucks, or sharing with friends and family without the need for plates and forks.
Understanding Your Ingredients: What You Need and Why
Here is what you need and why:
Peaches: Fresh vs. Frozen (Choosing the Best for Baking): For the absolute best flavor and texture, fresh, ripe peaches are always my top recommendation. Look for peaches that are fragrant and yield slightly to gentle pressure. If fresh peaches aren’t in season or readily available, frozen sliced peaches can be a fantastic substitute. Just be sure to thaw them completely and drain any excess liquid before using to prevent a watery filling.
Flour: The Foundation of a Flaky Crust (All-Purpose vs. Pastry): I typically use unbleached all-purpose flour for these bars. It provides a good balance of structure and tenderness for both the crust and the crumble topping. While pastry flour would yield an even more tender crumb, all-purpose is widely available and works beautifully. For a truly exceptional crust, I sometimes use a blend of all-purpose and a small amount of whole wheat pastry flour for added depth of flavor.
Butter: Cold is Key for Tenderness: Unsalted butter is essential here. For the crust, it’s crucial that your butter is very cold and cut into small pieces. This ensures that when it melts during baking, it creates pockets of steam, resulting in a wonderfully flaky and tender texture. For the crumble topping, slightly softened butter can be used, but still on the cooler side to achieve that perfect crumbly consistency.
Sugar: Balancing Sweetness with Peach Acidity: We use a combination of granulated sugar for the filling and brown sugar for the crumble. Granulated sugar highlights the natural sweetness of the peaches, while brown sugar in the crumble adds a lovely molasses note and helps create that signature chewy texture. Adjust the sugar slightly based on the sweetness of your peaches.
Spices: Enhancing Peach Flavor (Cinnamon, Nutmeg): A touch of ground cinnamon and a pinch of freshly grated nutmeg are non-negotiable for me. These warm spices beautifully complement the peaches, adding depth and complexity without overpowering their delicate flavor. They evoke that classic pie aroma that makes these bars so comforting.
Thickeners: Preventing a Soupy Filling (Cornstarch, Tapioca): To ensure a perfectly set, luscious peach filling that doesn’t ooze, a thickener is vital. I prefer cornstarch for its neutral flavor and excellent thickening power. You could also use tapioca starch (often labeled as tapioca flour) for a slightly clearer, glossier filling. Whichever you choose, make sure to mix it thoroughly with the peaches and sugar before baking.
Step-by-Step: Crafting Your Peach Pie Bars
Follow these step-by-step photos:
1. Prepping Your Peaches: Peeling and Slicing Techniques
Start by blanching your peaches to make peeling a breeze. Score a small ‘X’ at the bottom of each peach, then plunge them into boiling water for 30-60 seconds, followed immediately by an ice bath. The skins should slip right off! Once peeled, halve them, remove the pit, and slice them into uniform 1/4-inch thick pieces. Aim for consistency so they cook evenly. Gently blot any excess moisture with a paper towel.
2. Creating the Perfect Crust: Mixing and Pressing
In a large bowl, whisk together your flour, sugar, and salt. Add the very cold, cubed butter and cut it into the dry ingredients using a pastry blender, your fingertips, or a food processor until the mixture resembles coarse crumbs with some pea-sized pieces of butter remaining. Gradually add ice water, a tablespoon at a time, mixing until the dough just comes together. Don’t overmix! Press about two-thirds of the dough evenly into the bottom of a greased 9×13 inch baking pan. Chill this crust in the refrigerator while you prepare the filling.
3. Assembling the Filling: Maximizing Flavor and Texture
In a separate bowl, combine your sliced peaches with granulated sugar, cornstarch (or tapioca), lemon juice (for brightness and to prevent browning), cinnamon, and nutmeg. Toss gently to ensure the peaches are evenly coated. The cornstarch will help thicken the juices as they bake, preventing a watery filling. Pour this luscious peach mixture evenly over the chilled crust in your baking pan.
4. Baking to Golden Perfection: Signs of Doneness
Crumble the remaining dough mixture over the peach filling. Bake in a preheated oven (typically around 375°F or 190°C) for 45-55 minutes, or until the topping is golden brown and the peach filling is bubbly and tender when pierced with a knife. You should see the juices thickening and bubbling around the edges. If the topping browns too quickly, you can loosely tent the pan with foil.
5. Cooling for Clean Slices: The Importance of Patience
This is perhaps the most crucial step for perfectly structured bars! Once baked, remove the pan from the oven and place it on a wire rack to cool completely. This can take several hours, or even overnight. As the bars cool, the filling will continue to set, ensuring clean, beautiful slices. Resist the urge to cut into them too soon, or you’ll end up with a delicious, but messy, pile of peach goodness.
Expert Tips for Peach Pie Bar Success
- Don’t Overwork the Dough: For a Tender Crust: Overmixing develops gluten, leading to a tough crust. Mix just until the dough comes together. Visible streaks of butter are a good sign!
- Blot Your Peaches: Preventing a Watery Filling: After slicing, gently pat your peaches dry with paper towels. Excess moisture can lead to a soupy filling and a soggy bottom crust.
- Chill the Crust: Minimizing Shrinkage: Chilling the pressed crust before adding the filling helps the butter solidify, preventing the crust from shrinking excessively during baking and ensuring a crisp base.
- Customize Your Crumble: Adding Nuts or Oats: Feel free to add 1/2 cup of chopped pecans, walnuts, or rolled oats to your crumble topping for extra texture and flavor.
- Allow Complete Cooling: Essential for Structure: I cannot stress this enough! The filling needs time to set. Cooling completely, ideally for 3-4 hours or even overnight, is key for clean, firm slices.
Pairing Perfection: What to Serve with Peach Pie Bars
While these Peach Pie Bars are absolutely divine on their own, a little accompaniment can elevate the experience even further:
- Classic Vanilla Ice Cream: A scoop of cold, creamy vanilla ice cream melting over a slightly warm bar is pure bliss. The contrast in temperatures and textures is simply irresistible.
- Dollop of Whipped Cream: Lightly sweetened homemade whipped cream adds a cloud-like softness and richness that complements the peaches beautifully.
- Simple Glass of Iced Tea: For a refreshing summer treat, pair these bars with a tall glass of unsweetened iced tea. The tea cuts through the sweetness and cleanses the palate.
- Morning Coffee: Don’t underestimate the power of a peach pie bar with your morning coffee! It’s a delightful way to start the day or enjoy a mid-morning treat.
Storing and Reheating Your Peach Pie Bars
Airtight Storage: Keeping Them Fresh: To maintain their freshness and prevent them from drying out, store your cooled Peach Pie Bars in an airtight container. This will help keep the crust crisp and the filling moist.
Room Temperature vs. Refrigeration: When and Why: If you plan to consume them within 1-2 days, they can be stored at room temperature. For longer storage, or if your kitchen is particularly warm, refrigerate them. The cold will firm up the butter in the crust and prevent the fruit from spoiling. Just be aware that refrigeration can slightly alter the texture of the crust, making it a bit firmer.
Reheating for Warm Goodness: Oven or Microwave: If you prefer your bars warm, you have a couple of options. For a crispier crust, reheat individual bars in a preheated oven at 300°F (150°C) for about 10-15 minutes. For a quicker warm-up, a microwave works, but the crust won’t be as crisp. Heat in 15-30 second intervals until warmed through.
Frequently Asked Questions About Peach Pie Bars
Can I use canned peaches?
How do I prevent a soggy bottom crust?
Can I make these gluten-free?
How long do Peach Pie Bars last?
Can I freeze Peach Pie Bars?
I hope you enjoy making and sharing these delightful Peach Pie Bars as much as I do. They truly are a taste of summer in every bite! For more delicious recipes and baking tips, see more easy recipes from our kitchen.
Delicious Peach Pie Bars
- Total Time: 1 hour 20 minutes
- Yield: 12-16 bars
Description
These easy-to-make Peach Pie Bars capture the essence of summer with a buttery crust, sweet peach filling, and a delightful crumble topping. Perfect for any occasion, they offer all the flavor of a classic pie in a convenient bar form.
Ingredients
- For the Crust & Crumble:
- 2 ½ cups all-purpose flour, divided
- ¾ cup granulated sugar, divided
- ½ teaspoon salt
- 1 cup (2 sticks) unsalted butter, very cold and cubed, divided
- 2–4 tablespoons ice water
- ½ cup packed light brown sugar
- ½ teaspoon ground cinnamon
- For the Peach Filling:
- 6–7 medium ripe peaches (about 4 cups sliced), peeled and sliced
- ½ cup granulated sugar (adjust based on peach sweetness)
- 3 tablespoons cornstarch or tapioca starch
- 1 tablespoon fresh lemon juice
- ½ teaspoon ground cinnamon
- ¼ teaspoon freshly grated nutmeg
Instructions
- 1. Prepare the Crust & Crumble: In a large bowl, whisk 2 cups of flour, ¼ cup granulated sugar, and salt. Cut in ¾ cup of cold, cubed butter until coarse crumbs form. Gradually add ice water, mixing until dough just comes together. Press two-thirds of the dough into a greased 9×13 inch pan. Chill.
- 2. Make the Crumble Topping: To the remaining dough, add the remaining ½ cup flour, ½ cup brown sugar, and ½ teaspoon cinnamon. Cut in the remaining ¼ cup cold butter until crumbly. Set aside.
- 3. Prepare the Peach Filling: In a separate bowl, combine sliced peaches, ½ cup granulated sugar, cornstarch, lemon juice, ½ teaspoon cinnamon, and nutmeg. Toss gently to coat.
- 4. Assemble the Bars: Pour the peach filling evenly over the chilled crust. Sprinkle the crumble topping evenly over the peaches.
- 5. Bake: Bake in a preheated oven at 375°F (190°C) for 45-55 minutes, or until the topping is golden brown and the filling is bubbly.
- 6. Cool Completely: Let the bars cool completely on a wire rack for at least 3-4 hours (or overnight) before slicing and serving. This is crucial for the filling to set properly.
- Prep Time: 30 mins
- Cook Time: 50 mins