
Why Poptart Cookie Bars Are Your Next Go-To Treat
Imagine the comforting, familiar taste of a classic Poptart, but elevated. Now, picture that flaky, fruit-filled pastry nestled into a chewy, buttery cookie bar. That, my friends, is the magic of Poptart Cookie Bars! It’s an unexpected joy, a delightful mashup that takes two beloved treats and combines them into something truly extraordinary. For me, this recipe is a delicious trip down memory lane. As a kid, a Poptart was the ultimate breakfast indulgence. As an adult baker, I’ve found a way to transform that childhood favorite into a sophisticated, yet incredibly fun, grown-up indulgence that still brings a huge smile to my face.
Why This Recipe Works: Texture, Flavor, and Simplicity
- Perfectly balanced: This recipe masterfully marries a rich, chewy cookie base with the iconic flaky pastry top of a Poptart. Each bite offers a delightful contrast that keeps you coming back for more.
- Flavor explosion: The sweet, often fruity filling of the Poptart perfectly complements the buttery, vanilla-infused cookie dough. It’s a nostalgic taste that’s both comforting and exciting.
- Ease of execution: Forget the fuss of individual cookies! These bars are a no-brainer. You press, you layer, you bake. It’s a simple, straightforward process that delivers big on flavor with minimal effort.
- Versatility at its best: One of the best parts about these Poptart Cookie Bars is their adaptability. With so many Poptart flavors available, you can customize these bars to suit any craving or occasion.
Essential Ingredients & Smart Substitutions for Poptart Cookie Bars
Here is what you need and why:
Unsalted Butter: This is the foundation of our rich, chewy cookie base. Using unsalted butter gives you complete control over the salt content in your recipe. It contributes significantly to the chewiness and adds a luxurious richness. If you only have salted butter, you can use it, but reduce the added salt in the recipe by about ¼ teaspoon per stick of butter to avoid an overly salty result.
Granulated Sugar & Brown Sugar: This dynamic duo is crucial for both texture and flavor. Granulated sugar helps with spread and crispness, while brown sugar, with its molasses content, adds moisture, chewiness, and a deeper, more complex flavor. For a chewier bar, you can slightly increase the brown sugar ratio; for a crisper edge, lean more towards granulated sugar.
Eggs: Eggs act as a binder, holding all the ingredients together, and also contribute to the leavening, giving our cookie bars structure and a tender crumb. For a vegan alternative, a flax egg (1 tablespoon ground flaxseed mixed with 3 tablespoons water, let sit for 5 minutes) can be used, though it might result in a slightly denser texture.
Vanilla Extract: A good quality vanilla extract is a non-negotiable flavor enhancer. It brings warmth and depth, complementing the sweetness of the sugars and the fruit filling. Don’t skimp on the good stuff here!
All-Purpose Flour: This is the structural backbone of our cookie bars. For the best results, I always recommend sifting your flour. This aerates it and removes any lumps, ensuring a lighter, more consistent texture. Measuring correctly is also key – spoon the flour into your measuring cup and level it off with a straight edge, rather than scooping directly from the bag, which can compact the flour and lead to a dry, dense bar.
Baking Soda & Baking Powder: These leavening agents work together to give our bars the perfect rise and spread. Baking soda reacts with acidic ingredients (like brown sugar) to create tenderness, while baking powder provides a steady lift. Too much can lead to a metallic taste or excessive spreading; too little can result in dense, flat bars.
Salt: Often overlooked, salt is a flavor powerhouse! It balances the sweetness, enhances all the other flavors, and prevents the bars from tasting bland. Just a pinch truly makes a difference.
Poptarts: Ah, the star of the show! While many flavors work, I find that fruit-filled varieties like Strawberry, Raspberry, or Blueberry work exceptionally well, as their fillings soften beautifully during baking. Avoid Poptarts with thick frosting or sprinkles on top, as these can melt and become messy. A quick pre-bake prep of gently pressing them down can help them adhere better to the cookie dough.
Powdered Sugar & Milk/Cream: These are for our simple, sweet glaze. Powdered sugar dissolves easily for a smooth finish, and milk or cream allows you to adjust the consistency from a thin drizzle to a thicker, more opaque frosting.
Sprinkles: Entirely optional, but oh-so-fun! Sprinkles add a pop of color and a festive touch, making these bars even more appealing.
Step-by-Step Baking Guide: Crafting Your Poptart Cookie Bars
Follow these step-by-step instructions to create your perfect Poptart Cookie Bars:
1. Prepping for Success
Before you even think about mixing, preheat your oven to 350°F (175°C). Line a 9×13 inch baking pan with parchment paper, leaving an overhang on the sides. This parchment sling is your best friend for easy removal and clean cuts later. A properly preheated oven ensures an even bake from the start.
2. Creaming the Butter and Sugars
In a large bowl, using an electric mixer, cream together the softened unsalted butter, granulated sugar, and brown sugar until the mixture is light, fluffy, and pale in color. This process incorporates air, which is the foundation for a tender, chewy crumb. Scrape down the sides of the bowl frequently to ensure everything is well combined.
3. Incorporating Wet Ingredients
Beat in the eggs one at a time, mixing well after each addition. Then, stir in the vanilla extract. Ensure these wet ingredients are fully incorporated into the butter-sugar mixture for an even distribution of moisture and flavor throughout the dough.
4. Adding Dry Ingredients
In a separate bowl, whisk together the all-purpose flour, baking soda, baking powder, and salt. Gradually add the dry ingredients to the wet ingredients, mixing on low speed just until combined. Be careful not to overmix! Overmixing develops the gluten in the flour, leading to tough, dense cookie bars instead of tender ones.
5. Building the Base Layer
Press about two-thirds of the cookie dough evenly into the bottom of your prepared 9×13 inch baking pan. Use your hands or the back of a spoon to ensure it’s a uniform thickness. This forms the sturdy, delicious base for our bars.
6. Placing the Poptarts
Carefully arrange the Poptarts over the cookie dough base. Depending on the size of your Poptarts, you’ll likely use 6-8 Poptarts, creating a single layer. Try to place them so that when you cut the bars, each piece gets a good portion of Poptart. Gently press them down slightly into the dough.
7. The Top Cookie Layer
Take the remaining one-third of the cookie dough and crumble it evenly over the Poptarts. You can gently press some of the crumbles down, but leaving some looser will create a lovely, slightly textured top layer that bakes up beautifully. This method ensures the Poptarts are encased and protected during baking.
8. Baking to Golden Perfection
Bake for 25-30 minutes, or until the edges are golden brown and the center is set. A good sign of doneness is when a toothpick inserted into the cookie dough (not the Poptart) comes out with moist crumbs attached. Avoid over-baking, as this can lead to dry bars.
9. Cooling Completely
This is a crucial step! Let the Poptart Cookie Bars cool completely in the pan on a wire rack before attempting to cut them. Cooling allows the bars to set up properly, preventing them from crumbling when sliced. Patience is a virtue here!
10. Making the Simple Glaze
In a small bowl, whisk together the powdered sugar and milk (or cream) until smooth. Start with less liquid and add more a teaspoon at a time until you reach your desired pouring consistency – thick enough to coat a spoon but thin enough to drizzle easily.
11. Decorating and Serving
Once the bars are completely cool, drizzle the glaze generously over the top. If desired, immediately scatter some fun sprinkles over the wet glaze. Once the glaze has set, use the parchment paper overhang to lift the entire slab out of the pan. Place on a cutting board and slice into squares or rectangles. Serve and enjoy!
Expert Tips for Poptart Cookie Bar Perfection
- The ‘Chill’ Factor: While not strictly necessary for this recipe, chilling the dough for 30 minutes before pressing it into the pan can make it easier to handle and can result in a slightly chewier bar.
- Don’t Overmix: This cannot be stressed enough! Mix the dry ingredients into the wet ingredients only until just combined. Overmixing develops gluten, leading to tough, dry cookie bars.
- Poptart Placement: For the neatest slices and to ensure every bar gets a good Poptart portion, try to align your Poptarts in a grid pattern. This makes cutting much easier later on.
- Cutting Cleanly: The secret to neat squares is a completely cooled bar and a sharp, warm knife. Run your knife under hot water, wipe it dry, and then make your cuts. Repeat for each cut for perfectly clean edges.
- Flavor Experimentation: Don’t be afraid to get creative! Try different Poptart flavors like Brown Sugar Cinnamon, S’mores, or even seasonal varieties. You can also add a touch of lemon zest to your glaze for a brighter flavor, or a pinch of cinnamon for warmth.
What to Serve with Your Poptart Cookie Bars
These delightful Poptart Cookie Bars are fantastic on their own, but they also pair wonderfully with a few classic accompaniments. A tall glass of cold milk is always a winner, bringing out the nostalgic comfort of the treat. For the adults, a warm cup of coffee or a soothing tea makes for a perfect afternoon pick-me-up. To truly elevate this dessert, serve a warm bar with a scoop of creamy vanilla ice cream or a dollop of freshly whipped cream. They also make a fun and whimsical addition to any brunch spread, adding a touch of childhood joy to your morning feast. See more easy recipes for your next gathering!
Storing and Reheating Poptart Cookie Bars
To keep your Poptart Cookie Bars fresh and delicious, store them in an airtight container at room temperature for up to 3-4 days. For longer storage, these bars freeze beautifully! To freeze, first let them cool completely. Then, flash freeze the individual bars on a baking sheet for about an hour until firm. Once firm, transfer them to a freezer-safe bag or container, separating layers with parchment paper, and store for up to 2-3 months. To reheat, you can let them thaw at room temperature, or for a warm, gooey treat, pop them in the microwave for 10-15 seconds or in a toaster oven at a low temperature until just warmed through.
Poptart Cookie Bars FAQ
Can I use any flavor of Poptart?
My cookie layer is tough, what went wrong?
How do I prevent the Poptarts from drying out?
Can I make these gluten-free or dairy-free?
How far in advance can I make these bars?
Delicious Poptart Cookie Bars
- Total Time: 45 minutes
- Yield: 12-16 bars
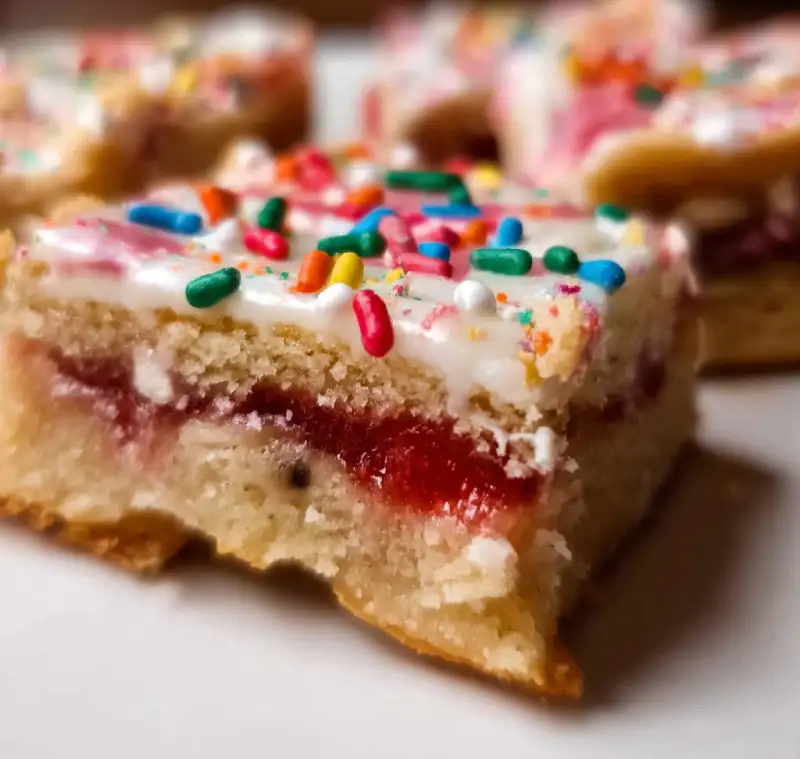
Description
These Poptart Cookie Bars combine a chewy cookie base with your favorite fruit-filled Poptarts, topped with a sweet glaze. An easy-to-bake treat that’s perfect for any occasion!
Ingredients
- 1 cup (2 sticks) unsalted butter, softened
- ¾ cup granulated sugar
- ¾ cup packed light brown sugar
- 2 large eggs
- 2 teaspoons vanilla extract
- 2 ½ cups all-purpose flour
- 1 teaspoon baking soda
- ½ teaspoon baking powder
- ½ teaspoon salt
- 6–8 Poptarts (fruit-filled recommended)
- For the Glaze:
- 1 ½ cups powdered sugar
- 2–3 tablespoons milk or cream
- Optional: Sprinkles for decorating
Instructions
- 1. Preheat & Prep: Preheat oven to 350°F (175°C). Line a 9×13 inch baking pan with parchment paper, leaving an overhang.
- 2. Cream Butter & Sugars: In a large bowl, cream softened butter, granulated sugar, and brown sugar until light and fluffy.
- 3. Add Wet Ingredients: Beat in eggs one at a time, then stir in vanilla extract.
- 4. Combine Dry Ingredients: In a separate bowl, whisk flour, baking soda, baking powder, and salt. Gradually add to wet ingredients, mixing on low speed until just combined. Do not overmix.
- 5. Form Base Layer: Press two-thirds of the cookie dough evenly into the prepared pan.
- 6. Place Poptarts: Arrange Poptarts in a single layer over the cookie dough base, gently pressing down.
- 7. Add Top Layer: Crumble the remaining cookie dough evenly over the Poptarts.
- 8. Bake: Bake for 25-30 minutes, or until edges are golden brown and the center is set.
- 9. Cool Completely: Let bars cool completely in the pan on a wire rack before glazing and cutting.
- 10. Make Glaze: Whisk powdered sugar and milk/cream until smooth, adjusting consistency as needed.
- 11. Glaze & Serve: Drizzle glaze over cooled bars, add sprinkles if desired. Once glaze sets, lift from pan and cut into squares.
- Prep Time: 15 mins
- Cook Time: 30 mins