
Table of Contents
- Introduction: Why This Cake Has My Heart (and Will Have Yours)
- Why This Recipe Delivers Unforgettable Flavor and Texture
- Ingredients: Understanding Each Component’s Role
- Step-by-Step Instructions: Baking Your Masterpiece
- Expert Tips for Success: Elevate Your Baking
- What to Serve With Your Banana Cake
- Storing and Reheating Your Brown Butter Banana Cake
- Frequently Asked Questions (FAQ)
Introduction: Why This Cake Has My Heart (and Will Have Yours)
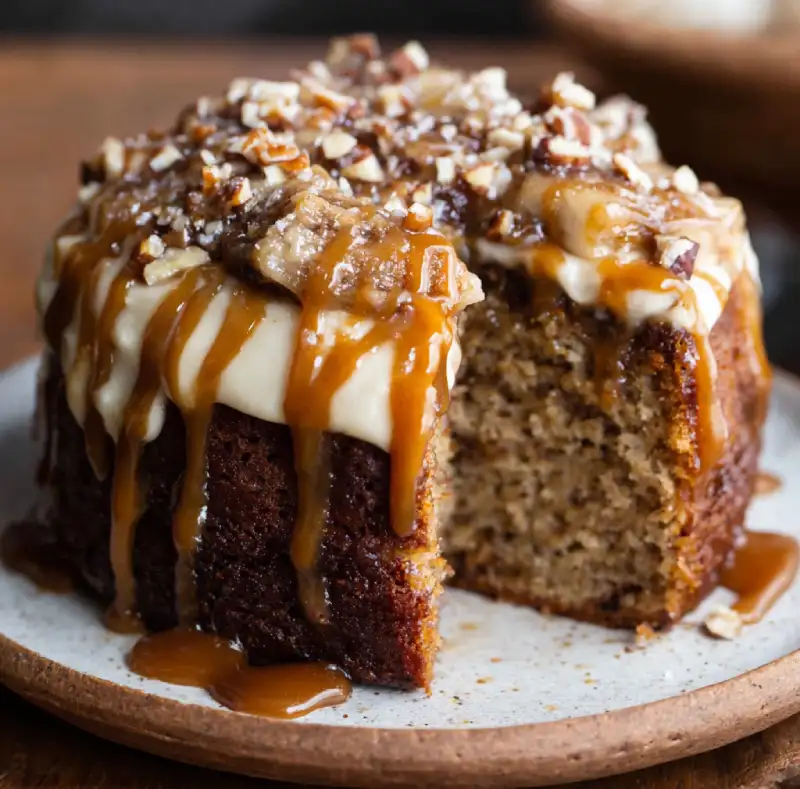
Oh, banana cake. It’s a classic for a reason, isn’t it? But what if I told you there’s a way to elevate that comforting, familiar flavor to something truly extraordinary? Something that will make your taste buds sing and your kitchen smell like pure heaven? Friends, prepare yourselves for the salted caramel brown butter banana cake. This isn’t just any banana cake; it’s a revelation. Imagine a cake so moist it practically melts in your mouth, infused with the deep, nutty aroma of brown butter, and swirled with ribbons of luscious, salty-sweet caramel. It’s a symphony of textures and flavors that will undoubtedly become your new baking obsession.
My journey to this perfect banana cake has been a delicious one, filled with countless experiments and a relentless pursuit of that ‘wow’ factor. I’ve tried them all – plain, frosted, spiced – but nothing, absolutely nothing, compares to the magic that happens when brown butter meets ripe bananas and a generous swirl of salted caramel. This recipe isn’t just about baking; it’s about creating an experience, a moment of pure culinary bliss. Get ready to bake the most unforgettable salted caramel brown butter banana cake you’ve ever tasted!
Why This Recipe Delivers Unforgettable Flavor and Texture
- Brown Butter: The Secret to Depth and Nutty Richness: This isn’t just a fancy step; it’s a flavor game-changer. Browning the butter toasts the milk solids, creating an incredible nutty, caramel-like aroma that permeates every bite of the cake, adding a complexity that regular butter simply can’t achieve.
- Salted Caramel Swirl: Balancing Sweetness with Savory Notes: The homemade salted caramel isn’t just a topping; it’s swirled directly into the batter, ensuring pockets of gooey, salty-sweet goodness throughout the cake. The salt perfectly cuts through the sweetness, creating an addictive balance that keeps you coming back for more.
- Ripe Bananas: Ensuring Unparalleled Moisture and Natural Sweetness: Overripe bananas are the unsung heroes here. Their high sugar content and soft texture contribute immense moisture and a natural sweetness, making the cake incredibly tender and flavorful without needing excessive added sugar.
- Perfect Crumb: A Cake That’s Tender, Not Dense: Through careful ingredient ratios and mixing techniques, we achieve a crumb that is wonderfully tender and moist, never dry or heavy. It’s the kind of cake that practically melts in your mouth.
Ingredients: Understanding Each Component’s Role
Here is what you need and why:
Bananas: Why Overripe is Key (and How to Ripen Quickly): You want bananas that are heavily speckled with brown, almost black. These are packed with natural sugars and moisture, which are crucial for the cake’s flavor and tender texture. If your bananas aren’t ripe enough, you can speed up the process by baking them in their peels on a baking sheet at 300°F (150°C) for 15-30 minutes until they are black and soft. Let them cool before using.
Brown Butter: The Flavor Catalyst (Don’t Skip This!): This is the star ingredient that transforms a good banana cake into an extraordinary one. Browning the butter develops a deep, nutty, toasted flavor that adds incredible depth and complexity. It’s worth the extra few minutes, I promise!
All-Purpose Flour: Provides the structure for our cake. I recommend using unbleached all-purpose flour for the best results. For a slightly lighter crumb, you could substitute a small portion with cake flour, but it’s not strictly necessary.
Baking Soda & Baking Powder: Our leavening agents. Baking soda reacts with the acidic bananas and brown sugar to create lift, while baking powder provides additional rise, ensuring a light and airy texture.
Granulated Sugar & Brown Sugar: Granulated sugar contributes to sweetness and tenderness, while brown sugar adds moisture, a subtle molasses flavor, and helps keep the cake incredibly moist.
Spices (Cinnamon, Nutmeg): These warm spices complement the banana and brown butter beautifully, adding another layer of cozy flavor without overpowering the main stars.
Eggs: Act as a binder, providing structure and richness to the cake. Ensure they are at room temperature for better emulsification with the other ingredients.
Sour Cream or Buttermilk: These acidic dairy products react with the baking soda, contributing to the cake’s tenderness and moisture. They also add a slight tang that balances the sweetness. You can make your own buttermilk by adding 1 tablespoon of lemon juice or white vinegar to regular milk and letting it sit for 5 minutes.
Salted Caramel: Homemade vs. Store-Bought (Pros & Cons): While homemade salted caramel offers unparalleled flavor and freshness, a good quality store-bought salted caramel can be a convenient shortcut. If using store-bought, ensure it’s a thick, pourable consistency. For homemade, this recipe from Food Network is a fantastic starting point.
Vanilla Extract: Enhances all the other flavors, adding a warm, aromatic note.
Step-by-Step Instructions: Baking Your Masterpiece
Follow these step-by-step instructions to create your perfect salted caramel brown butter banana cake:
1. Making the Brown Butter: Watch for the Golden Speckles
In a light-colored saucepan, melt the butter over medium heat. It will foam, then subside. Continue cooking, stirring occasionally, until the butter solids at the bottom turn golden brown and smell nutty. This usually takes 5-8 minutes. Immediately remove from heat and pour into a heatproof bowl to stop the cooking process. Let it cool slightly.
2. Preparing the Salted Caramel: Achieving Velvety Smoothness
If making homemade caramel, follow your preferred recipe. For a quick version, melt sugar in a saucepan until amber, then carefully whisk in warm heavy cream and butter, stirring until smooth. Finish with a pinch of sea salt. If using store-bought, ensure it’s warmed slightly to a pourable consistency.
3. Mixing the Wet Ingredients: Creaming for Airiness
In a large bowl, mash the ripe bananas thoroughly. Add the cooled brown butter, both sugars, eggs, sour cream (or buttermilk), and vanilla extract. Whisk until well combined and slightly airy. The mixture should be smooth but still have some banana chunks if you prefer a rustic texture.
4. Incorporating Dry Ingredients: The Art of Not Overmixing
In a separate bowl, whisk together the flour, baking soda, baking powder, cinnamon, nutmeg, and salt. Gradually add the dry ingredients to the wet ingredients, mixing on low speed or by hand until just combined. Stop mixing as soon as no dry streaks remain. Overmixing will develop the gluten and lead to a tough cake.
5. Layering and Swirling: Visual Appeal and Flavor Distribution
Pour about half of the batter into your prepared baking pan. Drizzle about half of the salted caramel over the batter. Use a knife or skewer to gently swirl the caramel into the batter. Repeat with the remaining batter and caramel. Don’t over-swirl, as you want distinct ribbons of caramel.
6. Baking to Perfection: Temperature and Doneness Cues
Bake in a preheated oven at 350°F (175°C) for 45-60 minutes, or until a wooden skewer inserted into the center comes out with moist crumbs, but no wet batter. The top should be golden brown and spring back when lightly touched. Keep an eye on it, as oven temperatures can vary.
7. Cooling Properly: The Patience for a Perfect Slice
Once baked, let the cake cool in the pan on a wire rack for at least 15-20 minutes before attempting to invert it. This allows the cake to set and prevents it from breaking. Once inverted, let it cool completely on the wire rack before slicing. This patience is crucial for a clean slice and optimal flavor.
Expert Tips for Success: Elevate Your Baking
- Don’t Rush the Brown Butter: Patience Pays Off: Browning butter takes a few minutes, but rushing it can lead to burnt butter or not enough flavor development. Keep the heat medium and stir frequently.
- Measure Flour Correctly: Avoid a Dry Cake: Always spoon your flour into the measuring cup and then level it off with a straight edge. Scooping directly from the bag can compact the flour, leading to too much flour and a dry cake.
- Gentle Mixing is Key: Preventing a Tough Crumb: Once you add the dry ingredients, mix only until just combined. Overmixing develops gluten, resulting in a dense, tough cake.
- Trust Your Nose: When the Brown Butter is Ready: Your nose is your best tool for brown butter. When you smell a rich, nutty aroma and see golden-brown flecks at the bottom of the pan, it’s done.
- The Toothpick Test: Ensuring Internal Doneness: Insert a wooden skewer or toothpick into the center of the cake. If it comes out clean or with a few moist crumbs attached, your cake is perfectly baked.
- Room Temperature Ingredients: For a Smooth Batter: Eggs and dairy at room temperature emulsify better with the other ingredients, creating a smoother, more uniform batter and a better-textured cake.
What to Serve With Your Banana Cake
This salted caramel brown butter banana cake is a showstopper on its own, but here are a few ideas to make it even more special:
- A La Mode: Vanilla Bean Ice Cream Perfection: A scoop of high-quality vanilla bean ice cream melting over a warm slice of cake is pure bliss. The cold creaminess perfectly contrasts the warm, moist cake.
- Simple Fresh Cream: Whipped to Lightness: A dollop of lightly sweetened whipped cream adds an elegant touch and a cloud-like texture that complements the cake beautifully.
- With Your Morning Coffee: An Indulgent Treat: There’s no rule that says cake can’t be breakfast! A slice of this banana cake with your favorite coffee or tea is the ultimate way to start (or end) your day.
Storing and Reheating Your Brown Butter Banana Cake
To keep your delicious salted caramel brown butter banana cake fresh and flavorful:
- Airtight Storage: Keeping it Fresh Longer: Store the cake in an airtight container at room temperature for up to 3-4 days. The moisture from the bananas and caramel helps keep it fresh.
- Freezing for Later: Your Future Self Will Thank You: This cake freezes beautifully! Wrap individual slices or the whole cooled cake tightly in plastic wrap, then in aluminum foil. Freeze for up to 2-3 months. Thaw overnight in the refrigerator or at room temperature.
- Gentle Reheating: Bringing Back the Warmth: To enjoy a warm slice, gently reheat individual portions in the microwave for 15-30 seconds, or in a preheated oven at 300°F (150°C) for 5-10 minutes.
Frequently Asked Questions (FAQ)
Can I use regular butter instead of brown butter?
What if I don’t have ripe bananas?
Can I make the salted caramel ahead of time?
How do I know when the cake is fully baked?
Can this recipe be made into cupcakes?
Salted Caramel Brown Butter Banana Cake
- Total Time: 1 hour 15 minutes
- Yield: 12 servings
Description
Unleash the best flavor with this salted caramel brown butter banana cake. This step-by-step guide makes it easy to bake.
Ingredients
- 1 cup (2 sticks) unsalted butter
- 3–4 very ripe medium bananas, mashed (about 1 ½ cups)
- ¾ cup granulated sugar
- ½ cup packed light brown sugar
- 2 large eggs, room temperature
- ½ cup sour cream or buttermilk, room temperature
- 1 teaspoon vanilla extract
- 2 cups all-purpose flour
- 1 teaspoon baking soda
- ½ teaspoon baking powder
- 1 teaspoon ground cinnamon
- ¼ teaspoon ground nutmeg
- ½ teaspoon salt
- ½ cup salted caramel sauce (homemade or good quality store-bought)
Instructions
- 1. Brown the Butter: In a light-colored saucepan, melt butter over medium heat until golden brown and nutty. Pour into a heatproof bowl and let cool slightly.
- 2. Prepare Caramel: Warm salted caramel if using store-bought, or prepare homemade caramel.
- 3. Mix Wet Ingredients: In a large bowl, mash bananas. Add cooled brown butter, both sugars, eggs, sour cream, and vanilla. Whisk until combined.
- 4. Combine Dry Ingredients: In a separate bowl, whisk flour, baking soda, baking powder, cinnamon, nutmeg, and salt.
- 5. Combine Wet and Dry: Gradually add dry ingredients to wet, mixing until just combined. Do not overmix.
- 6. Layer and Swirl: Pour half the batter into a greased 9×13 inch baking pan. Drizzle with half the caramel and swirl gently. Repeat with remaining batter and caramel.
- 7. Bake: Bake at 350°F (175°C) for 45-60 minutes, or until a wooden skewer inserted into the center comes out with moist crumbs.
- 8. Cool: Let cool in the pan for 15-20 minutes, then invert onto a wire rack to cool completely before slicing.
- Prep Time: 25 mins
- Cook Time: 50 mins