
Table of Contents
- Introduction: Why These Salted Caramel Chocolate Chip Cookies Rule
- Why This Recipe Delivers the Best Salted Caramel Chocolate Chip Cookies
- Essential Ingredients and Smart Substitutions
- Step-by-Step Baking Guide: Your Visual Walkthrough
- Expert Tips for Cookie Success
- What to Serve With Your Salted Caramel Chocolate Chip Cookies
- Storing and Reheating for Optimal Enjoyment
- Frequently Asked Questions About Salted Caramel Chocolate Chip Cookies
Introduction: Why These Salted Caramel Chocolate Chip Cookies Rule
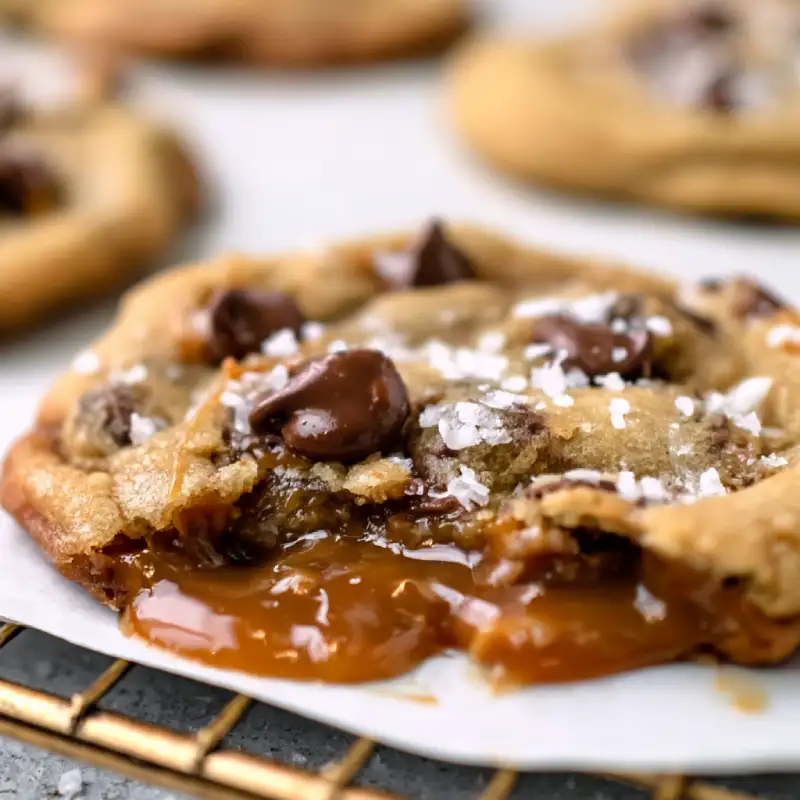
Oh, friends, prepare yourselves for a cookie experience that will redefine your dessert standards! Today, we’re diving headfirst into the glorious world of salted caramel chocolate chip cookies. Imagine: a cookie that’s perfectly chewy in the center, with just the right amount of crispness at the edges, studded with rich, melty chocolate, and bursting with pockets of gooey, buttery caramel, all balanced by that irresistible sprinkle of flaky sea salt. This isn’t just a cookie; it’s a symphony of textures and flavors, a true masterpiece of the baking world.
My Journey to the Perfect Cookie: A Personal Quest for Sweet, Salty Perfection
Like many of you, I’ve been on a lifelong quest for the ultimate chocolate chip cookie. But then, I discovered the magic of adding caramel and a kiss of salt, and everything changed. It took countless batches, a few burnt edges, and many happy taste-testers to perfect this recipe. I wanted a cookie that wasn’t just good, but truly unforgettable – one that would make you close your eyes and savor every single bite. And I’m thrilled to say, this is it!
What to Expect: Perfectly Chewy, Crinkly, and Irresistible
When you pull these salted caramel chocolate chip cookies from the oven, you’ll be greeted by golden-brown edges, beautifully crinkled tops, and an aroma that will fill your home with pure joy. Each bite delivers that satisfying chew, followed by the luxurious melt of chocolate and the sweet, salty burst of caramel. They are, quite simply, irresistible.
Why This Recipe Delivers the Best Salted Caramel Chocolate Chip Cookies
- The ‘Why’: Achieving Chewy Centers and Crispy Edges: Our precise ratio of sugars and fats, combined with a crucial chilling step, ensures that perfect balance of a soft, chewy interior and a delightfully crisp exterior.
- The ‘How’: Deep, Complex Caramelized Flavor: We start with brown butter, which adds an incredible nutty depth that elevates the entire cookie, making it far more complex than your average chocolate chip cookie.
- The ‘Science’: The Perfect Balance of Sweet and Salty: The flaky sea salt isn’t just for show; it’s a flavor enhancer, cutting through the sweetness of the chocolate and caramel, creating an addictive contrast that keeps you coming back for more.
- The ‘Secret’: Pockets of Melted Chocolate and Gooey Caramel: Strategic folding and the right type of caramel ensure you get those glorious, molten pockets of flavor in every single bite.
Essential Ingredients and Smart Substitutions
Here is what you need and why:
Butter Breakdown: Why Brown Butter Makes a Difference: We’re not just using any butter; we’re browning it! This simple step toasts the milk solids, creating a rich, nutty, caramel-like flavor that forms the backbone of these incredible salted caramel chocolate chip cookies. It adds an unparalleled depth that you just can’t get from plain melted butter. Unsalted butter is preferred so you can control the salt content.
Sugar’s Role: Granulated vs. Brown Sugar for Texture and Moisture: A combination of both granulated and brown sugar is key. Granulated sugar contributes to the crisp edges and spread, while brown sugar (especially dark brown sugar) adds moisture, chewiness, and a lovely molasses flavor that complements the caramel beautifully.
Flour Facts: All-Purpose for Structure, Not Toughness: Standard unbleached all-purpose flour provides the necessary structure without making the cookies tough. Make sure to measure it correctly (more on that in the tips!) to avoid dry cookies.
Chocolate Choices: Why Quality Matters and Chip Size for Melt: Don’t skimp on the chocolate! High-quality chocolate chips, chunks, or even a chopped chocolate bar will make a huge difference. I love a mix of milk and semi-sweet for complexity, and varying sizes ensure pockets of melty goodness throughout. Ghirardelli or Guittard are excellent choices.
Caramel Core: Embracing Gooey or Chewy Caramel Bits: This is where the magic happens! You can use store-bought caramel bits (like Kraft Caramels, unwrapped and chopped if large) or even homemade soft caramels. The key is to have pieces that will melt into gooey pockets. Avoid hard caramels that won’t soften properly.
Salt Secrets: Flaky Sea Salt for the Perfect Finish: This is non-negotiable for salted caramel chocolate chip cookies! Flaky sea salt (like Maldon) sprinkled on top after baking provides that crucial textural crunch and bursts of salinity that balance the sweetness. Do not use fine table salt here.
Leavening Agents: Baking Soda for Spread and Puffed Texture: Baking soda reacts with the acidic brown sugar to create spread and a slightly puffed, chewy texture. It’s essential for the perfect cookie structure.
Egg Excellence: Binding and Richness: Eggs act as a binder, holding everything together, and contribute to the richness and chewiness of the cookies. Ensure they are at room temperature for better emulsification with the butter and sugar.
How to Make Salted Caramel Chocolate Chip Cookies
Follow these step-by-step photos:
1. Brown Butter Basics: The First Step to Flavor Depth
In a light-colored saucepan, melt your unsalted butter over medium heat. Continue to cook, stirring occasionally, until the butter foams, then turns golden brown, and nutty-smelling solids appear at the bottom. This usually takes 5-8 minutes. Immediately pour the browned butter into a heatproof bowl to stop the cooking process. Let it cool slightly, about 10-15 minutes, until it’s still warm but not scorching hot.
2. Combining Wet Ingredients: Creaming for Aeration
To the slightly cooled brown butter, add both granulated and brown sugars. Whisk vigorously until well combined. Then, beat in the room temperature egg and egg yolk, along with the vanilla extract, until the mixture is lightened in color and fluffy, about 2-3 minutes. This aeration is crucial for a tender cookie.
3. Mixing Dry Ingredients: Ensuring Even Distribution
In a separate medium bowl, whisk together your all-purpose flour, baking soda, and a pinch of fine salt. Make sure there are no lumps and everything is evenly distributed. This prevents pockets of leavening agent in your final cookies.
4. Folding in Chocolate and Caramel: Strategic Placement for Pockets
Gradually add the dry ingredients to the wet ingredients, mixing on low speed or by hand until just combined. Be careful not to overmix! Once the flour streaks are almost gone, fold in your chocolate chips/chunks and caramel bits. I like to save a few to press onto the tops of the scooped dough for a prettier finish.
5. Chilling the Dough: The Non-Negotiable for Flavor and Texture
Cover the dough and refrigerate for at least 2 hours, or preferably overnight (up to 72 hours). This chilling time allows the flavors to meld, the flour to fully hydrate, and the butter to firm up, preventing excessive spreading and resulting in a chewier, more flavorful cookie. Trust me, don’t skip this step!
6. Scooping and Spacing: Achieving Uniform Cookies
Preheat your oven to 375°F (190°C) and line baking sheets with parchment paper. Use a 2-tablespoon cookie scoop to portion out the dough. Place the dough balls about 2 inches apart on the prepared baking sheets. If desired, press a few extra chocolate chips and caramel bits onto the tops of each dough ball.
7. Baking to Perfection: Visual Cues for Doneness
Bake for 10-12 minutes, or until the edges are golden brown and set, but the centers still look slightly soft and puffy. They will continue to cook slightly as they cool. For that perfect crinkly top, you can gently tap the baking sheet on the counter a few times during the last few minutes of baking.
8. The ‘Salt Sprinkle’: Finishing Touch for Pop
Immediately upon removing the cookies from the oven, sprinkle them generously with flaky sea salt. Let them cool on the baking sheet for 5-10 minutes before transferring them to a wire rack to cool completely. This allows them to set up properly and prevents them from breaking.
Expert Tips for Cookie Success
- Don’t Skip the Chill: Why Cold Dough is Key: Chilling the dough is paramount! It prevents spreading, deepens flavor, and creates that desirable chewy texture. Think of it as marinating your cookie dough.
- The Importance of Room Temperature Eggs: Embracing Emulsification: Room temperature eggs emulsify better with the butter and sugar, creating a smoother, more uniform dough and a better texture in the final cookie.
- Measuring Flour Correctly: Avoid Dry, Crumbly Cookies: Always spoon and level your flour, or better yet, weigh it with a kitchen scale. Too much flour is the number one culprit for dry, cakey cookies.
- Oven Calibration: Knowing Your Oven’s Hot Spots: Ovens can vary wildly! Invest in an oven thermometer to ensure your oven is at the correct temperature. Rotate your baking sheets halfway through baking for even browning.
- Cooling Rack Essentials: Stopping the Baking Process: Transferring cookies to a wire rack after a few minutes on the hot baking sheet stops the residual baking, preventing overcooked bottoms and ensuring a perfect texture.
- Achieving the Perfect Caramel Swirl: Techniques for Inclusions: If using soft caramels, chop them into small pieces (about 1/4-inch) to ensure they melt beautifully without creating huge, messy puddles. For an extra gooey effect, you can even drizzle a little extra caramel sauce on top of the warm cookies before the salt sprinkle.
What to Serve With Your Salted Caramel Chocolate Chip Cookies
Classic Pairings: Milk, Coffee, and Tea
These salted caramel chocolate chip cookies are absolutely divine on their own, but they truly shine when paired with a classic beverage. A tall, cold glass of milk is always a winner, cutting through the richness beautifully. For the adults, a hot cup of coffee or a robust black tea makes for a sophisticated and comforting treat. The bitterness of the coffee or tea perfectly complements the sweet and salty notes of the cookies.
Dessert Combinations: Ice Cream and More
Take these cookies to the next level by serving them warm with a scoop of vanilla bean ice cream. The contrast of warm cookie and cold, melting ice cream is pure bliss. You could also crumble them over a bowl of plain yogurt for a decadent breakfast or dessert, or even use them to make an epic ice cream sandwich!
Unexpected Delights: Balancing the Sweetness
For something a little different, consider pairing these rich cookies with a tart fruit compote or a dollop of unsweetened whipped cream. The slight acidity or lightness can provide a wonderful balance to the intense sweetness and richness of the caramel and chocolate. For more baking inspiration, see more easy recipes!
Storing and Reheating for Optimal Enjoyment
Airtight Storage Solutions: Keeping Cookies Fresh
To keep your salted caramel chocolate chip cookies at their best, store them in an airtight container at room temperature for up to 3-4 days. If you find them starting to dry out, you can place a slice of bread in the container with them; the cookies will absorb moisture from the bread, keeping them soft.
Freezing Baked Cookies: Your Future Self Will Thank You
These cookies freeze beautifully! Once completely cooled, place them in a single layer on a baking sheet and freeze until solid (about 1-2 hours). Then, transfer them to a freezer-safe airtight bag or container for up to 3 months. Thaw at room temperature or reheat for that fresh-baked feel.
Reheating for That Fresh-Baked Feel: Oven vs. Microwave
To enjoy a warm, gooey cookie experience, reheat them! Pop a cookie or two in the microwave for 10-15 seconds (be careful not to overheat, or the caramel can become too hot). Alternatively, place them on a baking sheet and warm in a preheated oven at 300°F (150°C) for 5-7 minutes until softened and warm throughout. This is especially good for bringing back that melty chocolate and gooey caramel.
Frequently Asked Questions About Salted Caramel Chocolate Chip Cookies
Can I use store-bought caramel?
Why are my cookies spreading too much?
How do I prevent my cookies from becoming hard?
Can I make these gluten-free?
What’s the best type of chocolate to use?
Delicious Salted Caramel Chocolate Chip Cookies
- Total Time: 10 minute
- Yield: 24 cookies
Description
Indulge in the ultimate sweet and salty treat with these perfectly chewy, crinkly salted caramel chocolate chip cookies. Featuring nutty brown butter and gooey caramel pockets, they’re simply irresistible.
Ingredients
- 1 cup (226g) unsalted butter
- ¾ cup (150g) granulated sugar
- 1 cup (200g) packed light or dark brown sugar
- 1 large egg + 1 large egg yolk, room temperature
- 2 teaspoons vanilla extract
- 2 ¼ cups (270g) all-purpose flour
- 1 teaspoon baking soda
- ½ teaspoon fine sea salt
- 1 ½ cups (255g) chocolate chips or chunks (mix of milk and semi-sweet recommended)
- 1 cup (180g) soft caramel bits, chopped if large
- Flaky sea salt, for sprinkling
Instructions
- Brown the Butter: In a light-colored saucepan, melt butter over medium heat. Cook, stirring, until foamy, then golden brown with nutty solids. Pour into a heatproof bowl and cool slightly (10-15 mins).
- Combine Wet Ingredients: To the cooled brown butter, add granulated and brown sugars; whisk well. Beat in egg, egg yolk, and vanilla until light and fluffy (2-3 mins).
- Mix Dry Ingredients: In a separate bowl, whisk flour, baking soda, and fine sea salt until combined.
- Combine & Fold: Gradually add dry ingredients to wet, mixing until just combined. Fold in chocolate chips and caramel bits.
- Chill Dough: Cover and refrigerate dough for at least 2 hours, or up to 72 hours.
- Scoop & Bake: Preheat oven to 375°F (190°C). Line baking sheets with parchment. Scoop dough (2 tbsp each) 2 inches apart.
- Bake: Bake for 10-12 minutes, until edges are golden and centers are slightly soft.
- Salt & Cool: Immediately sprinkle with flaky sea salt. Cool on baking sheet for 5-10 minutes, then transfer to wire rack to cool completely.
- Prep Time: 20 mins
- Cook Time: 10-12 mins