
Table of Contents
- Strawberry Crunch Cheesecake Tacos: Your New Favorite Dessert
- Why This Recipe Delivers on Flavor and Fun
- Ingredients: What You Need and Why
- Step-by-Step: Crafting Your Cheesecake Tacos
- Expert Tips for Cheesecake Taco Success
- Pairing Perfection: What to Serve Alongside
- Storage and Reheating: Keep Them Fresh
- Frequently Asked Questions About Strawberry Crunch Cheesecake Tacos
Strawberry Crunch Cheesecake Tacos: Your New Favorite Dessert
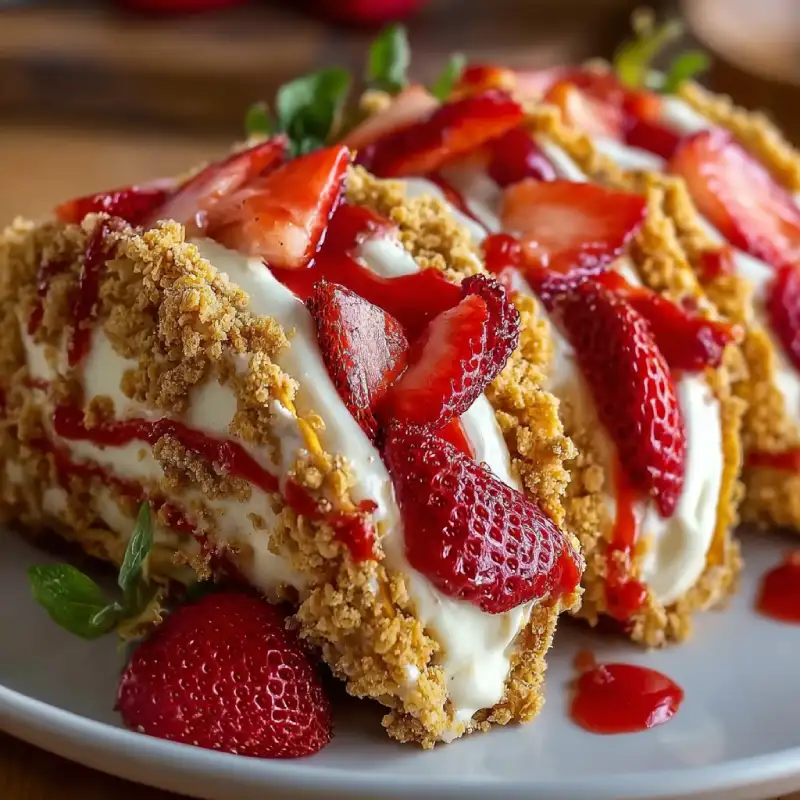
Prepare to have your dessert world rocked! Imagine a crispy, golden taco shell, cradling a cloud-like, no-bake cheesecake filling, all crowned with an irresistible, vibrant strawberry crunch. These Strawberry Crunch Cheesecake Tacos aren’t just a dessert; they’re an experience. Each bite delivers an explosion of textures and flavors – the satisfying crunch, the smooth creaminess, and the sweet-tart burst of strawberry. If you’ve been searching for a dessert that’s both playful and sophisticated, incredibly delicious, and surprisingly easy to make, then you’ve found your new obsession. Trust me, as someone who lives and breathes all things sweet, these tacos are a game-changer. See more easy recipes that will delight your taste buds!
Why You Need These Tacos in Your Life
Because life is too short for boring desserts! These Strawberry Crunch Cheesecake Tacos bring a smile to every face and a burst of joy to every palate. They’re perfect for parties, potlucks, or simply a delightful treat after a long week. They combine the best of a classic cheesecake with the fun, handheld appeal of a taco, making them utterly irresistible.
A Personal Sweet Tooth Confession
I’ve always been a sucker for anything strawberry and cheesecake. The moment I conceptualized combining the nostalgic crunch of a strawberry shortcake bar with the creamy decadence of cheesecake, all wrapped in a fun taco shell, I knew I was onto something special. This recipe is the culmination of many happy kitchen experiments, and I’m thrilled to share it with you.
Why This Recipe Delivers on Flavor and Fun
- Crunchy Shell, Creamy Filling: The Perfect Contrast: The magic of these Strawberry Crunch Cheesecake Tacos lies in the incredible textural interplay. The crisp, slightly sweet taco shell provides the ideal counterpoint to the rich, velvety smooth no-bake cheesecake filling.
- Sweet, Tart, and Tangy: A Balanced Bite: The strawberry crunch topping isn’t just for looks; it brings a delightful tartness that cuts through the sweetness of the cheesecake, creating a perfectly balanced flavor profile that keeps you coming back for more.
- Kid-Friendly and Crowd-Pleasing Appeal: Who doesn’t love a taco? And who doesn’t love cheesecake? Combine them, and you have a dessert that appeals to every age group. They’re fun to eat and even more fun to share!
- No-Bake Filling for Easy Execution: Forget the water baths and cracked cheesecakes! Our no-bake filling is incredibly simple to whip up, saving you time and stress without sacrificing an ounce of flavor or creaminess.
Ingredients: What You Need and Why
Here is what you need and why:
For the Strawberry Crunch Coating: Crushing the Flavor
Golden Oreos: These provide the perfect buttery, vanilla base for our crunch. Their light color allows the strawberry flavor to shine through. You can use vanilla wafers as an alternative.
Freeze-Dried Strawberries: This is where the intense, natural strawberry flavor comes from! Freeze-dried berries are concentrated and add a wonderful tartness and vibrant color without adding excess moisture. Do not substitute with fresh or frozen strawberries here.
Melted Unsalted Butter: Binds the crunch together and adds richness. Unsalted butter gives you control over the overall saltiness of the dish.
Granulated Sugar: A touch of sweetness to balance the tartness of the strawberries.
For the Sweet Taco Shells: Achieving Golden Crispiness
All-Purpose Flour: The structural backbone of our shells. Use a good quality, unbleached flour for best results.
Granulated Sugar: Sweetens the shells just enough to complement the filling without being overly sugary.
Baking Powder: Provides a little lift, making the shells slightly tender yet still crisp.
Salt: A pinch enhances all the other flavors.
Unsalted Butter (cold, cubed): Creates a tender, flaky texture when cut into the flour. Cold butter is crucial for this.
Ice Water: Helps bring the dough together without overworking it, keeping it tender. The cold temperature also helps keep the butter solid.
For the No-Bake Cheesecake Filling: Creamy Perfection Explained
Full-Fat Cream Cheese (softened): The star of our cheesecake! Full-fat cream cheese ensures a rich, creamy, and stable filling. Make sure it’s softened to room temperature for a lump-free mixture.
Powdered Sugar: Sweetens the filling and helps thicken it without adding a grainy texture. Sift it to avoid lumps.
Vanilla Extract: A classic flavor enhancer that complements the strawberry beautifully. Use pure vanilla extract for the best taste.
Heavy Cream (cold): Whipped into stiff peaks, this provides the light, airy, and stable base for our no-bake cheesecake. It must be very cold to whip properly. For a reliable brand, I often turn to King Arthur Baking’s guide on whipping cream for tips.
Ingredient Substitutions: Adapt to Your Pantry
While I highly recommend sticking to the recipe for optimal results, here are a few ideas: For the crunch, you could experiment with vanilla wafers or even shortbread cookies. For the shells, a store-bought sweet pastry dough could work in a pinch, though homemade is always superior. For the filling, you can swap out vanilla extract for almond extract for a different flavor profile, or even add a touch of lemon zest for extra brightness.
Step-by-Step: Crafting Your Cheesecake Tacos
Follow these step-by-step instructions to create your perfect Strawberry Crunch Cheesecake Tacos:
1. Making the Strawberry Crunch Topping: Texture First
In a food processor, pulse the Golden Oreos until they form fine crumbs. Add the freeze-dried strawberries and pulse again until they are also finely crushed and well combined with the Oreo crumbs. Transfer to a bowl, then stir in the granulated sugar and melted butter until the mixture is evenly moistened and clumpy. Spread this mixture onto a baking sheet lined with parchment paper and bake at 300°F (150°C) for 8-10 minutes, or until lightly toasted and fragrant. Let it cool completely; it will crisp up as it cools. This step is crucial for developing that signature crunch and deep strawberry flavor.
2. Shaping and Baking the Taco Shells: The Foundation
In a large bowl, whisk together the flour, sugar, baking powder, and salt. Cut in the cold, cubed butter using a pastry blender or your fingertips until the mixture resembles coarse crumbs with some pea-sized pieces of butter remaining. Gradually add the ice water, a tablespoon at a time, mixing until the dough just comes together. Do not overmix. Form into a disc, wrap in plastic, and chill for at least 30 minutes. On a lightly floured surface, roll out the dough to about 1/8-inch thickness. Use a 3-4 inch round cookie cutter to cut out circles. Drape each circle over the rungs of an oven rack or a specialized taco shell mold. Bake at 375°F (190°C) for 8-12 minutes, or until golden brown and crisp. Let cool completely on the rack to maintain their shape.
3. Preparing the No-Bake Cheesecake Filling: Smooth and Creamy
In a large mixing bowl, beat the softened full-fat cream cheese with an electric mixer until smooth and creamy, about 2-3 minutes. Gradually add the sifted powdered sugar and vanilla extract, beating until fully incorporated and lump-free. In a separate, very cold bowl, whip the cold heavy cream until stiff peaks form. Gently fold the whipped cream into the cream cheese mixture in two additions, being careful not to deflate the air. Mix until just combined and smooth. Transfer the filling to a piping bag fitted with a large star tip (or a Ziploc bag with the corner snipped off).
4. Assembling Your Strawberry Crunch Cheesecake Tacos: The Grand Finale
Once the taco shells are completely cool, carefully pipe the no-bake cheesecake filling into each shell, filling it generously. Immediately sprinkle a generous amount of the cooled strawberry crunch topping over the filling. You can also dip the edges of the filled taco into the crunch for maximum coverage. For best results, chill the assembled Strawberry Crunch Cheesecake Tacos for at least 30 minutes before serving to allow the filling to set further and the flavors to meld. Serve immediately after chilling for the ultimate crunch and creaminess.
Expert Tips for Cheesecake Taco Success
- Achieving the Perfect Taco Shell Shape: If you don’t have a taco shell mold, draping the dough circles over the rungs of an oven rack works wonderfully. Ensure they are spaced out to allow for even baking and air circulation.
- Preventing Soggy Shells: Timing is Key: To keep your shells perfectly crisp, don’t fill them until just before serving, or at most, an hour or two beforehand. The moisture from the filling can soften the shells over time.
- Cream Cheese Temperature Matters: For a Smooth Filling: Always ensure your cream cheese is at true room temperature. Cold cream cheese will result in a lumpy filling, no matter how much you beat it.
- Decorating for Impact: Presentations that Pop: For an extra touch, drizzle a little melted white chocolate over the crunch topping, or garnish with a fresh strawberry slice and a sprig of mint. A beautiful presentation always enhances the eating experience!
Pairing Perfection: What to Serve Alongside
Light and Refreshing Beverage Pairings
These Strawberry Crunch Cheesecake Tacos pair beautifully with a glass of sparkling rosé, a light and crisp iced tea, or even a cold glass of milk for the younger crowd. The effervescence of sparkling drinks cuts through the richness of the cheesecake, while tea or milk offer a comforting balance.
Complementary Dessert Additions
While these tacos are a complete dessert on their own, if you’re hosting a larger spread, consider serving them alongside a fresh fruit platter or a light lemon sorbet. The freshness will complement the richness of the cheesecake tacos without overwhelming the palate.
Storage and Reheating: Keep Them Fresh
How to Store Leftover Tacos
Store any leftover Strawberry Crunch Cheesecake Tacos in an airtight container in the refrigerator for up to 2-3 days. While the shells may soften slightly over time, the flavor will still be fantastic. To best preserve the crunch, you can store the unfilled shells and the filling separately, assembling just before serving.
Best Practices for Enjoying Later
These tacos are best enjoyed fresh, but if you have leftovers, allow them to come to room temperature for about 10-15 minutes before eating to allow the cheesecake filling to soften slightly and enhance its creamy texture. Reheating is not recommended as it will compromise the texture of both the shell and the filling.
Frequently Asked Questions About Strawberry Crunch Cheesecake Tacos
Can I make these ahead of time?
What if I don’t have a taco shell mold?
Can I use different fruit flavors?
How do I prevent the shells from breaking?
Strawberry Crunch Cheesecake Tacos
- Total Time: 1 hour 5 minutes
- Yield: 12 tacos
Description
These delightful tacos feature crispy sweet shells filled with a creamy no-bake cheesecake, topped with an irresistible strawberry crunch. A fun and flavorful dessert that’s perfect for any occasion!
Ingredients
- For the Strawberry Crunch Coating:
- 1 cup Golden Oreos, crushed
- 1/2 cup freeze-dried strawberries, crushed
- 2 tbsp granulated sugar
- 3 tbsp unsalted butter, melted
- For the Sweet Taco Shells:
- 1 1/2 cups all-purpose flour
- 2 tbsp granulated sugar
- 1/2 tsp baking powder
- 1/4 tsp salt
- 1/4 cup unsalted butter, cold and cubed
- 4–5 tbsp ice water
- For the No-Bake Cheesecake Filling:
- 8 oz full-fat cream cheese, softened
- 1/2 cup powdered sugar, sifted
- 1 tsp vanilla extract
- 1 cup heavy cream, cold
Instructions
- 1. Make the Strawberry Crunch: Pulse Golden Oreos and freeze-dried strawberries in a food processor until fine crumbs. Stir in sugar and melted butter. Spread on a parchment-lined baking sheet and bake at 300°F (150°C) for 8-10 minutes until toasted. Cool completely.
- 2. Prepare Taco Shells: Whisk flour, sugar, baking powder, and salt. Cut in cold butter until crumbly. Add ice water gradually until dough forms. Chill for 30 minutes. Roll dough to 1/8-inch thick, cut 3-4 inch circles. Drape over oven rack rungs or taco mold. Bake at 375°F (190°C) for 8-12 minutes until golden. Cool completely.
- 3. Make Cheesecake Filling: Beat softened cream cheese until smooth. Beat in powdered sugar and vanilla. In a separate bowl, whip cold heavy cream to stiff peaks. Gently fold whipped cream into cream cheese mixture until just combined. Transfer to a piping bag.
- 4. Assemble Tacos: Pipe cheesecake filling into cooled taco shells. Sprinkle generously with strawberry crunch topping. Chill for at least 30 minutes before serving for best results.
- Prep Time: 45 mins
- Cook Time: 20 mins