
Fuel Your Day: The Easiest Protein Pancakes You’ll Ever Make
Imagine waking up to the aroma of freshly cooked pancakes, but instead of a sugar crash, you’re fueled and ready to conquer your day. That’s exactly what these easy protein powder pancakes deliver! Forget dry, rubbery, or bland protein pancakes of the past. My quest for the perfect healthy breakfast has led me to this recipe, and trust me, yours will end here too. These aren’t just good for protein pancakes; they’re just plain good pancakes – fluffy, flavorful, and incredibly satisfying.
Table of Contents
- Why These Protein Pancakes Are Your New Go-To
- Ingredients Demystified: What You Need and Why
- Your Step-by-Step Guide to Perfect Protein Pancakes
- Expert Tips for Protein Pancake Perfection
- Serving Suggestions: Beyond Maple Syrup
- Storing and Reheating Your Protein Pancakes
- Troubleshooting & FAQs About Protein Powder Pancakes
Why These Protein Pancakes Are Your New Go-To
I know what you’re thinking: protein pancakes often sacrifice taste and texture for nutrition. Not these! These easy protein powder pancakes are a game-changer for several reasons:
- Never Dry, Always Fluffy: We’ve cracked the code to prevent that dreaded dry, dense texture. These pancakes are light, airy, and melt-in-your-mouth fluffy, thanks to a careful balance of ingredients and a crucial resting period.
- Flavor That Doesn’t Scream ‘Healthy’: The subtle sweetness and rich flavor profile mean you won’t even realize you’re eating something so good for you. We’ll discuss how to tame the protein powder taste, ensuring a delicious experience every time.
- Quick & Convenient: Minimal fuss for maximum gain! This recipe is designed for busy mornings, coming together in minutes with ingredients you likely already have on hand.
- Satisfying & Sustaining: The added protein keeps you feeling full and energized for longer, making these the perfect start to a productive day without the mid-morning slump.
Ingredients Demystified: What You Need and Why
Here is what you need and why:
Choosing Your Protein Powder: This is perhaps the most critical choice for your easy protein powder pancakes. I generally recommend a high-quality whey protein isolate for the best texture and flavor, as it tends to mix smoothly and doesn’t impart a strong ‘protein’ taste. However, if you’re dairy-free, a good quality plant-based protein (like a pea or rice blend) can work, but be aware that it might absorb more liquid, so you might need to adjust the milk slightly. Casein protein can also be used, but it often results in a slightly denser pancake. Experiment with your favorite, but always opt for one you enjoy the taste of on its own!
Flour Power: For a light and tender crumb, I love using a blend of all-purpose flour and a touch of oat flour. The all-purpose provides structure, while the oat flour adds a lovely chewiness and a boost of fiber. You can certainly use 100% all-purpose flour, or for a gluten-free option, a good quality gluten-free all-purpose blend (ensure it contains xanthan gum) works wonderfully. For a truly light pancake, you could even try a portion of cake flour.
Dairy vs. Non-Dairy Milk: Whole milk provides richness and helps create a tender pancake. However, unsweetened almond milk or soy milk are excellent non-dairy alternatives that won’t significantly impact the texture or flavor. Just ensure it’s unsweetened to control the overall sweetness of your pancakes.
Leavening Agents: The secret to rise and fluffiness! We’re using baking powder here, not baking soda. Baking powder is a double-acting leavener, meaning it reacts once with liquid and again with heat, giving your pancakes that beautiful lift. Ensure your baking powder is fresh for optimal results.
Sweeteners: While optional, a touch of sweetener can enhance the flavor, especially if your protein powder isn’t sweetened. A tablespoon of maple syrup, honey, or even a sugar substitute like erythritol or stevia can do the trick. Remember, your protein powder might already be sweetened, so taste your batter before adding more.
Fat: A little goes a long way! A tablespoon of melted butter or a neutral oil (like avocado or canola) adds moisture, richness, and helps with browning. It also contributes to that tender, melt-in-your-mouth texture we’re aiming for.
Egg: The egg acts as a binder, adds richness, and contributes to the overall structure and fluffiness of the pancakes. A large egg is standard.
Vanilla Extract: A splash of vanilla extract is a flavor booster that complements almost any protein powder flavor and adds a comforting, classic pancake taste.
Your Step-by-Step Guide to Perfect Protein Pancakes
Follow these step-by-step photos:
1. Prep Your Dry Ingredients: Whisking for Even Distribution
In a large bowl, whisk together your all-purpose flour, oat flour, protein powder, baking powder, and any optional sweeteners. Whisking thoroughly ensures that the leavening agents and protein powder are evenly distributed, preventing pockets of unmixed ingredients and guaranteeing a consistent rise in every pancake. This also helps to aerate the flours, contributing to a lighter batter.
2. Combining Wet Ingredients: The Right Order Matters
In a separate medium bowl, whisk together the milk, egg, melted butter (or oil), and vanilla extract until well combined. Ensuring the wet ingredients are fully mixed before adding them to the dry helps prevent overmixing later. The melted fat should be fully incorporated, not sitting in separate droplets.
3. Gentle Mixing: Avoiding Overworking the Batter
Pour the wet ingredients into the dry ingredients. Using a whisk or spatula, mix just until the dry ingredients are moistened. A few lumps are perfectly fine, even desirable! Overmixing develops the gluten in the flour, leading to tough, chewy pancakes. Stop mixing as soon as you no longer see streaks of dry flour.
4. Resting the Batter: Why It’s Crucial for Fluffiness
Cover the bowl and let the batter rest for 5-10 minutes at room temperature. This step is crucial for achieving truly fluffy pancakes. During this rest, the flour fully hydrates, the protein powder absorbs liquid, and the baking powder begins to activate, creating tiny air bubbles that will expand during cooking. This also allows any gluten developed during mixing to relax, resulting in a more tender pancake.
5. Griddle Prep: Achieving the Ideal Cooking Surface
While the batter rests, preheat your griddle or a large non-stick skillet over medium-low heat. Lightly grease it with a pat of butter or a spray of cooking oil. The ideal temperature is key: too hot and the outside will burn before the inside cooks; too cool and they won’t brown properly. A good test is to sprinkle a few drops of water – they should sizzle and evaporate quickly, but not violently.
6. Pouring and Flipping: Visual Cues for Doneness
Pour about 1/4 cup of batter per pancake onto the hot griddle. Cook for 2-3 minutes per side, or until golden brown. Look for visual cues: bubbles will start to form on the surface of the pancake, and the edges will begin to look set and dry. This is your signal to flip! Flip only once to ensure even cooking and browning. Food Network has some great visual guides if you’re unsure!
7. Keeping Warm: Stacking for Success
As you cook the pancakes, transfer them to a plate and keep them warm in a low oven (around 200°F / 95°C) while you finish the rest of the batch. Stacking them also helps to keep them moist and tender until serving.
Expert Tips for Protein Pancake Perfection
- The ‘Don’t Overmix’ Rule: Seriously, I can’t stress this enough! Lumps are your friends. Overmixing leads to tough, rubbery pancakes. Mix just until the dry ingredients are incorporated.
- Temperature Control: Mastering Your Griddle Heat: Start with medium-low heat. If your pancakes are browning too quickly on the outside and staying raw inside, your griddle is too hot. If they’re not browning at all, it’s too cool. Adjust as needed.
- The Test Pancake: Adjusting Before You Commit: Always cook one small test pancake first. This allows you to check the griddle temperature and taste the pancake. If it’s too thick, add a splash more milk. If it’s too thin, add a tablespoon of flour.
- Adding Extras: Fruits, Nuts, and Chocolate Chips: For an extra boost of flavor and texture, gently fold in fresh berries, chopped nuts, or a few chocolate chips after the batter has rested. Don’t overmix!
- Flavor Boosters: Vanilla Extract and Spices: Don’t underestimate the power of a good vanilla extract. A dash of cinnamon or nutmeg can also elevate the flavor profile, especially with plain or vanilla protein powders.
Serving Suggestions: Beyond Maple Syrup
While a drizzle of pure maple syrup is always a classic, these easy protein powder pancakes are versatile enough for so much more!
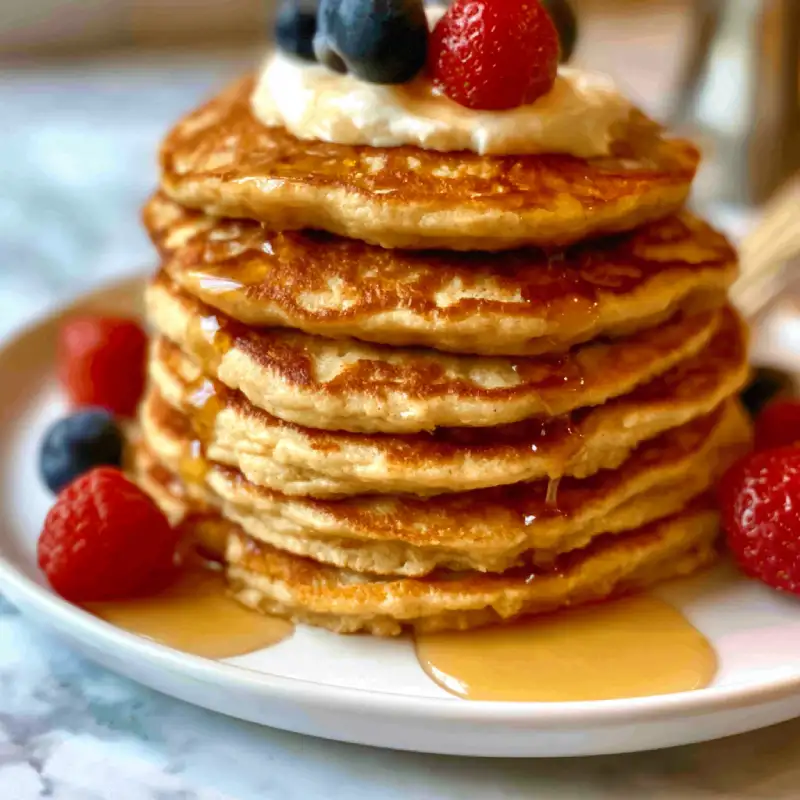
- Fresh Fruit Power-Ups: Top with a vibrant medley of fresh berries (strawberries, blueberries, raspberries), sliced bananas, or even a sprinkle of pomegranate seeds for a burst of freshness and antioxidants.
- Nut Butters and Seed Toppings: A dollop of almond butter, peanut butter, or cashew butter adds healthy fats and extra protein. Sprinkle with chia seeds, flax seeds, or hemp hearts for omega-3s and crunch.
- Yogurt and Granola Combos: A spoonful of Greek yogurt (plain or flavored) provides a creamy, tangy contrast and even more protein. Add a sprinkle of your favorite granola for texture.
- Savory Sides (Yes, really!): Don’t knock it ’til you try it! These pancakes pair surprisingly well with a side of scrambled eggs, turkey bacon, or even a slice of avocado for a truly balanced and satisfying meal.
Storing and Reheating Your Protein Pancakes
These easy protein powder pancakes are fantastic for meal prep!
- Cooling Completely: The Key to Preventing Soggy Pancakes: Before storing, ensure your pancakes are completely cooled on a wire rack. Stacking warm pancakes will trap steam, making them soggy.
- Freezing for Future Feasts: Best Practices: Once cooled, stack pancakes with parchment paper in between each one to prevent sticking. Place them in an airtight freezer-safe bag or container. They’ll keep well for up to 2-3 months.
- Reheating Methods: Microwave, Toaster Oven, and Pan:
- Microwave: For a quick reheat, microwave 1-2 pancakes for 30-60 seconds, or until warm.
- Toaster Oven: For a slightly crispier edge, reheat in a toaster oven at 300°F (150°C) for 5-7 minutes, or until heated through.
- Pan: Reheat in a dry non-stick skillet over medium-low heat for 1-2 minutes per side, until warm and slightly crispy.
Troubleshooting & FAQs About Protein Powder Pancakes
Why are my pancakes dry?
Can I make this recipe gluten-free?
What’s the best type of protein powder to use?
How can I make them sweeter without adding sugar?
Can I prepare the batter ahead of time?
For more delicious and easy recipes, be sure to check out My Cakes Recipes!
Easy Protein Powder Pancakes
- Total Time: 25 minutes
- Yield: 8-10 pancakes (2-3 servings)
Description
Whip up these incredibly fluffy and flavorful protein pancakes for a satisfying breakfast that keeps you full and energized. Say goodbye to dry, bland protein pancakes and hello to your new favorite morning meal!
Ingredients
- 1 scoop (approx. 30g) vanilla or unflavored protein powder (whey isolate recommended)
- 1/2 cup all-purpose flour
- 1/4 cup oat flour (or more all-purpose flour)
- 1 tbsp baking powder
- 1/4 tsp salt
- 1 large egg
- 3/4 cup milk (dairy or non-dairy)
- 1 tbsp melted butter or neutral oil
- 1 tsp vanilla extract
- 1–2 tbsp sweetener of choice (maple syrup, honey, or sugar substitute, optional)
Instructions
- 1. Combine Dry Ingredients: In a large bowl, whisk together protein powder, all-purpose flour, oat flour, baking powder, salt, and optional sweetener until well combined.
- 2. Combine Wet Ingredients: In a separate medium bowl, whisk together the egg, milk, melted butter (or oil), and vanilla extract.
- 3. Mix Batter: Pour the wet ingredients into the dry ingredients. Mix gently with a whisk or spatula just until the dry ingredients are moistened. A few lumps are okay – do not overmix!
- 4. Rest Batter: Cover the bowl and let the batter rest for 5-10 minutes at room temperature. This is crucial for fluffy pancakes.
- 5. Preheat Griddle: While the batter rests, preheat a griddle or large non-stick skillet over medium-low heat. Lightly grease with butter or cooking spray.
- 6. Cook Pancakes: Pour about 1/4 cup of batter per pancake onto the hot griddle. Cook for 2-3 minutes per side, or until golden brown and bubbles appear on the surface. Flip only once.
- 7. Serve Warm: Transfer cooked pancakes to a plate and keep warm in a low oven (200°F / 95°C) while you finish the batch. Serve immediately with your favorite toppings.
- Prep Time: 10 mins
- Cook Time: 15 mins