
Table of Contents
- Make Your Own Healthy Frozen Yogurt: A Refreshing Treat Anyone Can Master
- Why This Recipe Delivers on Flavor and Texture
- Ingredients for Success: Understanding Each Component
- Step-by-Step: Crafting Your Perfect Frozen Yogurt
- Expert Tips for Optimal Frozen Yogurt
- Creative Pairings: What to Serve With Your Healthy Frozen Yogurt
- Storing and Reheating (Yes, You Can Reheat Frozen Yogurt!)
- Healthy Frozen Yogurt FAQs
Make Your Own Healthy Frozen Yogurt: A Refreshing Treat Anyone Can Master
Imagine a dessert that’s lusciously creamy, bursting with vibrant fruit flavor, and leaves you feeling refreshed, not guilty. That’s exactly what we’re diving into today with this incredible Healthy Frozen Yogurt recipe! Forget those store-bought tubs laden with artificial flavors, excessive sugar, and stabilizers. When you make your own, you’re in complete control of every single ingredient, ensuring a treat that’s not only delicious but genuinely good for you. You get to dictate the sweetness, choose your favorite fruits, and avoid any unwanted additives, all while saving a few dollars. My journey to finding the perfect, guilt-free frozen treat has been a delicious adventure, and I’m thrilled to share the culmination of my experiments with you. This recipe isn’t just about making frozen yogurt; it’s about crafting a wholesome, delightful experience right in your own kitchen.
Why This Recipe Delivers on Flavor and Texture
- Creamy texture without added fat: The secret to that rich, luxurious mouthfeel lies in the specific type of yogurt we use and a few clever techniques that prevent ice crystal formation, giving you a scoopable dream without needing extra cream.
- Balanced sweetness: We harness the naturally occurring sugars in ripe fruit and complement them with just the right amount of natural sweetener. This amplifies the fruit’s essence rather than overwhelming it, resulting in a perfectly balanced, never cloyingly sweet, treat.
- Intense fruit flavor: By focusing on high-quality, ripe fruit – whether fresh or frozen – we ensure every spoonful is packed with authentic, vibrant fruit taste. This isn’t a subtle hint; it’s a full-on flavor explosion!
- No ice crystals: Through careful preparation, proper chilling, and smart churning methods, we achieve a remarkably smooth, scoopable consistency that rivals premium ice cream, free from any unpleasant icy bits.
Ingredients for Success: Understanding Each Component
Here is what you need and why:
Greek Yogurt (the base): This is the star of our Healthy Frozen Yogurt. I highly recommend using full-fat Greek yogurt for the best texture. Its higher fat content contributes to a creamier, less icy result. If you’re looking for dairy-free alternatives, full-fat coconut cream yogurt or almond milk yogurt can work beautifully, though you might need to adjust the sweetness slightly and expect a slightly different, but still delicious, texture. The thickness of Greek yogurt is key to preventing an icy final product.
Sweetener (honey, maple syrup, or stevia): We’re aiming for balanced sweetness. Honey and maple syrup are fantastic natural options that add a lovely depth of flavor. Start with a smaller amount and taste as you go, as the sweetness of your fruit will vary. For a lower-calorie option, a natural sweetener like stevia can be used, but be mindful of its potency and adjust to your preference. Remember, the goal is to amplify the fruit, not mask it.
Fruit (fresh or frozen): This is where the flavor magic happens! Ripe, fresh fruit will give you the most vibrant taste. However, frozen fruit is often picked at its peak ripeness and is incredibly convenient, often leading to a thicker, colder base for churning. Berries, mangoes, peaches, and cherries all work wonderfully. If using fresh fruit, ensure it’s very ripe for maximum sweetness and flavor. If using frozen, you can often skip adding ice, which helps prevent a watery consistency.
Vanilla Extract (flavor enhancer): A good quality vanilla extract is a secret weapon in many desserts. It doesn’t just add vanilla flavor; it enhances and rounds out the other flavors, making the fruit taste even brighter and more complex without overpowering it. A little goes a long way!
Optional additions (lemon juice, zest, pinch of salt): These are subtle tricks that elevate your frozen yogurt from good to extraordinary. A tiny squeeze of fresh lemon juice or a bit of zest can brighten the fruit flavors, adding a refreshing tang. A minuscule pinch of salt (yes, even in sweet dishes!) helps to balance and intensify all the flavors, making them pop. Don’t skip these if you want a truly gourmet experience!
Step-by-Step: Crafting Your Perfect Frozen Yogurt
Follow these step-by-step photos:
1. Prepare Your Equipment and Ingredients
Preparation is paramount for perfect frozen yogurt. Ensure your ice cream maker bowl (if using) has been in the freezer for at least 24 hours, ideally longer. This extreme cold is crucial for preventing ice crystals. Also, make sure your Greek yogurt and any liquid sweeteners are well-chilled. If using fresh fruit, wash, hull, and chop it into small pieces. If using frozen fruit, you can use it directly from the freezer.
2. Blend to Perfection
In a high-speed blender, combine your chilled Greek yogurt, chosen fruit (fresh or frozen), sweetener, vanilla extract, and any optional additions like lemon juice or a pinch of salt. Blend until the mixture is completely smooth and creamy. There should be no lumps of fruit. The consistency should be thick, like a very thick smoothie. Taste and adjust sweetness if necessary – remember, flavors will be slightly muted when frozen.
3. Churn (or Freeze) Your Mixture
With an ice cream maker: Pour the blended mixture into your pre-chilled ice cream maker bowl and churn according to the manufacturer’s instructions, typically for 15-25 minutes. The mixture will thicken and resemble soft-serve ice cream. Don’t over-churn; stop when it reaches a soft, creamy consistency. For those without an ice cream maker, pour the mixture into a shallow, freezer-safe container. Freeze for 30-45 minutes, then remove and stir vigorously with a fork or whisk to break up ice crystals. Repeat this stirring process every 30-45 minutes for 2-3 hours, until it reaches a scoopable consistency.
4. Firm Up for Scoopability
Once churned (or manually stirred), transfer the soft-serve consistency frozen yogurt to an airtight, freezer-safe container. Press a piece of parchment paper or plastic wrap directly onto the surface of the frozen yogurt to prevent ice crystals from forming. Freeze for at least 2-4 hours, or until firm enough to scoop. For the best texture, let it sit at room temperature for 5-10 minutes before serving to soften slightly.
Expert Tips for Optimal Frozen Yogurt
- Don’t over-churn: Stop your ice cream maker as soon as the frozen yogurt reaches a soft-serve consistency. Over-churning can incorporate too much air, leading to a less dense and sometimes icy texture.
- The importance of pre-chilling: This cannot be stressed enough! A thoroughly chilled ice cream maker bowl and cold ingredients are your best defense against ice crystals. The faster the mixture freezes, the smaller the ice crystals, resulting in a smoother texture.
- Adjusting sweetness to taste: Always taste your mixture before churning. Remember that cold dulls sweetness, so it should taste slightly sweeter than you’d prefer before freezing. Personalize your batch to your exact preference!
- Using ripe fruit: Ripe fruit is naturally sweeter and more flavorful, reducing the need for added sweeteners. It also has a better texture when blended, contributing to a smoother final product.
- Dairy-free alternatives: When using dairy-free yogurts, opt for full-fat versions (like coconut cream yogurt) for the best creaminess. You might also consider adding a tablespoon of a neutral oil (like refined coconut oil) to the blend to help with texture, as dairy-free options can sometimes be more prone to iciness.
Creative Pairings: What to Serve With Your Healthy Frozen Yogurt
Your homemade Healthy Frozen Yogurt is fantastic on its own, but it also serves as a wonderful canvas for creative toppings and pairings. Elevate your dessert experience with these delicious ideas:
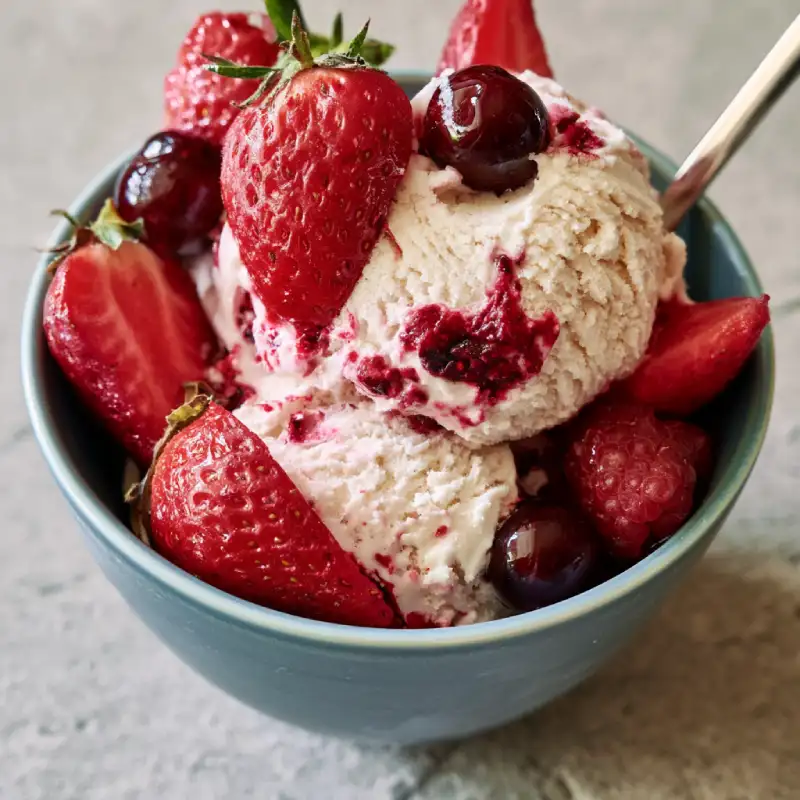
- Fresh berries and fruit compotes: A simple scattering of fresh raspberries, blueberries, or sliced strawberries adds a burst of freshness and contrasting texture. For something a little more elegant, a quick homemade fruit compote (simmered fruit with a touch of sweetener) is divine.
- Homemade granola and nuts: For a satisfying crunch and added nutrients, sprinkle on some homemade granola or a handful of toasted nuts like almonds, walnuts, or pecans. This adds a lovely textural contrast and makes it feel more substantial.
- A drizzle of honey or chocolate sauce: A swirl of extra honey or maple syrup can enhance the natural sweetness. For a touch of indulgence, a drizzle of homemade chocolate sauce or melted dark chocolate takes it to the next level.
Storing and Reheating (Yes, You Can Reheat Frozen Yogurt!)
To keep your Healthy Frozen Yogurt at its best, proper storage is key. Transfer any leftovers to an airtight, freezer-safe container. Press a piece of plastic wrap or parchment paper directly onto the surface of the frozen yogurt before sealing the container. This creates a barrier that prevents air from reaching the surface, which is the main culprit behind freezer burn and ice crystal formation. Stored this way, your homemade frozen yogurt will maintain its quality for up to 2-3 weeks. Beyond that, it might start to develop a slightly icier texture, though it will still be safe to eat.
When you’re ready to enjoy it again, it will likely be quite firm straight from the freezer. To achieve that perfect scoopable consistency, simply let the container sit out at room temperature for about 10-15 minutes. For a quicker softening trick, you can microwave it on a low power setting (e.g., 30% power) for 15-30 seconds, checking frequently and stirring until it reaches your desired texture. This gentle warming helps to soften it without melting it completely, making it easy to scoop and enjoy!
Healthy Frozen Yogurt FAQs
Can I make this without an ice cream maker?
How long does homemade frozen yogurt last?
What’s the best type of yogurt to use?
Can I use artificial sweeteners?
Why is my frozen yogurt icy?
Can I add protein powder?
For more easy and delicious recipes, be sure to see more easy recipes on my blog!
Healthy Frozen Yogurt
- Total Time: 58 minute
- Yield: 4 servings
Description
Discover the best flavor in this step-by-step guide to making delicious healthy frozen yogurt. Easy to make and perfect for any occasion!
Ingredients
- 2 cups (500g) full-fat plain Greek yogurt, well-chilled
- 2 cups (approx. 300g) ripe fruit (e.g., berries, mango, peaches), fresh or frozen
- 2–4 tablespoons honey, maple syrup, or preferred sweetener (to taste)
- 1 teaspoon vanilla extract
- Optional: 1 teaspoon fresh lemon juice or 1/4 teaspoon lemon zest
- Optional: Pinch of salt
Instructions
- 1. Prepare: Ensure your ice cream maker bowl is frozen solid (at least 24 hours). Wash and chop fresh fruit if using.
- 2. Blend: In a high-speed blender, combine Greek yogurt, fruit, sweetener, vanilla extract, and optional lemon juice/zest/salt. Blend until completely smooth and creamy. Taste and adjust sweetness.
- 3. Churn: Pour the mixture into your pre-chilled ice cream maker. Churn according to manufacturer’s instructions (typically 15-25 minutes) until it reaches a soft-serve consistency. (For no-churn, see FAQ).
- 4. Freeze: Transfer the soft frozen yogurt to an airtight, freezer-safe container. Press plastic wrap directly onto the surface. Freeze for 2-4 hours, or until firm enough to scoop.
- 5. Serve: Let sit at room temperature for 5-10 minutes to soften slightly before scooping and serving with your favorite toppings.
- Prep Time: 10 mins
- Cook Time: 20-25 mins (churning)