


Table of Contents
- Intro: Unlock Delicious Blackberry Flavor at Home
- Why This Homemade Blackberry Butter Recipe Works
- Ingredients for the Best Blackberry Butter (And Smart Substitutions)
- How to Make Homemade Blackberry Butter
- Expert Tips for Success
- What to Serve Homemade Blackberry Butter With
- Storing and Reheating Your Blackberry Butter
- Frequently Asked Questions (FAQ)
Intro: Unlock Delicious Blackberry Flavor at Home
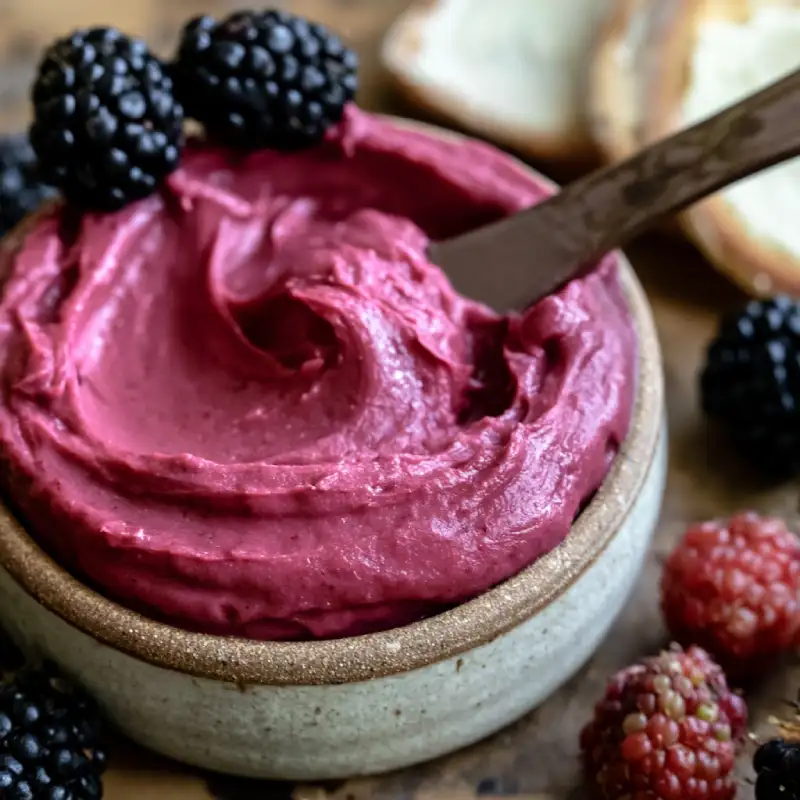
Imagine a spread so vibrant, so intensely fruity, yet so luxuriously smooth it melts in your mouth. That, my friends, is the magic of homemade blackberry butter. Forget everything you thought you knew about fruit spreads; this isn’t just jam. This is a culinary revelation, a concentrated burst of summer that elevates everything it touches. While jam is wonderful, blackberry butter offers a richer, more velvety texture, with the pure essence of the berry shining through, unhindered by seeds or excessive sweetness. It’s a game-changer for your breakfast table, your dessert creations, and even savory dishes!
My journey to perfecting this rich, fruity spread began years ago, with an abundance of wild blackberries from my grandmother’s garden. I wanted something more sophisticated than a simple jam, something that truly captured the deep, complex flavor of those sun-ripened berries. After countless experiments, tweaking ratios, and refining techniques, I finally landed on this recipe. It’s a labor of love, yes, but one that yields unparalleled results – a spread so good, you’ll wonder how you ever lived without it. Get ready to experience the best homemade blackberry butter you’ve ever tasted!
Why This Homemade Blackberry Butter Recipe Works
- Achieves perfect balance: This recipe is meticulously crafted to be not too sweet, not too tart. It lets the natural flavor of the blackberries sing, with just enough sugar to enhance their sweetness and lemon juice to provide a bright counterpoint.
- Creamy, spreadable texture every time, never runny: The secret lies in the careful cooking process and the addition of butter at just the right moment, creating an emulsified, velvety texture that glides onto toast and holds its shape beautifully.
- Intense, natural blackberry flavor without artificial additives: We’re using real, fresh (or frozen!) blackberries, allowing their pure, unadulterated taste to be the star. No artificial flavors or colors needed here!
- Simple process: Minimal fuss, maximum reward for busy cooks: While it requires a little patience for simmering, the steps themselves are straightforward. You’ll be amazed at the gourmet result you can achieve with such a manageable process.
Ingredients for the Best Blackberry Butter (And Smart Substitutions)
Here is what you need and why:
Fresh Blackberries: These are the heart and soul of our homemade blackberry butter. Essential for vibrant flavor and color, fresh berries offer the most intense taste. However, don’t despair if fresh aren’t available! Frozen berries work beautifully, with a small adjustment – you might need to simmer them a little longer to reduce the extra liquid they release. Just make sure they are unsweetened.
Granulated Sugar: This isn’t just for sweetness; it balances the tartness of the blackberries and acts as a natural preservative, contributing to the butter’s texture. You can adjust the amount to your preference and the sweetness of your berries. For an alternative sweetness, you could experiment with honey or maple syrup, but be aware these will impart their own distinct flavors and may alter the final texture slightly.
Lemon Juice: A crucial ingredient! Lemon juice brightens the flavor of the blackberries, preventing the butter from tasting flat. It also contains pectin, which aids in setting, and acts as a natural preservative, extending the shelf life. For a subtle, intriguing twist, you could try key lime juice, which offers a slightly more aromatic citrus note.
Unsalted Butter: This is what truly makes it a ‘butter’ and not just a jam. Unsalted butter creates incredible richness, a silky mouthfeel, and contributes to that wonderfully creamy, spreadable texture. If you’re looking for a vegan option, a high-quality vegan butter replacement can be used. Choose one that is firm when cold and melts smoothly for the best results.
How to Make Homemade Blackberry Butter
Follow these step-by-step instructions to create your own luscious homemade blackberry butter:
1. Prep the Berries: Clean and Initial Mash
Start by thoroughly washing your fresh blackberries. If using frozen, there’s no need to thaw them first. Place the berries in a large, heavy-bottomed pot or Dutch oven. Add about 1/4 cup of water (this helps prevent scorching, especially with frozen berries). Using a potato masher, gently mash the berries. You don’t need to pulverize them; just break them down enough to release their juices. This initial mash is crucial for extracting maximum flavor during simmering.
2. Simmering Process: Extracting Maximum Flavor
Bring the mashed berries to a gentle simmer over medium heat. Once simmering, reduce the heat to low and continue to cook, stirring occasionally, for about 15-20 minutes. The goal here is to soften the berries completely and allow their juices to release. You’ll notice the mixture becoming more liquid and the berries breaking down further. This slow simmer is key to developing deep, concentrated blackberry flavor.
3. Straining for Smoothness: Achieving That Silky Texture
This is the step that transforms it from a jam-like consistency to a smooth, luxurious butter! Carefully pour the cooked berry mixture through a fine-mesh sieve set over a large bowl. Using the back of a spoon or a rubber spatula, press firmly on the solids to extract as much liquid and pulp as possible. Discard the seeds and any remaining fibrous material. What you’re left with is a beautiful, smooth blackberry purée – the foundation of your butter. This step is non-negotiable for that signature silky texture.
4. Incorporating Butter and Final Cook: Emulsifying to Perfection
Return the smooth blackberry purée to the clean heavy-bottomed pot. Add the granulated sugar and lemon juice. Stir well to combine. Bring the mixture to a gentle simmer over medium-low heat, stirring frequently to prevent sticking. Cook for another 20-30 minutes, or until the mixture has thickened considerably. It should coat the back of a spoon. Now, remove the pot from the heat and stir in the cold, cubed unsalted butter, one piece at a time, until fully melted and incorporated. The butter will emulsify with the fruit purée, creating that rich, glossy finish and creamy texture. This is where the magic happens!
5. Testing for Doneness: The Wrinkle Test Explained
To ensure your homemade blackberry butter is perfectly set, perform the ‘wrinkle test.’ Place a small plate in the freezer for 5-10 minutes. Spoon a small amount of the hot blackberry butter onto the chilled plate. Let it sit for 30 seconds, then push it with your finger. If the surface wrinkles, it’s ready! If it’s still too runny, return the pot to low heat and cook for a few more minutes, testing again. This test is more reliable than relying solely on cook time.
Expert Tips for Success
- Don’t skip the straining step: Seriously, this is what differentiates fruit butter from jam. Removing the seeds is crucial for that incredibly smooth, luxurious texture that defines a fruit butter.
- Adjust sugar to your berries’ sweetness: Blackberries vary in sweetness. Taste your purée before adding all the sugar. You might need a little more or a little less depending on how ripe and sweet your berries are.
- Low and slow simmering for best results: Patience is a virtue here. Cooking over low to medium-low heat prevents scorching and allows the flavors to meld beautifully, resulting in a richer, more complex butter.
- Using a potato masher for initial breakdown: This is the easiest and most efficient method for breaking down the berries without over-processing them. A fork works too, but a masher is quicker.
- Sterilizing jars: If you plan to store your blackberry butter for an extended period, especially at room temperature (though refrigeration is generally recommended for home cooks), sterilizing your jars is crucial for longer shelf life and food safety. You can find detailed instructions on how to sterilize jars on Food Network.
What to Serve Homemade Blackberry Butter With
The versatility of homemade blackberry butter is truly astounding! Here are some ideas to get you started:
- Classic pairings: Slather it generously on warm toast, fluffy scones, stacks of pancakes, or crispy waffles. It’s an instant upgrade to any breakfast or brunch.
- Unexpected delights: Use it as a glaze for roasted chicken or pork loin for a sweet and savory kick. Swirl it into plain yogurt or oatmeal for a burst of fruity flavor. It’s also fantastic spread on a grilled cheese sandwich with a sharp cheddar!
- Dessert applications: Use it as a vibrant filling for tarts, a delicious layer in cakes, or even as a topping for vanilla ice cream or cheesecake. It adds a sophisticated fruit element to any sweet treat. For more easy recipes and baking inspiration, be sure to check out mycakesrecipes.com!
Storing and Reheating Your Blackberry Butter
Proper storage ensures you can enjoy your delicious homemade blackberry butter for weeks or even months!
- Refrigeration: Once cooled, transfer the blackberry butter to clean, airtight jars. Store in the refrigerator for up to 3-4 weeks. Ensure the jars are properly sealed to maintain freshness.
- Freezing for extended storage: For longer storage, blackberry butter freezes beautifully. Pour the cooled butter into freezer-safe containers or jars, leaving about an inch of headspace to allow for expansion. It can be frozen for up to 6 months. Thaw overnight in the refrigerator before using.
- Reheating and serving tips: If your blackberry butter has become very firm in the refrigerator, you can gently warm it in a small saucepan over low heat, stirring until it reaches your desired spreadable consistency. Avoid overheating, as this can alter the texture.
Frequently Asked Questions (FAQ)
Can I use frozen blackberries?
How do I know when the butter is done?
What’s the difference between fruit butter and jam?
Can I reduce the sugar content?
How long does homemade blackberry butter last?
Homemade Blackberry Butter
- Total Time: 12 minute
- Yield: 2 cups
Description
Discover how to make delicious homemade blackberry butter with this step-by-step guide. Enjoy the best flavor with this easy-to-bake recipe.
Ingredients
- 4 cups fresh or frozen blackberries
- 1/4 cup water (optional, for fresh berries)
- 1 cup granulated sugar (adjust to taste)
- 2 tablespoons fresh lemon juice
- 4 tablespoons unsalted butter, cold and cubed
Instructions
- 1. Prep Berries: Wash fresh blackberries. Place berries and water (if using) in a heavy-bottomed pot. Mash gently with a potato masher.
- 2. Simmer: Bring to a gentle simmer over medium heat, then reduce to low. Cook for 15-20 minutes, stirring occasionally, until berries are soft.
- 3. Strain: Pour mixture through a fine-mesh sieve into a bowl, pressing solids to extract all liquid and pulp. Discard seeds.
- 4. Cook with Sugar & Lemon: Return smooth purée to the pot. Add sugar and lemon juice. Simmer over medium-low heat for 20-30 minutes, stirring frequently, until thickened.
- 5. Add Butter & Test: Remove from heat. Stir in cold, cubed butter until melted and incorporated. Perform the ‘wrinkle test’ (spoon onto a chilled plate; if it wrinkles when pushed, it’s done).
- 6. Store: Ladle hot butter into clean, warm jars. Cool completely, then seal and refrigerate.
- Prep Time: 15 mins
- Cook Time: 50-60 mins