


Table of Contents
- Your New Go-To Dessert: No-Bake Pineapple Cream
- How This Recipe Works: Texture and Flavor
- Ingredients and Substitutions: The ‘Why’ Behind Each Choice
- Step-by-Step Instructions: Visual Walkthrough
- Expert Tips for Success: Don’t Skip These!
- What to Serve With Your Pineapple Cream Dessert
- Storing and Reheating (Spoiler: No Reheating Here!)
- FAQs About No-Bake Pineapple Cream Dessert
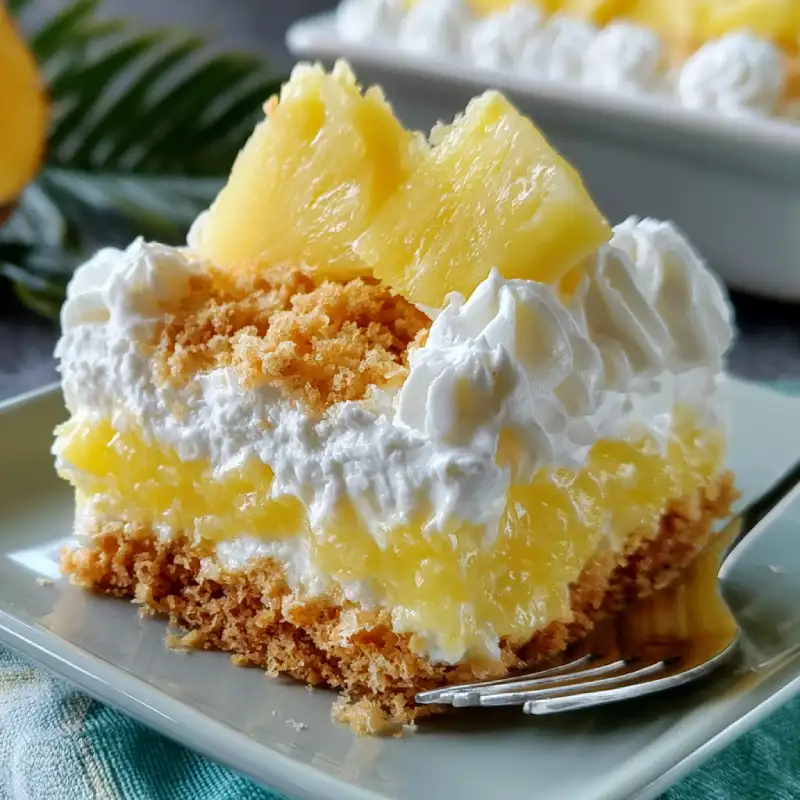
Imagine a dessert that’s effortlessly elegant, bursting with bright, tropical flavor, and so incredibly creamy it practically melts in your mouth. Now imagine making it without ever turning on your oven! Welcome to the delightful world of the no-bake pineapple cream dessert – a culinary marvel that’s about to become your new favorite. This isn’t just a dessert; it’s a refreshing escape, a creamy dream, and a testament to how simple ingredients can create something truly extraordinary. It’s perfect for picnics, potlucks, or just a sweet treat at home. The delicate balance of tangy pineapple and rich, smooth cream, all atop a buttery graham cracker crust, makes for an unforgettable experience. For more easy and delicious recipes, see more easy recipes and begin your culinary journey with us!
Your New Go-To Dessert: No-Bake Pineapple Cream
This no-bake pineapple cream dessert is more than just a treat; it’s a family favorite for a reason. Its simplicity makes it approachable for even novice bakers, while its sophisticated flavor profile satisfies the most discerning palates. It’s the perfect showstopper for any gathering, striking that sweet spot between indulgent and refreshing. The combination of textures from the crumbly crust to the luscious cream is utterly compelling, making every bite a delight.
How This Recipe Works: Texture and Flavor
This no-bake pineapple cream dessert is truly a masterpiece of texture and flavor, designed to captivate your senses with every spoonful.
- Creamy & Velvety Smooth Texture: The combination of cream cheese and perfectly whipped heavy cream creates a filling that is incredibly smooth and light, dissolving luxuriously on the tongue without being overly heavy.
- Bright, Tangy Pineapple Flavor: The star of the show, crushed pineapple, brings a burst of tropical tartness that perfectly cuts through the richness of the cream, creating a harmonious balance.
- Refreshing & Light Finish: Unlike many desserts, this one leaves you feeling refreshed rather than weighed down. Its cool temperature and vibrant fruit notes make it ideal for warmer days or as a delightful end to any meal.
- Effortless to Prepare: True to its “no-bake” nature, this recipe requires minimal effort and no oven time, making it a stress-free option for busy schedules or when you want a delicious treat without the fuss.
Ingredients and Substitutions: The ‘Why’ Behind Each Choice
Here is what you need and why:
Crust Foundation: Graham Crackers: We choose graham crackers for their classic, slightly sweet, and honeyed flavor that complements the pineapple beautifully. When crushed and mixed with melted butter, they form a firm, crumbly base that doesn’t get soggy. While other cookies like vanilla wafers or shortbread could work, graham crackers offer that quintessential, beloved taste and texture that truly makes this dessert shine. For a gluten-free option, look for gluten-free graham crackers.
Dairy Base: Cream Cheese & Whipping Cream: This dynamic duo is crucial for achieving the perfect creaminess. Full-fat cream cheese provides a rich, tangy foundation and stabilizes the filling, ensuring it sets beautifully. It needs to be softened at room temperature for smooth, lump-free whipping. Heavy whipping cream, when beaten to stiff peaks, incorporates air, making the dessert light and airy. Do not substitute with half-and-half or milk; they won’t provide the necessary fat content for whipping. Ensure your cream is very cold for best results.
Sweetener & Thickener: Confectioners’ Sugar & Gelatin: Confectioners’ sugar (powdered sugar) not only sweetens the cream cheese mixture but also helps to make it smooth and prevents a gritty texture often associated with granulated sugar in no-bake fillings. It dissolves easily and contributes to the dessert’s velvety mouthfeel. Unflavored gelatin is our secret weapon for ensuring a perfectly firm set. Without it, the filling might be too soft. It’s bloomed in cold water and then gently warmed to dissolve, providing essential structure without altering the taste.
Star Flavor: Canned Crushed Pineapple: The convenience of canned crushed pineapple is unmatched, providing consistent sweetness and fine texture. It’s absolutely critical to drain it properly – and some might even say squeeze out excess liquid – to prevent a watery filling that won’t set. The acidity of pineapple can sometimes be tricky with dairy, but with proper draining and the gelatin, it works harmoniously to deliver that vibrant, tropical tang. You can learn more about working with canned fruits from resources like Food Network.
Flavor Enhancers: Vanilla Extract & Lemon Zest: A good quality vanilla extract adds warmth and depth, rounding out the flavors of the dairy and fruit. It’s a classic pairing that elevates almost any sweet dish. Fresh lemon zest (just a tiny bit!) is optional but highly recommended. It brightens the entire dessert, adding an aromatic, zesty lift that perfectly complements the pineapple’s tang without making the dessert taste overtly lemon-flavored.
Step-by-Step Instructions: Visual Walkthrough
Follow these step-by-step instructions to create your perfect no-bake pineapple cream dessert:
1. Prepare the Crust
In a medium bowl, combine the finely crushed graham cracker crumbs with melted unsalted butter and a tablespoon of sugar, if desired. Mix until the crumbs are evenly moistened and resemble wet sand. Press this mixture firmly into the bottom of a 9×13 inch baking dish or a 9-inch springform pan. Use the back of a spoon or the bottom of a flat-bottomed glass to ensure a compact, even layer. Place the pan in the refrigerator to chill while you prepare the filling, allowing it to firm up.
2. Whip the Cream Cheese Mixture
In a large mixing bowl, beat the softened full-fat cream cheese with an electric mixer until light and fluffy, about 2-3 minutes. Gradually add the confectioners’ sugar and vanilla extract, continuing to beat until smooth and no lumps remain. In a separate small bowl, sprinkle the gelatin over 1/4 cup cold water and let it bloom for 5 minutes. Then, gently warm it in the microwave for 10-15 seconds (or over a double boiler) until completely dissolved, ensuring no granules remain. Slowly stream the dissolved gelatin into the cream cheese mixture while the mixer is running, beating for another minute to fully incorporate.
3. Fold in Whipped Cream
In another large, very clean bowl, whip the very cold heavy whipping cream until stiff peaks form. Be careful not to overmix, as it can turn grainy. Once stiff peaks are achieved, gently fold about one-third of the whipped cream into the cream cheese mixture using a spatula. This lightens the cream cheese base, making it easier to incorporate the remaining whipped cream without deflating it. Then, carefully fold in the rest of the whipped cream until just combined, being careful to preserve its airy texture.
4. Combine with Pineapple
Ensure your crushed pineapple is impeccably drained. Place the crushed pineapple in a fine-mesh sieve and press out as much liquid as possible with the back of a spoon. You can even gently press it between layers of paper towels for extra dryness. Once thoroughly drained, gently fold the crushed pineapple and any optional lemon zest into the cream cheese and whipped cream mixture until evenly distributed. This step ensures the dessert has no excess moisture to spoil the set.
5. Assemble the Dessert & Chill Thoroughly
Retrieve your chilled graham cracker crust from the refrigerator. Evenly spread the pineapple cream mixture over the crust, using an offset spatula to smooth the top. Cover the pan tightly with plastic wrap to prevent any odors from the refrigerator from seeping in. Transfer the dessert to the refrigerator and chill for a minimum of 4-6 hours, or preferably overnight. A longer chill time ensures the gelatin fully sets and the flavors meld beautifully, creating a perfect, sliceable dessert.
Expert Tips for Success: Don’t Skip These!
- Properly Drain Pineapple for Best Texture: This is a non-negotiable step! Excess liquid from the pineapple will prevent your dessert from setting properly and result in a watery mess. Use a fine-mesh sieve and press firmly, or even pat dry with paper towels after draining.
- Chill Cream Cheese for Easier Whipping: For the smoothest, lump-free cream cheese mixture, ensure your cream cheese is at proper room temperature. This allows it to whip up easily and combine seamlessly with other ingredients.
- Don’t Overmix Whipped Cream: Whip heavy cream to stiff peaks, but stop as soon as they form. Overmixing can cause the cream to become grainy or even separate, which will affect the airy texture of your dessert.
- For a Firm Set, Allow Ample Chill Time: Patience is a virtue here! While 4-6 hours might seem long, overnight chilling is truly best. It gives the gelatin ample time to do its job, resulting in a perfectly firm, sliceable dessert.
- Grease Pan for Easy Slicing: If using a standard baking dish and aiming for clean slices, lightly grease the pan or line it with parchment paper with an overhang. This allows for easy lifting and neat serving, especially if you’re not using a springform.
What to Serve With Your Pineapple Cream Dessert
This no-bake pineapple cream dessert is delightful on its own, but a few simple additions can elevate it further. Consider a light dusting of fresh fruit garnish like a few tender pineapple chunks, some fresh berries (strawberries or blueberries provide a lovely color contrast), or a sprig of mint for a pop of freshness. A sprinkle of toasted coconut flakes adds a wonderful textural element and enhances the tropical feel. For those who can’t get enough creaminess, a delicate light whipped cream dollop on top of each slice is always a welcome touch.
Storing and Reheating (Spoiler: No Reheating Here!)
Good news! This no-bake pineapple cream dessert is one that you definitely want to keep cold and avoid any heat. Reheating is absolutely out of the question as it would cause the gelatin to melt and the dessert to become a liquid mess.
- Refrigeration Guidelines: Store any leftover dessert tightly covered with plastic wrap in the refrigerator. It will stay fresh and delicious for 3-4 days. The plastic wrap is crucial to prevent it from absorbing refrigerator odors and to maintain its moisture.
- Freezing Options (and limitations): While you can technically freeze this dessert, the texture might change slightly upon thawing. The cream cheese filling can become a little grainier, and the crust might be softer. If you choose to freeze, wrap individual slices or the entire dessert very tightly in plastic wrap, then again in foil, to prevent freezer burn. It can be frozen for up to 1 month. Thaw in the refrigerator overnight before serving.
Frequently Asked Questions
Can I use fresh pineapple?
While fresh pineapple offers a wonderful flavor, it contains an enzyme called bromelain that can prevent gelatin and dairy proteins from setting. For this particular recipe, it’s highly recommended to stick with canned crushed pineapple, as the canning process deactivates this enzyme, ensuring your dessert sets beautifully. How long does it need to chill?
For the best results and a perfectly firm, sliceable dessert, a minimum of 4-6 hours of chilling is necessary. However, if you have the time, chilling it overnight (8-12 hours) is ideal. This allows the gelatin to fully set and the flavors to meld beautifully. Can I make this dessert ahead of time?
Absolutely! This no-bake pineapple cream dessert is an excellent make-ahead option. You can prepare it up to 2 days in advance, keeping it tightly covered in the refrigerator. In fact, making it ahead often allows the flavors to deepen and the texture to fully develop, making it even more delicious. What if my crust is too crumbly?
If your crust is too crumbly, it likely needs more melted butter or firmer pressing into the pan. Ensure your graham cracker crumbs are fine and that the butter is evenly distributed. When pressing into the pan, use a firm hand or the bottom of a glass to compact it tightly. Chilling time also helps solidify the crust. Can I make this gluten-free?
Yes, happily! To make this no-bake pineapple cream dessert gluten-free, simply substitute traditional graham cracker crumbs with your favorite brand of gluten-free graham crackers. The rest of the ingredients in this recipe are naturally gluten-free, but always double-check labels to be certain.