
Your New Go-To Dessert: Simple Icebox Cake
Imagine a dessert that’s incredibly creamy, delightfully rich, yet surprisingly light, and requires absolutely no baking. That, my friends, is the magic of a Simple Icebox Cake. It’s a dessert that practically makes itself, transforming humble ingredients into a show-stopping treat with a texture that’s somewhere between a mousse and a perfectly set pudding. The way the crisp wafers soften into a cake-like consistency, infused with the sweet, airy cream, is pure culinary alchemy. It’s a taste of effortless indulgence that will have everyone asking for the recipe!
Why I love this dessert for stress-free entertaining.
As a home baker, I’m always looking for recipes that deliver maximum impact with minimal fuss, especially when entertaining. The icebox cake is my secret weapon! It’s entirely make-ahead, meaning I can assemble it the day before, pop it in the fridge, and forget about it until dessert time. No last-minute oven juggling, no frantic cooling, just pure, unadulterated enjoyment for both me and my guests. It’s the epitome of stress-free entertaining.
The magic of minimal effort, maximum flavor.
Seriously, the ingredient list is short, the steps are simple, and the payoff is HUGE. The magic truly happens during the chill time, as the cream slowly softens the cookies, creating a harmonious, melt-in-your-mouth texture that belies its easy preparation. It’s a testament to how simple ingredients, when treated right, can create something truly extraordinary.
Why This Simple Icebox Cake Recipe Delivers
- Creamy, dreamy texture: The secret lies in the extended chill time. As the cake rests, the moisture from the whipped cream slowly permeates the cookies, transforming them from crisp wafers into tender, cake-like layers that practically dissolve on your tongue. It’s a textural marvel!
- Balanced sweetness: This recipe strikes the perfect balance. It’s sweet enough to satisfy your dessert cravings without being cloyingly rich. The natural bitterness of chocolate wafers (if using) or the subtle flavor of graham crackers provides a lovely counterpoint to the sweet cream.
- No-bake advantage: Keep your kitchen cool, especially during warmer months! This dessert requires zero oven time, making it perfect for summer gatherings or when you just don’t want to heat up the house.
- Customizable flavor profile: While classic chocolate is divine, this recipe is a blank canvas for your creativity. From different cookie types to various flavorings in the cream, the possibilities are truly endless.
Ingredients: What You Need & Why It Matters
Here is what you need and why:
Heavy Cream (or Heavy Whipping Cream): This is the backbone of your icebox cake. You need a minimum of 36% milk fat for it to whip up properly into stable, fluffy peaks. Freshly made whipped cream is always superior to store-bought aerosol cans; the texture is richer, and it holds up better for softening the cookies. Store-bought tubs of whipped topping (like Cool Whip) can be used for convenience, but they often contain stabilizers and artificial flavors that can alter the final taste and texture. For the best results, whip your own!
Chocolate Wafers or Graham Crackers: These are the crucial structural elements that transform into your ‘cake’ layers. Chocolate wafers (like Nabisco Famous Wafers) are traditional and create a rich, dark chocolate flavor. Graham crackers offer a milder, slightly honeyed flavor and a different texture. The key is that they are thin and porous enough to absorb moisture from the cream and soften beautifully. Avoid overly thick or dense cookies that won’t soften adequately.
Sweetener (Granulated Sugar or Sweetened Condensed Milk): This adds sweetness to your whipped cream. Granulated sugar provides a clean sweetness and allows you to control the level. Sweetened condensed milk not only sweetens but also adds a lovely richness and helps stabilize the whipped cream, making it even creamier and less prone to weeping. If using sweetened condensed milk, you might need less heavy cream as it adds volume.
Flavorings (Vanilla Extract, Cocoa Powder, Espresso Powder): These elevate the overall taste. Pure vanilla extract is a must for almost any sweet cream. For a chocolate icebox cake, a touch of unsweetened cocoa powder can be added to the cream for an extra chocolatey punch. A pinch of espresso powder (even in a chocolate cake) can deepen and enhance the chocolate flavor without making it taste like coffee. Don’t be afraid to experiment with other extracts like almond or peppermint!
Substitutions that work (and why they work):
- Cookies: Beyond wafers and graham crackers, try Biscoff cookies for a spiced caramel flavor, thin shortbread cookies, or even thin ginger snaps for a festive twist. The principle is the same: thin, relatively dry cookies that can absorb moisture.
- Cream: For a dairy-free option, full-fat canned coconut cream (chilled overnight, scoop out the thick cream) can be whipped similarly to heavy cream. The flavor will be distinctly coconut, which can be delicious!
- Sweetener: Powdered sugar can also be used in place of granulated sugar; it dissolves more easily and can help stabilize the cream slightly.
Building Your Masterpiece: Step-by-Step Instructions
Follow these step-by-step photos:
1. Prep the Pan
Line an 8×4 or 9×5 inch loaf pan (or an 8×8 inch square pan for a wider cake) with plastic wrap, leaving an overhang on all sides. This overhang will be your lifesaver for easy removal later. A springform pan can also work, but lining it ensures a clean release and prevents sticking.
2. Whip Your Cream
In a large, chilled bowl (a metal bowl chilled in the freezer for 10-15 minutes works wonders!), combine the cold heavy cream, sweetener (sugar or condensed milk), and any flavorings (vanilla, cocoa powder). Using an electric mixer (handheld or stand mixer with a whisk attachment), start on low speed and gradually increase to high. Whip until stiff peaks form. This means when you lift the whisk, the cream holds its shape firmly. Be careful not to over-mix, or you’ll end up with butter!
3. Layering Method: Wafer, Cream, Repeat
Spread a thin layer of whipped cream on the bottom of your prepared pan. This acts as an adhesive for your first layer of cookies. Arrange a single layer of chocolate wafers or graham crackers over the cream, breaking them as needed to fit snugly. Don’t worry if they’re not perfect; they’ll soften. Top the cookies with another generous layer of whipped cream, spreading it evenly to the edges. Repeat this process, alternating layers of cookies and cream, until you run out of ingredients, ending with a final layer of cream.
4. Finishing Touches
Once all layers are assembled, smooth the top layer of cream with an offset spatula or the back of a spoon. You can leave it plain, or for a decorative touch, sprinkle with a dusting of cocoa powder, chocolate shavings, or finely crushed cookies. This not only looks pretty but also adds a hint of flavor and texture.
5. Chill Time: The Non-Negotiable Step for Success
Cover the pan tightly with the overhanging plastic wrap, ensuring no air can get in. Refrigerate for a minimum of 6-8 hours, but ideally overnight (12-24 hours) for the best results. This extended chill time is absolutely crucial for the cookies to soften and for the flavors to meld, transforming it into that delightful cake-like consistency. Do not rush this step!
Expert Tips for Icebox Cake Success
- Don’t over-mix your cream: Whipped cream goes from perfectly fluffy to grainy butter very quickly. Watch it closely and stop mixing as soon as stiff peaks form. If you see it starting to look curdled, you’ve gone too far.
- Even layers are key: Strive for relatively even layers of cream and cookies. This ensures a consistent texture throughout the cake and prevents some cookies from being too soft while others remain too firm.
- The importance of sufficient chill time: I cannot stress this enough! The 6-8 hour minimum is truly just that – a minimum. Overnight (12-24 hours) will give you the absolute best, most cake-like texture. Patience is a virtue here.
- Covering properly: Ensure your icebox cake is tightly covered with plastic wrap during chilling. This prevents the cream from absorbing refrigerator odors and, more importantly, keeps it from drying out or forming a crust.
- Experimenting with flavors: Get creative! Add a tablespoon of instant espresso powder to chocolate cream, a splash of liqueur (like Kahlua or Grand Marnier), citrus zest, or even a swirl of fruit puree between layers. The possibilities are endless! For more inspiration, check out King Arthur Baking’s icebox cake variations.
Serve It Up: What Pairs Well with Icebox Cake
This Simple Icebox Cake is fantastic on its own, but a few simple additions can elevate the experience:
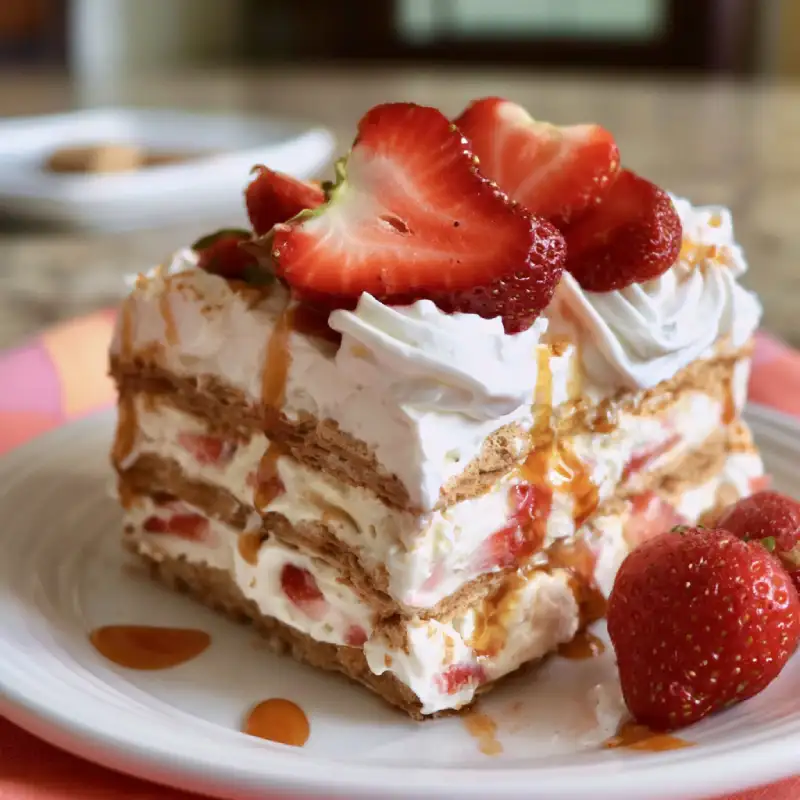
- Fresh berries: The tartness of fresh raspberries, strawberries, or blueberries provides a wonderful contrast to the rich, sweet cream.
- A light drizzle: A delicate drizzle of chocolate sauce, caramel sauce, or even a fruit coulis can add an extra layer of flavor and visual appeal.
- A simple cup of coffee or tea: The classic pairing! The bitterness of coffee or the warmth of tea beautifully complements the sweetness of the cake.
Storing and Reheating Your Icebox Cake
Proper storage is key to keeping your Simple Icebox Cake fresh and delicious.
- Proper storage for freshness: Keep the icebox cake tightly covered with plastic wrap in the refrigerator. This prevents it from drying out and absorbing any unwanted odors.
- Shelf life in the refrigerator: An icebox cake will stay fresh and delicious for 3-4 days in the refrigerator. After that, the cookies might become a bit too soft, and the cream might start to lose its optimal texture.
- Freezing for longer enjoyment (and thawing tips): Yes, you can freeze icebox cake! Wrap the entire cake (or individual slices) tightly in plastic wrap, then in aluminum foil. It can be frozen for up to 1 month. To thaw, transfer it to the refrigerator overnight or for several hours until soft enough to slice. Do not thaw at room temperature, as the cream can become watery.
Frequently Asked Questions
Can I use different cookies?
How long does it need to chill?
Can I make it dairy-free?
Why won’t my cream whip?
For more easy and delicious dessert ideas, be sure to See more easy recipes on my blog!
Simple Icebox Cake
- Total Time: 15 minutes
- Yield: 8-10 servings
Description
This no-bake Simple Icebox Cake transforms humble cookies and whipped cream into a creamy, dreamy dessert with minimal effort. It’s the perfect make-ahead treat for any occasion.
Ingredients
- 2 cups (480ml) cold heavy cream (or heavy whipping cream)
- 1/2 cup (100g) granulated sugar, or 1/2 cup (120ml) sweetened condensed milk
- 1 teaspoon pure vanilla extract
- 1/4 cup (20g) unsweetened cocoa powder (optional, for chocolate cream)
- 1 pinch espresso powder (optional, enhances chocolate flavor)
- 1 (9-ounce/255g) package chocolate wafers (like Nabisco Famous Wafers) OR 1 (14.4-ounce/408g) package graham crackers
Instructions
- 1. Prepare Your Pan: Line an 8×4 or 9×5 inch loaf pan (or an 8×8 inch square pan) with plastic wrap, leaving a generous overhang on all sides for easy removal.
- 2. Whip the Cream: In a large, chilled bowl, combine the cold heavy cream, sweetener (sugar or condensed milk), vanilla extract, and optional cocoa and espresso powders. Using an electric mixer, whip on medium-high speed until stiff peaks form. Be careful not to over-mix.
- 3. Assemble Layers: Spread a thin layer of whipped cream on the bottom of the prepared pan. Arrange a single layer of cookies over the cream, breaking them as needed to fit snugly. Top the cookies with a generous, even layer of whipped cream. Repeat this layering process, alternating cookies and cream, until all ingredients are used, ending with a final layer of cream.
- 4. Finish and Chill: Smooth the top layer of cream. If desired, sprinkle with a dusting of cocoa powder or chocolate shavings. Cover the pan tightly with the overhanging plastic wrap. Refrigerate for a minimum of 6-8 hours, but ideally overnight (12-24 hours), for the best texture.
- 5. Serve: Once thoroughly chilled, use the plastic wrap overhang to lift the cake out of the pan. Remove the plastic wrap and slice with a sharp knife. Serve immediately, perhaps with fresh berries or a drizzle of chocolate sauce.
- Prep Time: 15 mins
- Cook Time: 0 mins