
Soft Christmas Thumbprint Cookies: A Festive Recipe
Table of Contents
- 1. Introduction: Festive Soft Christmas Thumbprint Cookies
- 2. Why You’ll Love These Cookies
- 3. Gather Your Ingredients for Soft Christmas Thumbprint Cookies
- 4. How to Make Soft Christmas Thumbprint Cookies: 5 Delicious Steps
- 5. Tips for Perfect Thumbprint Cookies Every Time
- 6. Variations and Substitutions
- 7. Serving and Storing Your Christmas Cookies
1. Introduction: Festive Soft Christmas Thumbprint Cookies
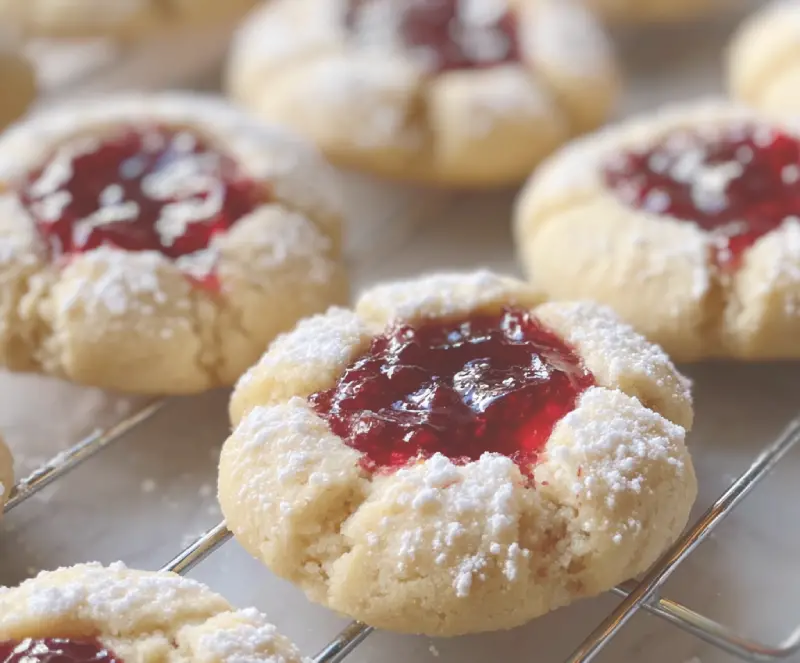
There’s nothing quite like the smell of holiday baking wafting through the house, and this recipe for Soft Christmas Thumbprint Cookies will fill your home with cheer. These classic cookies feature a melt-in-your-mouth, buttery shortbread base with a sweet, jewel-like center of your favorite jam. They are incredibly simple to make and are the perfect addition to any cookie platter or gift box.
Whether you’re a seasoned baker or just starting your holiday traditions, this guide will walk you through creating the most delicious and tender thumbprint cookies. They are a fantastic project for baking with kids and a guaranteed crowd-pleaser at any festive gathering. Let’s get our aprons on and start baking!
2. Why You’ll Love These Cookies
These aren’t just any cookies; they are little bites of holiday magic! The texture is unbelievably soft and tender, thanks to the rich, buttery dough. Unlike crispy shortbread, these cookies have a delicate crumb that practically dissolves on your tongue.
What makes this an easy cookie recipe is the straightforward process and simple ingredients. Plus, they are endlessly customizable! You can switch up the jams, roll them in nuts or sprinkles, or drizzle them with a sweet glaze. They look beautiful on a dessert table and taste even better. See others recipes here .
3. Gather Your Ingredients for Soft Christmas Thumbprint Cookies
Before you begin, gather these simple pantry staples. Using high-quality ingredients, especially good butter and your favorite jam, will make a world of difference in the final flavor. Precision in baking is key, so I always recommend weighing your dry ingredients for the best results. You can find excellent digital scales for baking online.
- For the Cookies:
- 1 cup (227g) unsalted butter, softened to room temperature
- 2/3 cup (133g) granulated sugar
- 1 large egg yolk
- 2 teaspoons pure vanilla extract
- 1/4 teaspoon almond extract (optional, but recommended)
- 2 1/4 cups (270g) all-purpose flour
- 1/2 teaspoon salt
- For the Filling & Glaze:
- 1/2 cup seedless raspberry or strawberry jam
- 1 cup (120g) powdered sugar (for glaze)
- 2-3 teaspoons milk or cream (for glaze)
- 1/2 teaspoon pure vanilla extract (for glaze)
4. How to Make Soft Christmas Thumbprint Cookies: 5 Delicious Steps
Follow these simple steps to create perfectly soft and chewy thumbprint cookies. The key is not to overmix the dough and to chill it properly before baking!
4.1. Step 1: Prepare the Cookie Dough
- In a large bowl using a hand mixer or a stand mixer with a paddle attachment, cream together the softened butter and granulated sugar until light and fluffy, about 2-3 minutes.
- Beat in the egg yolk, vanilla extract, and almond extract (if using) until just combined. Scrape down the sides of the bowl as needed.
- In a separate bowl, whisk together the all-purpose flour and salt. Gradually add the dry ingredients to the wet ingredients, mixing on low speed until just a few streaks of flour remain. Do not overmix!
- Cover the dough with plastic wrap and chill in the refrigerator for at least 60 minutes. This step is crucial for preventing the cookies from spreading too much while baking.
4.2. Step 2: Shape and Fill the Thumbprint Cookies
- Preheat your oven to 350°F (175°C). Line two large baking sheets with parchment paper.
- Remove the chilled dough from the refrigerator. Scoop and roll the dough into 1-inch balls (about 1 tablespoon each). Place them about 2 inches apart on the prepared baking sheets.
- Using your thumb or the back of a 1/2 teaspoon measuring spoon, gently press an indentation into the center of each dough ball. Be careful not to press all the way through.
- Spoon about 1/2 teaspoon of your favorite jam into each indentation. For tips on choosing the best jam for baking, this article from King Arthur Baking is a fantastic resource.
4.3. Step 3: Bake to Golden Perfection
- Bake for 11-14 minutes, or until the edges are lightly golden brown. The centers will still look soft and pale.
- Let the cookies cool on the baking sheet for 5 minutes before carefully transferring them to a wire rack to cool completely. The jam will be very hot, so be cautious!
4.4. Step 4: Cool and Glaze (Optional)
- Once the cookies are completely cool, you can add a simple vanilla glaze for an extra touch of sweetness and beauty.
- In a small bowl, whisk together the powdered sugar, 2 teaspoons of milk, and vanilla extract until smooth. If the glaze is too thick, add more milk, a tiny bit at a time.
- Drizzle the glaze over the cooled cookies using a spoon or a piping bag. Let the glaze set for about 30 minutes before serving or storing. These are truly wonderful festive desserts.
5. Tips for Perfect Thumbprint Cookies Every Time
- Don’t Skip the Chill: Chilling the dough is non-negotiable! It solidifies the butter, which prevents the cookies from spreading into flat discs in the oven.
- Room Temperature Ingredients: Ensure your butter and egg yolk are at room temperature for a smooth, well-emulsified dough.
- Measure Flour Correctly: Spoon the flour into your measuring cup and level it off with a knife. Packing the flour in can lead to dry, tough cookies.
- Re-press If Needed: If the indentations puff up during baking, you can gently press them down again with the back of a spoon as soon as they come out of the oven.
6. Variations and Substitutions
One of the best parts about this Soft Christmas Thumbprint Cookies recipe is how versatile it is. Get creative with these fun variations!
- Go Nuts: Roll the cookie dough balls in finely chopped walnuts, pecans, or almonds before making the indentation.
- Flavor Twists: Swap the vanilla extract for lemon extract and fill with lemon curd, or add a pinch of cinnamon to the dough and fill with apple butter.
- Chocolate Lover’s Dream: Fill the indentations with chocolate ganache or a Hershey’s Kiss after baking (press it in while the cookies are still warm).
7. Serving and Storing Your Christmas Cookies
These cookies are perfect for holiday parties, cookie exchanges, or as a thoughtful homemade gift. Arrange them on a platter with other holiday treats for a stunning presentation.
To store, place the completely cooled cookies in an airtight container at room temperature. They will stay fresh for up to 5 days. For longer storage, you can freeze the baked cookies (before glazing) in a freezer-safe container for up to 3 months. Let them thaw at room temperature before glazing and serving.
Foire Aux Questions
Can I make the cookie dough ahead of time?
Absolutely! This dough is perfect for making in advance. You can prepare the dough, wrap it tightly in plastic wrap, and refrigerate it for up to 3 days. You can also freeze the dough (either in a disc or as pre-rolled balls) for up to 3 months. Just let it thaw in the refrigerator before baking.
My cookies spread too much. What did I do wrong?
Spreading is usually caused by two things: butter that is too soft or dough that isn’t chilled enough. Make sure your butter is at room temperature (around 65°F/18°C), not melted. Most importantly, do not skip the 60-minute chilling step! If your kitchen is warm, you can even pop the shaped cookies back into the fridge for 10 minutes before baking.
What other fillings can I use besides jam?
The possibilities are endless! Besides jam, you can fill these thumbprint cookies with lemon curd, caramel, chocolate ganache, or even Nutella. If using chocolate, it’s best to add it after baking while the cookies are still warm so it melts perfectly into the center.