
Table of Contents
- Make Your Own Sugar-Free Blackberry Jam: Sweetness Without the Guilt
- Why This Sugar-Free Blackberry Jam Recipe Delivers
- Ingredients and Smart Substitutions for Perfect Jam
- Step-by-Step: Crafting Your Blackberry Jam
- Expert Tips for Sugar-Free Jam Success
- Serving Suggestions: Beyond Toast
- Storing and Reheating Your Sugar-Free Jam
- Sugar-Free Blackberry Jam FAQs
Make Your Own Sugar-Free Blackberry Jam: Sweetness Without the Guilt
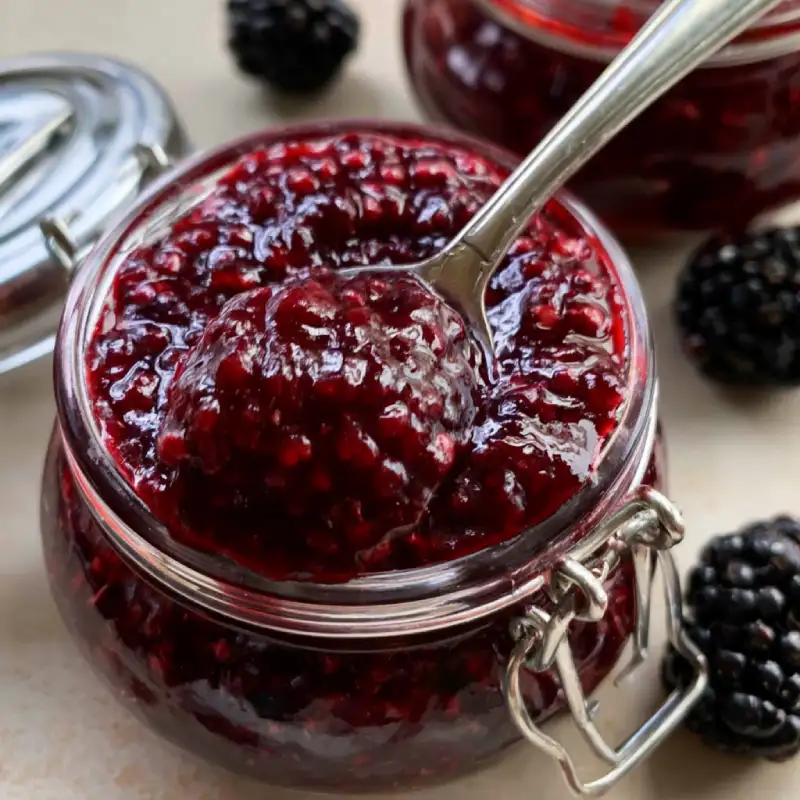
Imagine a spoonful of vibrant, bursting-with-flavor blackberry jam, perfectly spreadable, with just the right balance of sweet and tart. Now, imagine all of that deliciousness without a single gram of added sugar. Sounds like a dream, right? Well, today, we’re making that dream a reality with this incredible sugar-free blackberry jam recipe! It’s thick, glossy, and tastes like summer in a jar, proving that you absolutely don’t need refined sugar to create a truly spectacular preserve.
Why I Switched to Sugar-Free Spreads
For years, I adored traditional jams and jellies, but as I became more mindful of my sugar intake and its impact on my energy levels and overall health, I started exploring alternatives. The store-bought sugar-free options often fell flat – either too artificial-tasting, too thin, or lacking that authentic fruit punch. That’s when I decided to take matters into my own hands, and after much experimentation, I perfected this sugar-free blackberry jam. It’s been a game-changer for my breakfasts and desserts, allowing me to enjoy the rich flavors I love without the guilt.
Why This Sugar-Free Blackberry Jam Recipe Delivers
- Achieving Perfect Jam Consistency Without Sugar: This recipe masterfully uses natural pectin and precise cooking times to achieve that ideal, spoonable jam texture without relying on sugar for setting.
- Balancing Sweetness and Tartness Naturally: We leverage the natural tartness of blackberries and a carefully chosen natural sweetener to create a harmonious flavor profile that truly highlights the fruit.
- Showcasing True Blackberry Flavor: Without excessive sugar masking the fruit, the pure, intense flavor of fresh blackberries shines through, making every bite a delight.
- Suitable for Various Dietary Needs (Keto, Diabetic-Friendly): By using erythritol or a stevia blend, this jam is an excellent choice for those following ketogenic diets, managing blood sugar, or simply reducing their sugar intake.
Ingredients and Smart Substitutions for Perfect Jam
Here is what you need and why:
Fresh Blackberries: Quality is Key: The star of our show! Opt for ripe, plump, and firm blackberries. The fresher and higher quality your berries, the more vibrant and flavorful your jam will be. While fresh is best, you can absolutely use frozen blackberries (do not thaw them first; add directly to the pot).
Natural Sweetener: Erythritol vs. Stevia Blends (Why We Choose Them): For this sugar-free blackberry jam, I highly recommend granular erythritol or a high-quality erythritol-stevia blend. Erythritol provides bulk and a clean sweetness without the aftertaste sometimes associated with pure stevia. It also doesn’t raise blood sugar, making it ideal for keto and diabetic-friendly recipes. Avoid liquid sweeteners as they can affect the jam’s set.
Pectin: Your Setting Agent Explained: Since we’re not using sugar, which aids in setting, a low-sugar or no-sugar pectin is crucial. Look for brands specifically designed for sugar-free or reduced-sugar recipes. This is what gives our jam that lovely, firm, yet spreadable consistency. Follow the package directions for the specific type you use, as amounts can vary slightly.
Lemon Juice: More Than Just Flavor: Freshly squeezed lemon juice is essential. It not only brightens the flavor of the blackberries but also provides the necessary acidity for the pectin to activate and set properly. Don’t skip it!
Water: The Unsung Hero: A small amount of water helps to get the berries cooking and release their juices without scorching, especially at the beginning of the process.
Step-by-Step: Crafting Your Blackberry Jam
Follow these simple steps to create your perfect sugar-free blackberry jam:
1. Prepare Your Blackberries
Gently wash your fresh blackberries under cool water. If using frozen, no need to thaw. Place them in a large, heavy-bottomed pot or Dutch oven. Lightly mash about half of the berries with a potato masher or fork to help release their juices. This creates a nice texture with some whole berry pieces.
2. Combine Ingredients for Initial Simmer
Add the water and lemon juice to the pot with the mashed blackberries. Stir well. Bring the mixture to a gentle simmer over medium heat, stirring occasionally. Cook for about 5-7 minutes, or until the berries have softened and released a good amount of juice.
3. Add Pectin and Bring to a Rolling Boil
In a small bowl, whisk the pectin with about 2 tablespoons of your chosen sweetener (taken from the total amount). This prevents the pectin from clumping when added to the hot fruit. Stir the pectin-sweetener mixture into the simmering berries. Increase the heat to medium-high and bring the jam to a full, rolling boil that cannot be stirred down. Boil vigorously for exactly 1 minute, stirring constantly to prevent sticking.
4. Test for Set Point
Remove the pot from the heat. To test for set, place a small spoonful of jam on a chilled plate (placed in the freezer for 5 minutes prior). Let it sit for 1-2 minutes, then push it with your finger. If it wrinkles, it’s set! If not, return the jam to the heat and boil for another minute, then retest. Stir in the remaining sweetener now, tasting and adjusting to your preference.
5. Jarring Your Jam Safely
Carefully ladle the hot jam into clean, sterilized jars, leaving about 1/4 inch headspace. Wipe the rims clean, apply lids, and screw on bands until fingertip tight. For shelf-stable jam, process in a boiling water canner for 10 minutes (adjusting for altitude). For refrigerator jam, allow to cool completely on the counter, then store in the fridge. Learn more about safe canning practices here.
Expert Tips for Sugar-Free Jam Success
- Choosing the Right Pot: Use a wide, heavy-bottomed pot. The wide surface area allows for quicker evaporation, and the heavy bottom prevents scorching.
- Avoiding Undercooked/Overcooked Jam: The rolling boil time after adding pectin is critical. Too short, and it won’t set; too long, and it can become too stiff or lose flavor. Stick to the recommended times and use the plate test.
- Troubleshooting Common Issues (Too runny, too thick): If your jam is too runny, you can try re-boiling it with a bit more pectin (mixed with sweetener first). If it’s too thick, you can gently warm it and stir in a tablespoon or two of hot water until desired consistency is reached.
- Adjusting Sweetness Post-Cook: While it’s best to add most sweetener during cooking, you can always stir in a little more granular erythritol or stevia blend after the jam has cooled slightly if you prefer it sweeter.
Serving Suggestions: Beyond Toast
Breakfast Pairings
This sugar-free blackberry jam is fantastic on low-carb toast, keto pancakes, or stirred into plain Greek yogurt. It’s also wonderful swirled into oatmeal or as a topping for cottage cheese.
Dessert Enhancements
Use it as a filling for sugar-free thumbprint cookies, a topping for cheesecake, or layered in a parfait with whipped cream and fresh berries. It also makes a delightful sauce for grilled peaches or a simple vanilla ice cream.
Savory Applications
Don’t limit jam to sweet dishes! This blackberry jam pairs beautifully with soft cheeses on a charcuterie board, or as a glaze for pork tenderloin or chicken. The tartness cuts through richness wonderfully.
Storing and Reheating Your Sugar-Free Jam
Refrigerator Storage Guidelines
Once opened or if not water-bath canned, your sugar-free blackberry jam should be stored in the refrigerator. It will typically last for 3-4 weeks. Always use a clean spoon to prevent contamination.
Freezing for Longer Shelf Life
For longer storage, this jam freezes beautifully! Ladle cooled jam into freezer-safe containers, leaving about 1/2 inch headspace. It can be frozen for up to 6 months. Thaw in the refrigerator overnight before using.
Simple Reheating Methods
If you prefer your jam warm (perhaps over pancakes or ice cream), you can gently reheat it in a small saucepan over low heat, stirring until warmed through. Alternatively, microwave small portions in 15-second intervals, stirring in between.
Sugar-Free Blackberry Jam FAQs
Can I use frozen blackberries?
What if my jam doesn’t set?
Is this recipe keto-friendly?
How long does it last?
For more delicious and easy recipes, be sure to check out mycakesrecipes.com!
Sugar-Free Blackberry Jam
- Total Time: 35 minutes
- Yield: Approx. 3-4 half-pint jars
Description
Enjoy the vibrant taste of summer with this easy-to-make sugar-free blackberry jam. Perfect for those seeking a delicious, guilt-free spread without added sugars.
Ingredients
- 4 cups fresh or frozen blackberries
- 1/2 cup water
- 2 tablespoons fresh lemon juice
- 1/4 cup low-sugar or no-sugar pectin
- 1/2 cup granular erythritol or erythritol-stevia blend (or to taste)
Instructions
- 1. Prepare Blackberries: Wash fresh blackberries. If using frozen, do not thaw. Place berries in a large, heavy-bottomed pot. Lightly mash about half of the berries.
- 2. Simmer Berries: Add water and lemon juice to the pot. Bring to a gentle simmer over medium heat, stirring occasionally, for 5-7 minutes until berries soften and release juices.
- 3. Add Pectin: In a small bowl, whisk pectin with 2 tablespoons of the sweetener. Stir this mixture into the simmering berries.
- 4. Boil and Set: Increase heat to medium-high and bring to a full, rolling boil that cannot be stirred down. Boil vigorously for exactly 1 minute, stirring constantly.
- 5. Test and Sweeten: Remove from heat. Perform a plate test for set (place a spoonful on a chilled plate, push after 1-2 mins; if it wrinkles, it’s set). Stir in remaining sweetener, adjusting to taste.
- 6. Jar Jam: Ladle hot jam into clean, sterilized jars, leaving 1/4 inch headspace. Wipe rims, apply lids and bands. Cool on counter for refrigerator storage, or process in a boiling water canner for 10 minutes for shelf-stable jam.
- Prep Time: 15 mins
- Cook Time: 20 mins